Planning a NYE party right after the chaos of all other winter holidays can be an absolute deal-breaker. Luckily the internet is a never-ending pool of party inspiration and cocktail recipes, so to save you time I rounded up a few perfect details and ideas that you can use to throw the perfect NYE bash (with minimal prep). Click through the links for the tutorials and recipes!
12.28.2016
Craft a Fabulous Cocktail Party for NYE
This shop has been compensated by Collective Bias, Inc. and its advertiser. All opinions and ideas are mine alone. #AmopeForTheHoliday #CollectiveBias
During the winter months it's easy to neglect your twinkle toes... no one's going to see them while you're wearing boots all season right?! Give your friends (or yourself) a pampering gift of soft, beautiful feet along with a pair of fancy slippers! I've partnered with Amopé Pedi Perfect™ to share a fun DIY to turn a basic pair of slippers into fancy footwear you can gift this holiday!
This post was sponsored by The NJ Lottery. All content and Ideas are my own.
Experiencing gift-giving fatigue this holiday season? Coming up with fresh gift ideas that are budget friendly and fun can be a challenge--especially if you're like me and save shopping for the last minute! Procrastination aside, it's never too late to make simple customizations to make a gift feel personalized and thoughtful!
Experiencing gift-giving fatigue this holiday season? Coming up with fresh gift ideas that are budget friendly and fun can be a challenge--especially if you're like me and save shopping for the last minute! Procrastination aside, it's never too late to make simple customizations to make a gift feel personalized and thoughtful!
This shop has been compensated by Collective Bias, Inc. and its advertiser. All opinions are mine alone. #TubeFree #CollectiveBias
Fun fact! I haven't seen an empty toilet paper tube in a LONG time...that's because once I discovered there was such thing as a "tubeless" roll I realized how obsolete it was! As I've tried to make more sustainable choices in fashion and in my home life this year I have to say your bathroom is the place to start! By choosing a tubeless roll you eliminate a significant amount of needless cardboard (that takes fossil fuels to produce) and you get more sheets per roll. If you ask me that's a win-win--That's why I've partnered with Scott, my favorite toilet paper brand, to share a sustainable bathroom makeover to get your house guest ready for this holiday season!
Fun fact! I haven't seen an empty toilet paper tube in a LONG time...that's because once I discovered there was such thing as a "tubeless" roll I realized how obsolete it was! As I've tried to make more sustainable choices in fashion and in my home life this year I have to say your bathroom is the place to start! By choosing a tubeless roll you eliminate a significant amount of needless cardboard (that takes fossil fuels to produce) and you get more sheets per roll. If you ask me that's a win-win--That's why I've partnered with Scott, my favorite toilet paper brand, to share a sustainable bathroom makeover to get your house guest ready for this holiday season!
11.07.2016
Make a Spiced Apple Pie
I try to treat myself to one really nice sweater each year--especially since my closet slim-down. It's a fun hunt to find one to splurge on that I'll wear several times a week, so I thought I'd share a few I've found in my internet travels that are currently in the running!
1. Knit Sweater by Shelia Couture on Etsy
I'm a HUGE fan of this designer's confetti-colored knits. Click through to her shop to see her collection of fabulous accessories, clothes and home goods!
A good vest is hard to find...especially one that isn't puffy and looks great under a coat. I've never regretted a single Loft purchase so I'm going to pay this Lou & Grey vest a visit soon at their new flagship location in NYC (I hear it's dreamy).
I'm ready to channel some Full House vibes with a peppy pink sweater and high waisted jeans. I love candy-colored cashmere under my oatmeal boucle coat in the winter!
Let's get real...I'd never wear this because of my thing with cardigans...but I think it's fabulous for someone that won't drag it through snowy sludge in the city streets.
This one might be a touch matronly for my style...but I was drawn to the tie and could get aged down with some patched/topstitched denim!
Again...let's get real... I won't be purchasing this unless I win the lottery next week, but it's certainly worth the price tag considering someone stitched this together by hand. PLUS--the lion's mane fringe collar is very Lindsey Crafter
Now here's my No. 1 pick. I'm obsessed with a chic mock turtleneck. I have two quarter length turtle necks from Target that I wear constantly during the winter, but this version is far higher quality and might last me a few more seasons.
I LOVE the chunky cuffs on the sleeves of this sweater. In the past I've had problems with the thick cuffed collars of some Anthro sweaters I've purchased (and returned) so this is definitely one to try on in the store.
9. Alpaca Blend Sweater with Thumb Holes on Etsy
I'm really trying to be more aware of the environmental impact of my purchases. Supporting makers that craft garments by hand is a great way to change your shopping habits and I love the look of this cozy hand-knit sweater stitched together in Canada!
10. Cropped Cashmere Crew by Everlane
Don't be basic--just wear basics. This cozy cropped cashmere is a step up from a fruit of the loom sweatshirt if you're feeling like putting in a lil'bit of effort.
Happy Fall Ya'll! And remember most of your garments end up in landfills so make thoughtful purchases this (and every) season!
xo Lindsey Crafter
10.31.2016
Headboards You Can DIY
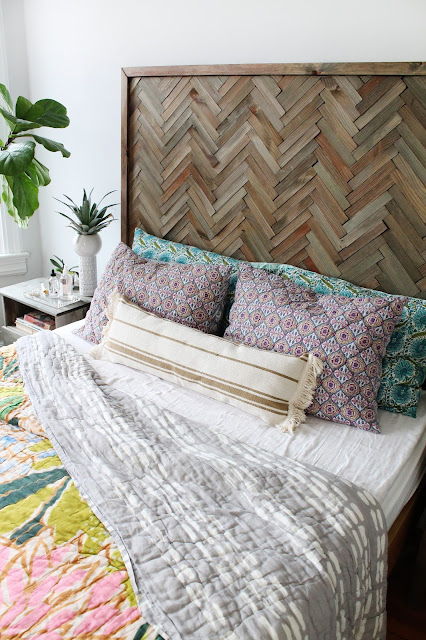
For years I had an odd aversion to having a headboard above my bed. Even going to the extreme/insane lengths of rebuilding a bed frame from Ikea with lumber to avoid purchasing the headboard component. I'm not entirely sure now on the reason...maybe wanting to achieve a "boho" look...but after years of naked space above my bed I'm finally embracing the overall need for scale in a room and how headboards can actually make your room feel larger and cozier! Headboard-less yourself?! Check out these awesome ideas below for dressing the space above your bed!
Halloween is in just a week--but it's not too late to throw a spooky soiree all of your friends will remember as the BEST Halloween party ever. I've partnered with my friends over at Cost Plus World Market to share some fun party tips and ideas for throwing a Speakeasy Style Halloween Cocktail Party. Be sure to click through to see all of my horrifically fabulous styling tips!
‘Tis the season of apple picking, fireside sitting and crunching through piles of leaves. I’ve swapped out my sundresses and sandals for sweaters and leggings, but that wardrobe change also calls for fresh fall footwear. I’ve added my crafty touch to a pair of Dixon Boots and am sharing how to get the embellished straps I’ll be sporting this season on the Minnetonka Blog!
10.17.2016
Make a DIY Eyeshadow Palette
This shop has been compensated by Collective Bias, Inc. and its advertiser. All opinions are mine alone. #MyPureRelief #CollectiveBias
Anyone else hoard makeup as a hobby? Even though I don't wear makeup everyday I still get sucked into all of the beauty tutorials on Pinterest and Youtube! Each season I try to freshen up my look--so
I've partnered with Clear Eyes® to share a fun DIY to get you ready for the Fall!
10.04.2016
Make a Papier Mache Beaded Chandelier
9.21.2016
Indian Summer Style
Fall starts tomorrow but it's still HOT HOT HOT. Here are some things to help you transition into fall without breaking a sweat! Shop through links below...
These wide leg Pilcros from Anthro are going to be my capsule wardrobe purchase for fall! I love the silhouette and posh wrap belt.
This subtle liquid color is the perfect partner to your beachy glow.
I love the alternative shape of this watch and the warm rose gold is perfect for accessorizing your cozy pre-fall outfits.
The sun is still shining bright-- protect your eyes while apple picking, hiking or picnicking with these posh sunnies!
Pack for a quick getaway in this utilitarian tote...durable and ample packing space for your straightener and a few wardrobe changes.
6. Woven Wallet
Woven wall hangings have taken over the internet...but I love seeing the traditional texture applied to other surfaces and accessories like this Fossil Wallet/Clutch.
Layer these two lovely long necklaces for extra texture and eclectic accessorizing.
9. Clogs
These aubergine wooden clogs are as comfy as they are chic! Wear with dresses, colorful tights or with wide leg jeans like the pair I'm crushing on above ^
10. Bourbon Candle
Almost as good as the real thing?
11. Blanket
The temperature is starting to drop at night! Be sure to pack a cozy blanket for early fall outings!
12. Hammock
Enjoy watching the changing of the leaves while relaxing in this retro macrame hammock.
Happy Fall Y'all! - Lindsey Crafter
This post includes affiliate links for your convenience and at no extra charge to you! Thanks for supporting the brands that keep Lindsey Crafter goin'!
SaveSave
This shop has been compensated by Collective Bias, Inc. and its advertiser. All opinions are mine alone. #SToKCoffee #cbias #CollectiveBias. Thanks for supporting the brands that keep Lindsey Crafter's content fresh and creative!
As a crafter and content creator working from home requires serious focus and several "boosts" throughout the day -- most of this time this meant taking quick trips out to a coffee shop for a mediocre iced latte and a fresh magazine! I'd tried making iced coffee at home and trying cold brews from the grocery store but none of them were cutting it. About a month ago Ian brought home a new iced coffee to try and I haven't looked back! After switching to SToK™ I've saved cash, time and consumer waste ( all those plastic cups)--and that means more money to do the things I really love!
We do our best to remember our reusable shopping bags when getting our weekly essentials...but sometimes we slip and end up with 5,000 plastic shopping bags. They're great to have around the house in small quantities for cleaning up messes--but I like to challenge myself on how they can be repurposed into crafting materials. I've used plastic bags to fill floor poufs and seen other crafters create plastic "plarn" for crocheted baskets--but my FAVORITE repurposing technique has been creating plastic textiles for making water resistant totes and bags. See how I crafted these dyed plastic lunch sacks from recycled plastic bags below!
Things You'll Need
20-30 white plastic bags
Iron
Parchment Paper
Scissors
Sewing machine & Serger
Coordinating thread
Ruler or Square
Pen
Pen
Rit DyeMore (for dyeing plastic)
Plastic Container for dyeing
Here's How
1. Select several clean, white plastic shopping bags and cut off the bottom seam and handles to create a large rectangle. Layer 4-5 pieces of plastic in between two pieces of parchment paper and use an iron on medium heat to fuse the pieces together. The plastic will shrink significantly with the application of heat--if the iron is too hot you'll have lots of ripples and texture in your completed textile.
2. Cut the following pieces to create a medium sized lunch sack:
Trace the pieces onto the plastic with a square edge and pen before cutting out pieces with sharp scissors.
Trace the pieces onto the plastic with a square edge and pen before cutting out pieces with sharp scissors.
3. Place each piece in a dye bath to create fun colors! Gradually add water to increase the depth and lighten the color for an ombre effect. Follow the manufacturer's instructions for dyeing plastic--I expedited the process by transferring dye to the stovetop to encourage more of a color transfer. The color didn't turn out as BOLD as I had liked...but I still like watercolor look instead of a plain white bag. Alternatively you could decorate your plastic material with fabric paint and stamps!
4. After you've rinsed and dried all the pieces, serge the raw edges with a coordinating thread to reinforce the material.
6. Stitch all of the pieces together 1/4" away from the edge, trim away stray threads and you're done! If you want to keep your sack closed you can quickly stitch a small tab of velcro to the edge of the opening.
SToK™ is pure coffee with no weird ingredients or flavors-- I fill up my favorite travel mug with ice, a little half and half, and a LOT of SToK™ before hitting up the flea market, the beach or just working on home improvement projects around the house!
Haven't seen this goodness in stores? Find it in the coffee/tea cooler at Walmart! My favorite SToK™ is the red bottle with just a touch of sweet!
xo Lindsey Crafter
xo Lindsey Crafter
This shop has been compensated by Collective Bias, Inc. and its advertiser. All opinions are mine alone. #StimulateTheSenses #CollectiveBias . Thanks for supporting the brands That keep Lindsey Crafter's content fresh and creative!
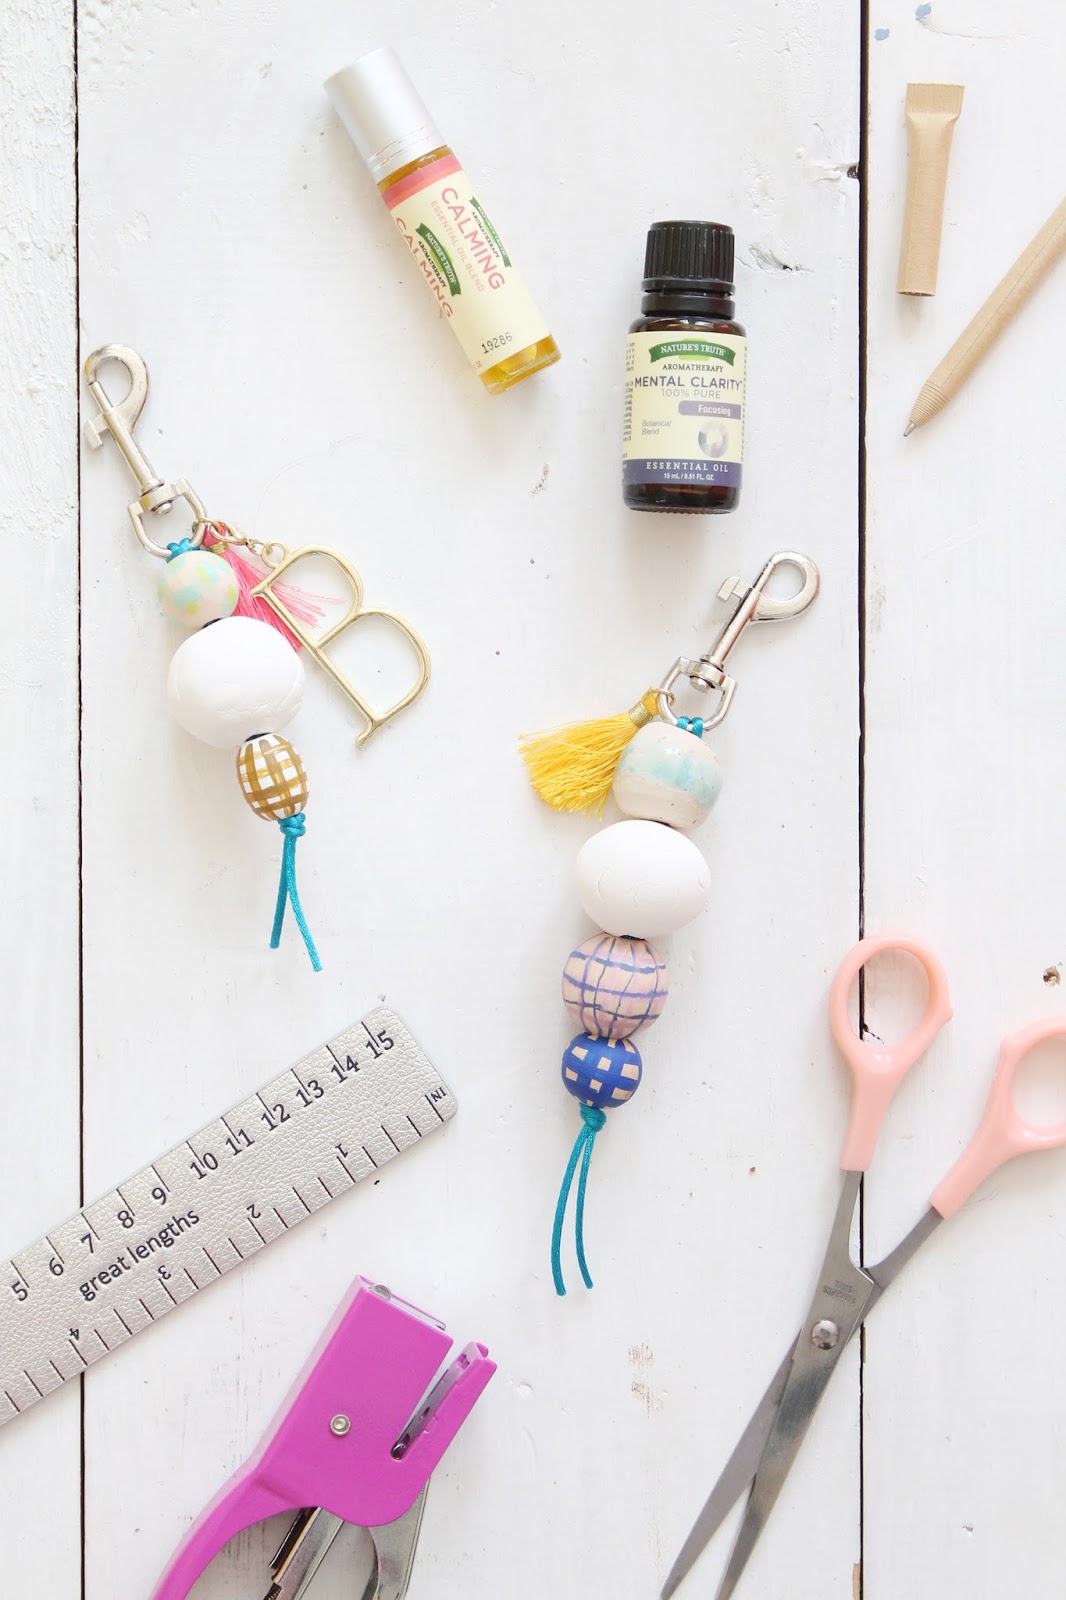
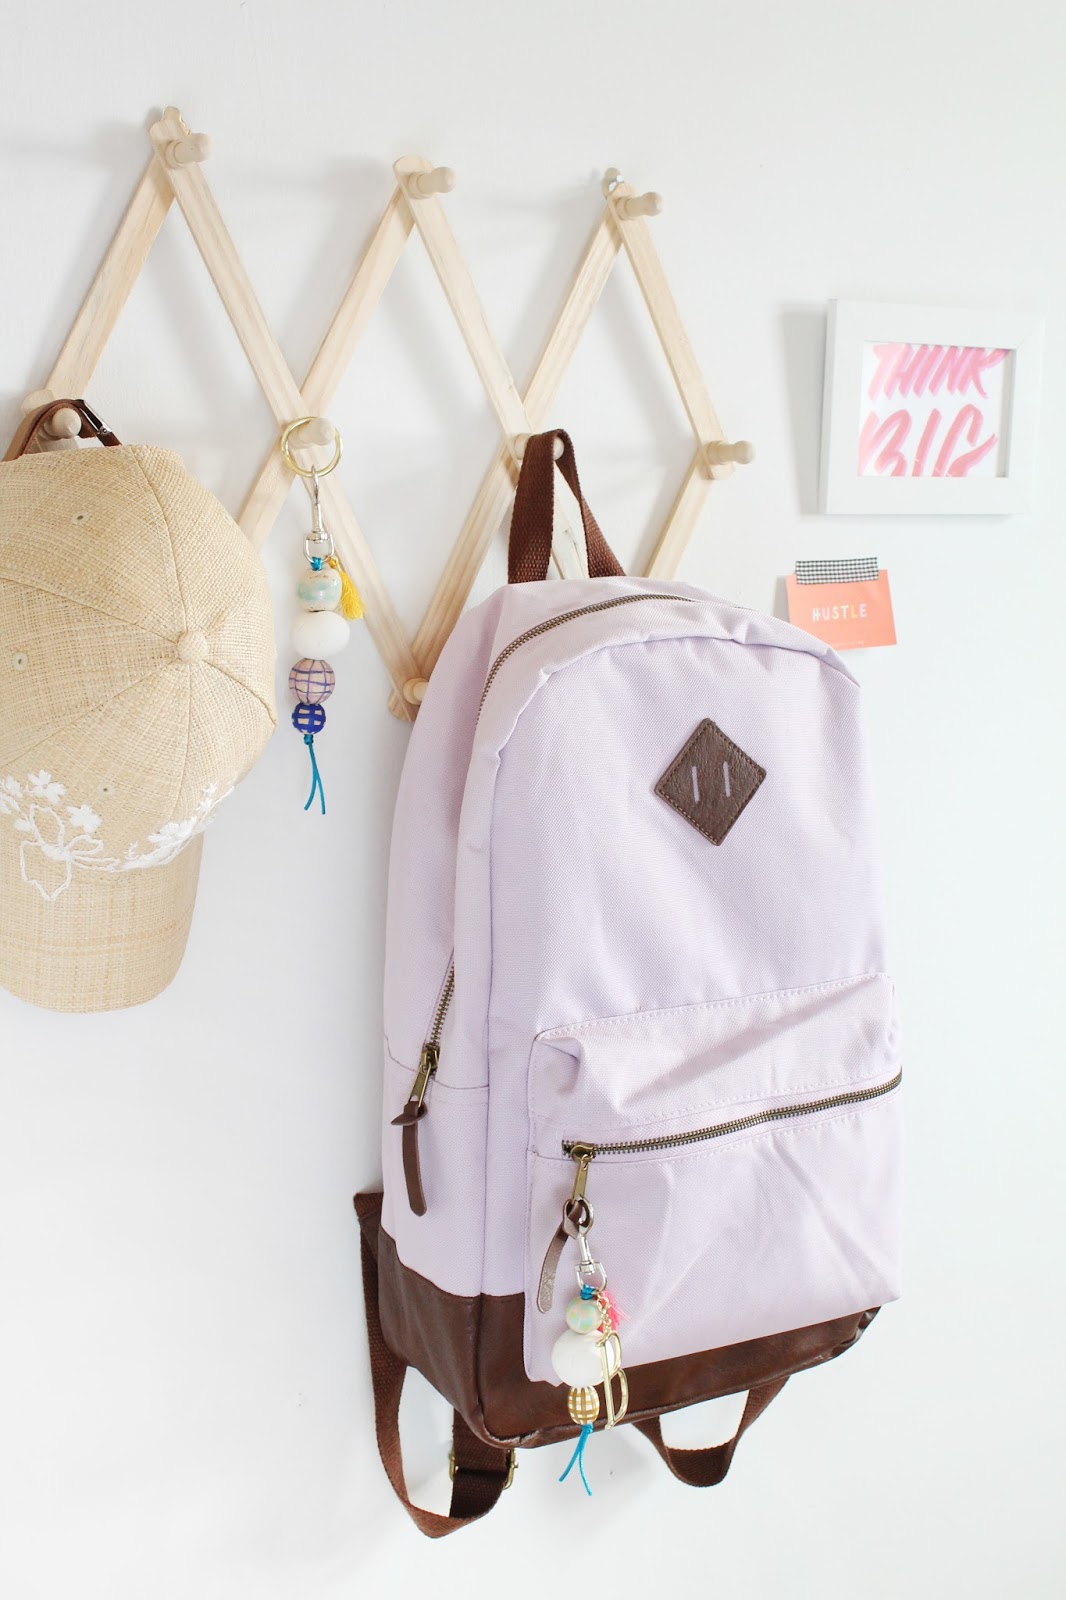
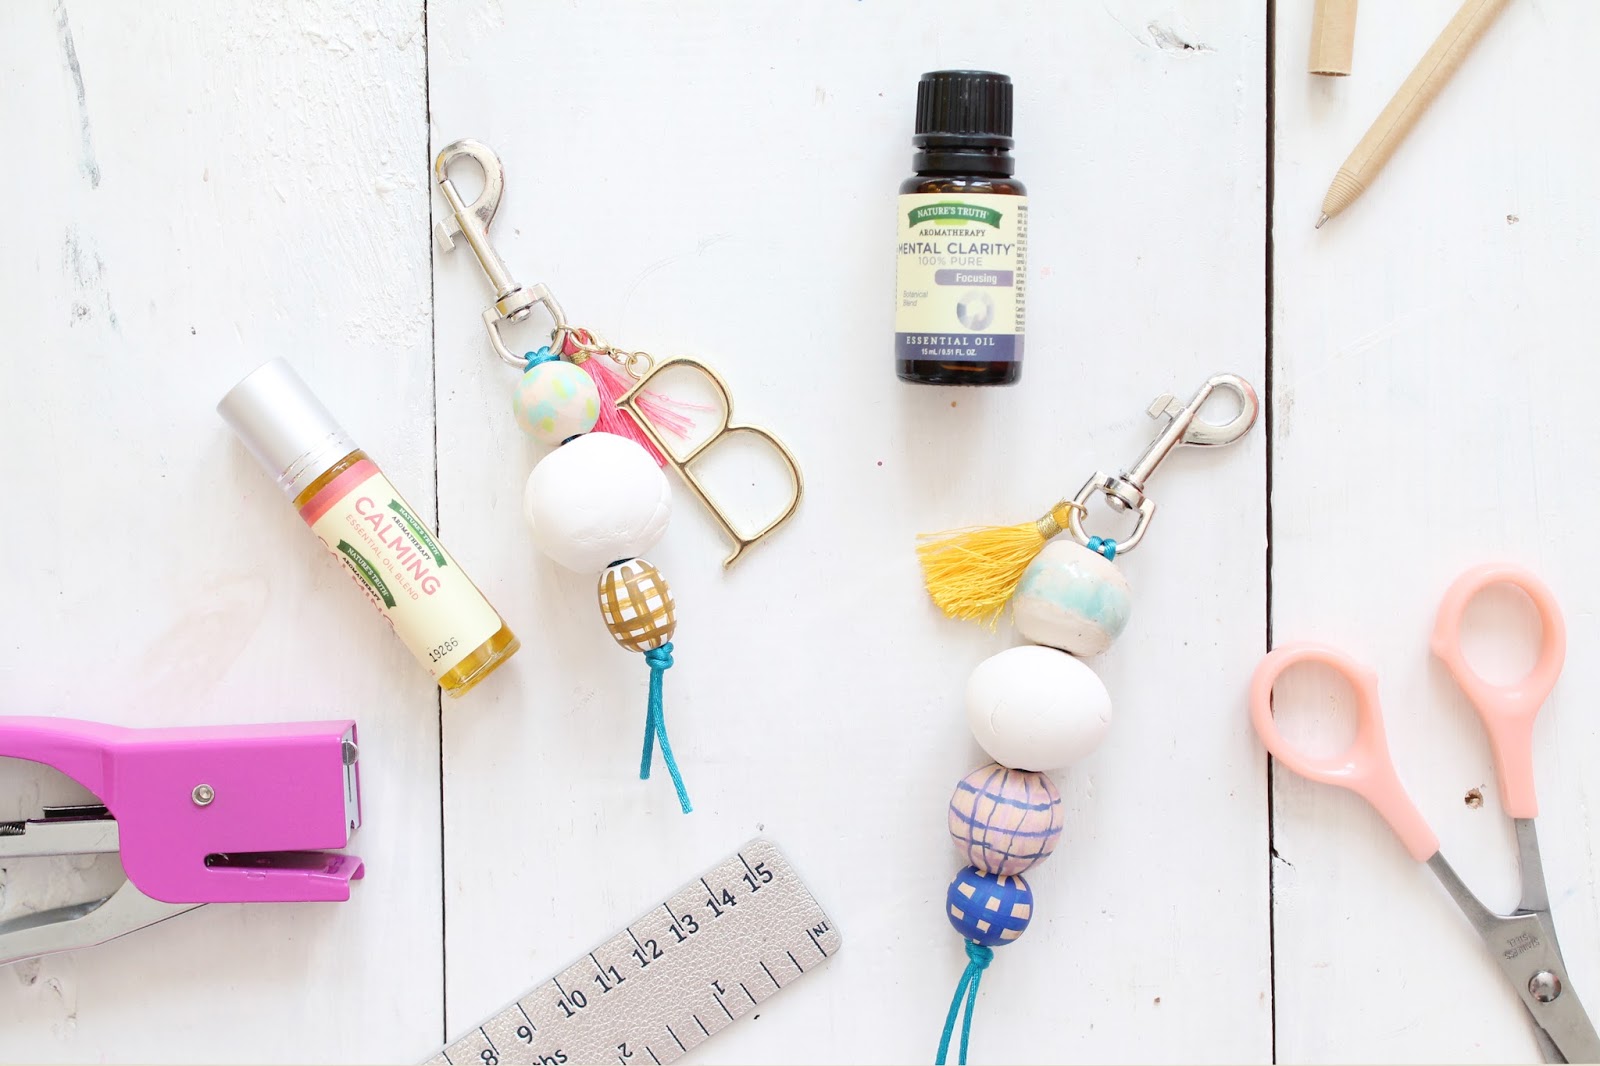
I've been using essential oils in diffusers and to boost homemade cleaners for years-- so I was thrilled to create a back to school DIY in partnership with Nature's Truth Essential Oils! These diffuser keychains are perfect for clipping on a book bag or hanging on your dorm room door to refresh your space (and your mind) while emitting soothing and stimulating scents throughout the day!
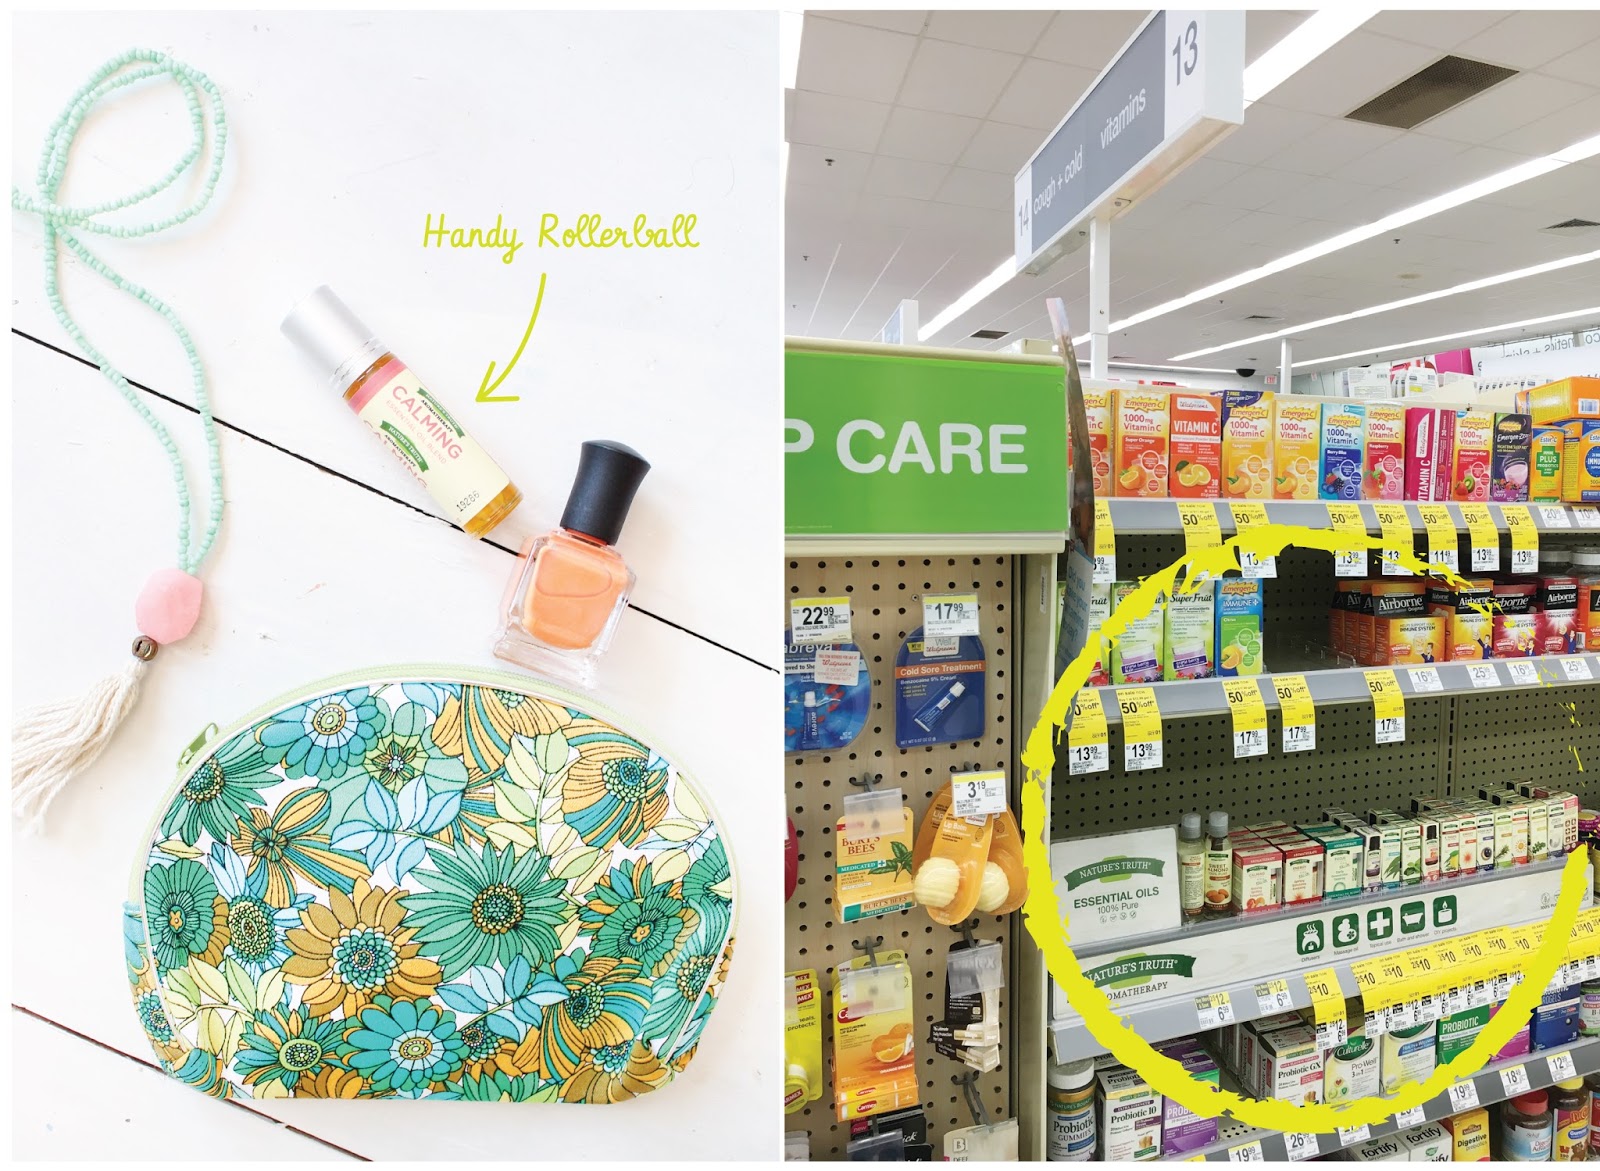
Nature's Truth Essential Oils are available in the vitamin aisle--I chose Calming, Mental Clarity, and Purify to be used on the diffuser interchangeably and to meet each user's individual needs. Keep the handy rollerball in your makeup bag or pencil pouch for spill-free application!
Want more ideas on how to use essential oils in your home? Check out Nature's Truth's Social Hub to get inspiration for a myriad of uses! First time user? Get your $1.00 off coupon here and try a scent or two!
I've been using essential oils in diffusers and to boost homemade cleaners for years-- so I was thrilled to create a back to school DIY in partnership with Nature's Truth Essential Oils! These diffuser keychains are perfect for clipping on a book bag or hanging on your dorm room door to refresh your space (and your mind) while emitting soothing and stimulating scents throughout the day!
Nature's Truth Essential Oils are available in the vitamin aisle--I chose Calming, Mental Clarity, and Purify to be used on the diffuser interchangeably and to meet each user's individual needs. Keep the handy rollerball in your makeup bag or pencil pouch for spill-free application!
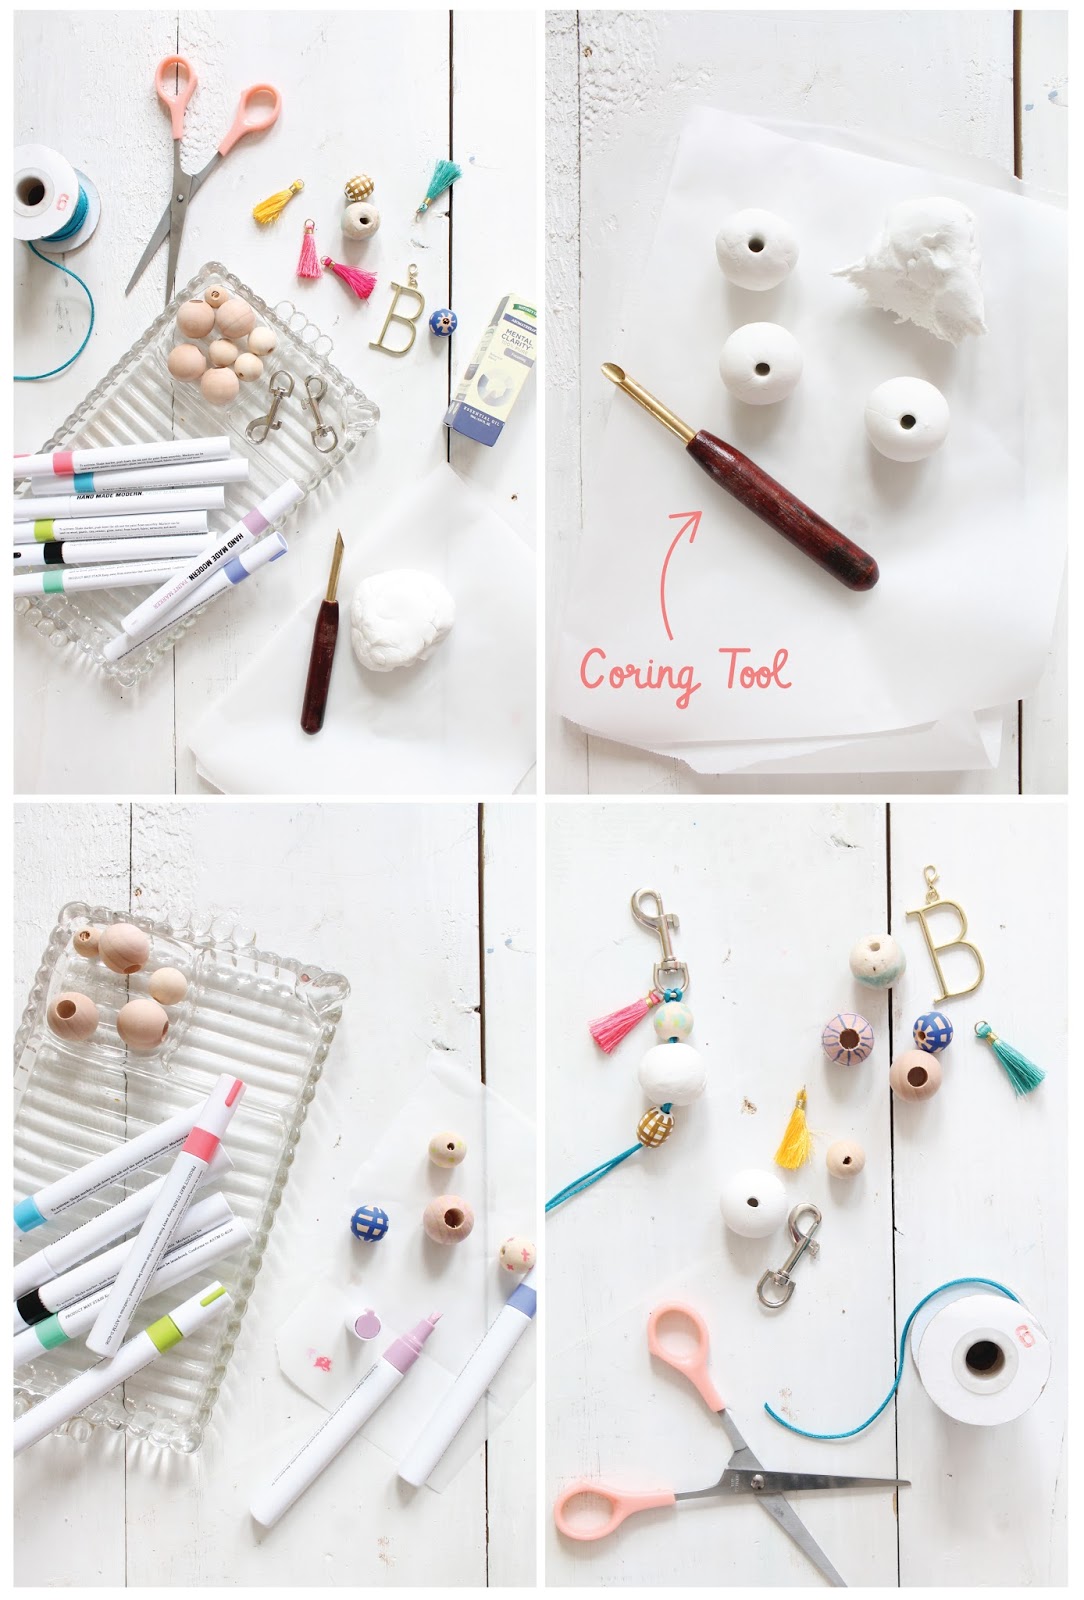
Things You'll Need
Air Dry Clay
Coring Tool for Clay Modeling
Coring Tool for Clay Modeling
Sanding Block
Assorted Wood Beads
Paint Pens
Cotton Cord
Key Chain Hook or Ring
Your Favorite Nature's Truth Essential Oils
* Be sure the air dry clay you purchase is natural clay and not a plant based modeling medium like paper clay!
* Be sure the air dry clay you purchase is natural clay and not a plant based modeling medium like paper clay!
1. Make Clay Beads
Pinch off a small amount of clay (about 1") and roll between your palms to create a smooth ball. Use a coring tool or wood skewer to core the bead--creating a clean hole through the center of the ball. Place on a piece of wax paper to dry overnight.
Pinch off a small amount of clay (about 1") and roll between your palms to create a smooth ball. Use a coring tool or wood skewer to core the bead--creating a clean hole through the center of the ball. Place on a piece of wax paper to dry overnight.
2. Sand Clay Beads
After your beads have dried completely (they'll no longer feel cool to the touch) use a 120 grit sanding block to smooth the bead.
After your beads have dried completely (they'll no longer feel cool to the touch) use a 120 grit sanding block to smooth the bead.
3. Paint Wood Beads
While you're waiting on the clay beads to dry, decorate large wood beads with a paint pen and
While you're waiting on the clay beads to dry, decorate large wood beads with a paint pen and
3. Thread Beads on Cotton Cord
Loop a 12-14" length of cord through a keychain hook or clasp so that two strands of cord are hanging down. Thread on beads, tassels and charms before knotting at the bottom bead. Trim off excess cord and burn the ends to prevent fraying.
Loop a 12-14" length of cord through a keychain hook or clasp so that two strands of cord are hanging down. Thread on beads, tassels and charms before knotting at the bottom bead. Trim off excess cord and burn the ends to prevent fraying.
4. Add Drops of Essential Oil
Add a few drops of essential oil to the clay bead to diffuse throughout the day. Clip on a purse, backpack or pin on a bulletin board as a inspirational (and scent-sational) charm!Want more ideas on how to use essential oils in your home? Check out Nature's Truth's Social Hub to get inspiration for a myriad of uses! First time user? Get your $1.00 off coupon here and try a scent or two!
xo Lindsey Crafter
SaveSave
9.08.2016
Hand Printed Textiles with Scotchgard™
This shop has been compensated by Collective Bias, Inc. and its advertiser. All opinions are mine alone. #ProtectYourEverything #CollectiveBias . Thanks for supporting the brands that keep Lindsey Crafter's content fresh and creative!

I mixed my own shades of trendy paint colors with standard colors from the craft store...use contrasting hues to print fabrics for upholstery projects, zipper pouches or pillows!
What You'll Need :
Cotton Canvas Fabric (at least 1 yard)
Fabric Paint
Staple Gun
Hot Glue Gun
Scissors
Hot Glue Gun
Scissors
Yarn, Rubber Bands, Recycled Cardboard Tubes
Foam Sheet or Shapes
Scrap Paper or Cardboard
Paintbrushes
Optional: Sewing Machine
Furniture and Cushion you Plan to Upholster
Furniture and Cushion you Plan to Upholster
1. Iron a large section of canvas fabric and lie flat on your work surface. Be sure to Line your work area with scraps of cardboard or paper to protect your surfaces from paint.
2. Wrap cardboard tubes with rubber bands or yarn to create abstract stamps. Gather other lost items you could use to make marks or prints on the fabric like erasers and corks and employ them to create unique textures on your fabric. I used a hot glue gun to create a raised texture on a tube and let the glue cool before using as a rolling stamp.
3. Brush fabric paint onto your stamp with a paint brush and practice your marks on a scrap piece of paper. Use a dowel rod or your hands to roll the stamp across the fabric to create your pattern. Design your fabric with your finished project in mind! Get creative with layering stamps and textures to create a dimensional print.
4. Keep your hand-printed artwork pristine by protecting it from daily use with Scotchgard™ Fabric Protector. Allow the fabric paint to dry overnight before following the manufacturer's instructions to treat the fabric.
5. After protecting your fabric cut pieces to size and use a staple gun to secure your upholstery project to the base. I did a little cutting and sewing to cover a square cushion for a piano bench I found on the side of the street in Brooklyn! Simply measure each side of the cushion to make pattern pieces and add 1/2" seam allowance to all edges before piecing together on your sewing machine.
I got bold and used this sweet fabric covered bench as a coffee table! Scotchgard™ Fabric Protector repels liquids and blocks stains without affecting the feel of the fabric. Simply add a stack of your favorite magazines, a succulent in a fun pot and a hot cup of coffee to complete your cozy little nook!
Find more ways to use Scotchgard Fabric Protector in your home here and protect your everything from spills, stains and just everyday life!
I picked up a can at Target with this coupon along with a few other fun decor items to spruce up my bedroom for Fall! Have any fun upholstery projects you've completed recently? Share your tutorials in the comments below!
xo Lindsey Crafter
9.01.2016
Fall Fairy Garden
Not-so-spooky pumpkins are my favorite DIYs for Fall--they transition easily from summer to fall and stay cheery well through the changing of the leaves. After the success of my floral pumpkins last season I had to stick with the theme this year--see how I crafted this darling Fall Fairy Garden in a faux pumpkin below!
What You'll Need
Faux Pumpkin ( I used this diorama pumpkin)
Acrylic Paint
Paint Brushes
Potting Soil
Decorative Moss
Decorative Moss
Small Gravel or Colored Sand
Several Succulents in Various Sizes
Spoon
1. If desired, spray painted the inside and outside of the faux pumpkin with a light color and let dry--be sure to tape off the stem with masking tape to protect it from overspray. Add a hand painted leaf pattern on the interior with a contrasting terra cotta chalk paint and a small round paint brush for a little pizazz! Let dry completely before planting.
2. Fill the bottom of the pumpkin with 3" of potting soil. Use a spoon to help position succulents and distribute soil where needed. Use varying heights of succulents--with the taller plants in the back as "trees" and shorter/smaller succulents as bushes in the foreground.
3. Add moss ( found in the floral section of most craft stores) around the base of the plants for lush "grass". Pour fine gravel or colored sand down the middle of the garden to create a path!
4. Place miniature furniture and props in your garden to inspire imagination. Prop small birds up on taller succulents with floral wire so they look like they're sitting up in a tree!
Customize the colors to coordinate with the rest of your seasonal decor! Be sure to place your pumpkin in a sunny spot and water your succulents periodically! How cute would this be with some battery powered LED fairy lights on your front porch at night?!
xo Lindsey Crafter
xo Lindsey Crafter
8.31.2016
Hand Painted Accent Wall
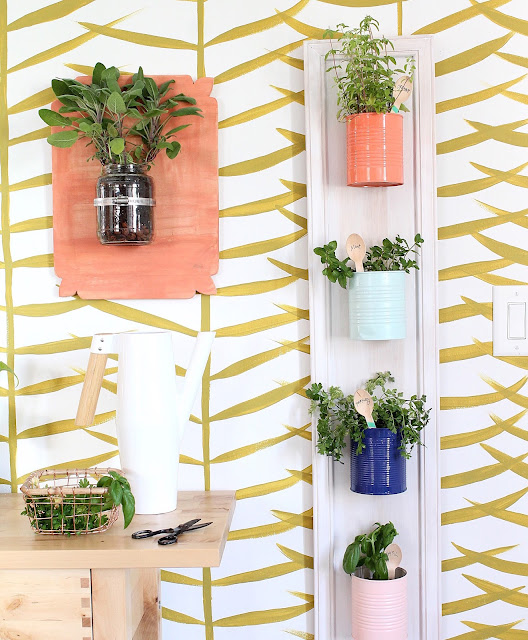
Our kitchen is LITERALLY my least favorite room in our rental apartment. Between the brown wood cabinets...dull tile and mismatched appliances I've really had it up to HERE with trying to make it work. After eliminating the potential of removable wallpaper due to cost I had a reluctant idea to hand paint a texture on the wall to just try to make it better. I'm here to say that this experiment was a HUGE success. I even like it with the brown cabinets (*shock*gasp*). See how I transformed my blah kitchen into my favorite room in the house with a hand painted accent wall--and for under $30!
Things you'll Need
Things you'll Need
Medium (1/2" angled paintbrush (artists brush, not a brush from the hardware store)
Interior paint in your choice of shade (quart)
Painter's Tape
Measuring tape
Paint Rags
1. Measure and Tape off Vertical Sections
Each of my sections was 13" wide. You can change the effect and how the leaves interact with each other by increasing the spacing or making smaller strokes when painting leaves.
Each of my sections was 13" wide. You can change the effect and how the leaves interact with each other by increasing the spacing or making smaller strokes when painting leaves.
2. Paint "Stems"
Use a medium paint brush to paint vertical lines along the edge of the tape--don't worry if they're not perfect--a painterly effect is what we're going for . Peel off tape and touch up where needed.
Use a medium paint brush to paint vertical lines along the edge of the tape--don't worry if they're not perfect--a painterly effect is what we're going for . Peel off tape and touch up where needed.
3. Paint Leaves
Practice your leaf strokes on a scrap piece of cardboard before tackling your wall. Each of my leaves crossed over one from another stem and tapers and both ends. At first I tried to make them too thick and it looked too heavy. Slender palm like leaves are easier to paint and once you get in a groove it will go quickly. I did this entire wall by eye but if you struggle with keeping your vertical spacing consistent just use a ruler to measure increments along your stem. This entire wall took me about 6 hours and 1/2 small can of paint! Touch up with white paint where needed.
Practice your leaf strokes on a scrap piece of cardboard before tackling your wall. Each of my leaves crossed over one from another stem and tapers and both ends. At first I tried to make them too thick and it looked too heavy. Slender palm like leaves are easier to paint and once you get in a groove it will go quickly. I did this entire wall by eye but if you struggle with keeping your vertical spacing consistent just use a ruler to measure increments along your stem. This entire wall took me about 6 hours and 1/2 small can of paint! Touch up with white paint where needed.
8.26.2016
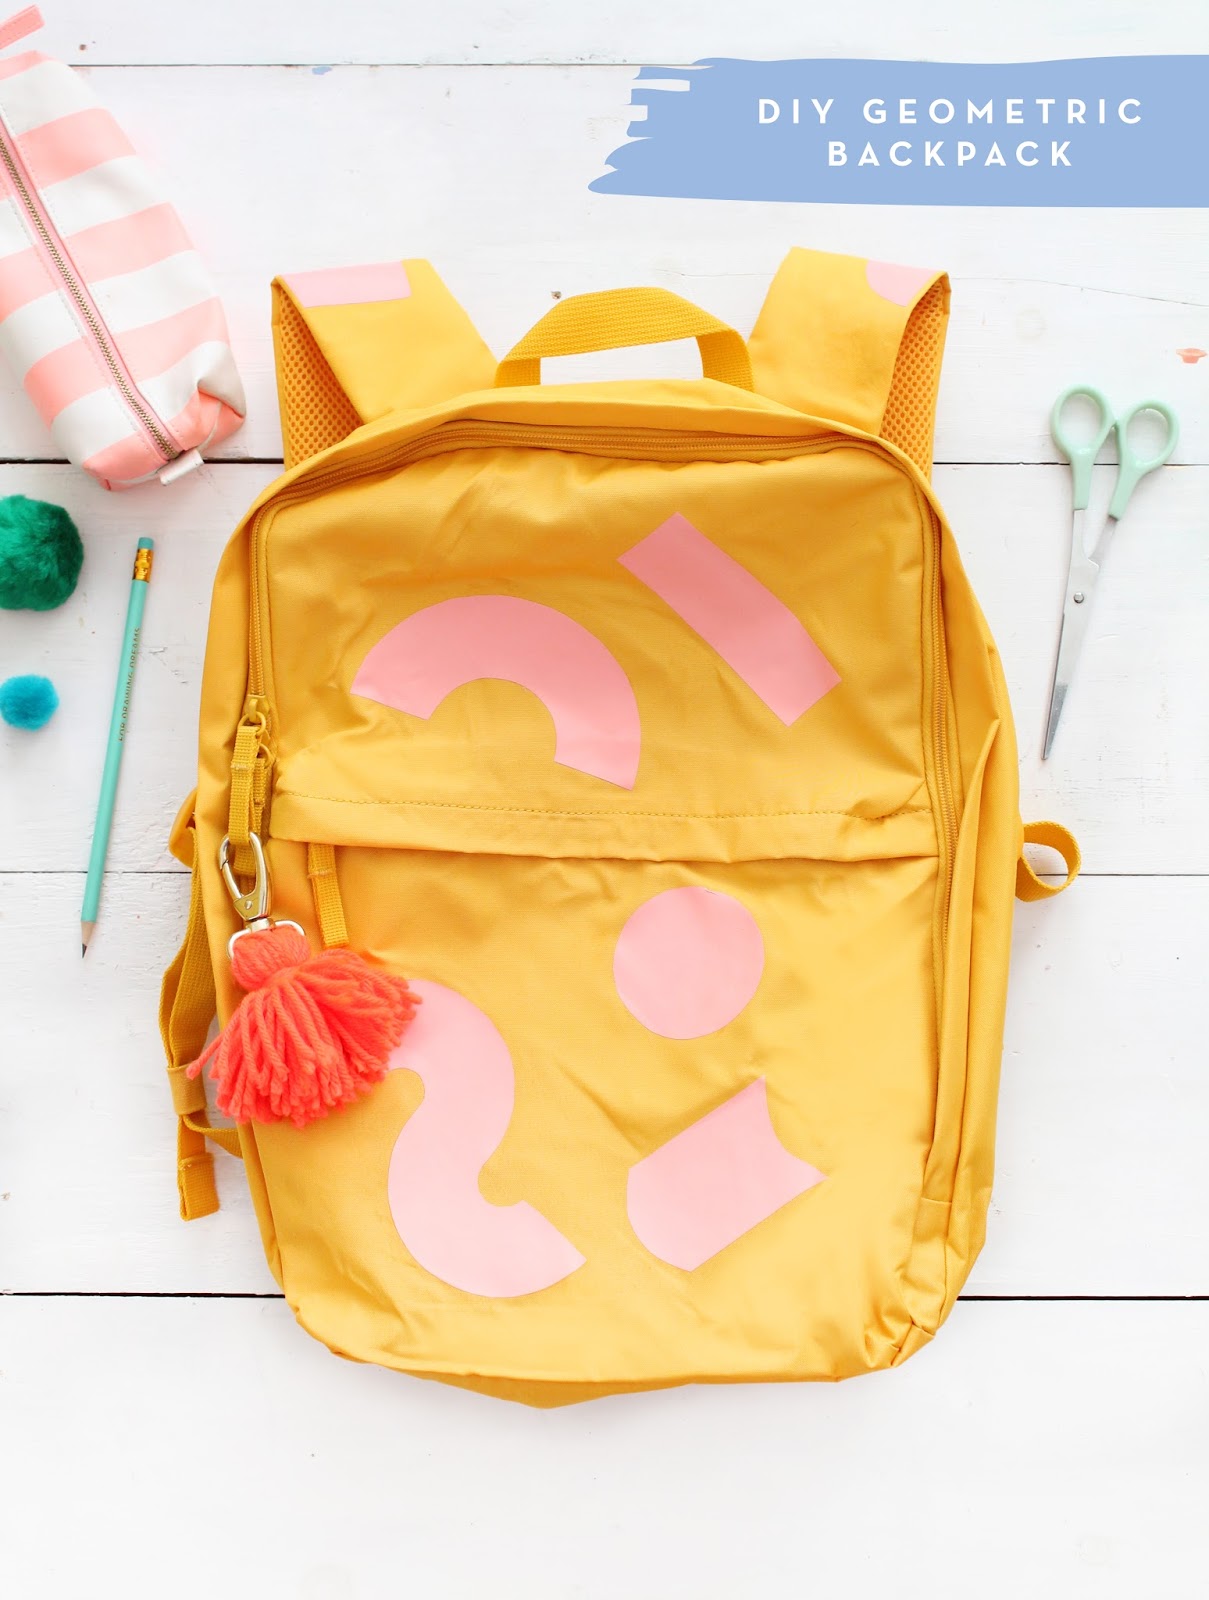
DIY Geometric Shapes Backpack
Back to school season means shopping for all the essentials (most likely the week before?!)--save money by customizing a basic fabric backpack with iron on vinyl-- a unique satchel that costs under $30!
I made this backpack without the use of a vinyl cutting machine--so if you have one you can certainly eliminate time and steps by using one. I was a bit apprehensive about working with vinyl for the first time--and only armed with a craft knife and an iron! I can safely say this project (errrr...experiment) was a breeze and can be tackled in about an hour!
I made this backpack without the use of a vinyl cutting machine--so if you have one you can certainly eliminate time and steps by using one. I was a bit apprehensive about working with vinyl for the first time--and only armed with a craft knife and an iron! I can safely say this project (errrr...experiment) was a breeze and can be tackled in about an hour!
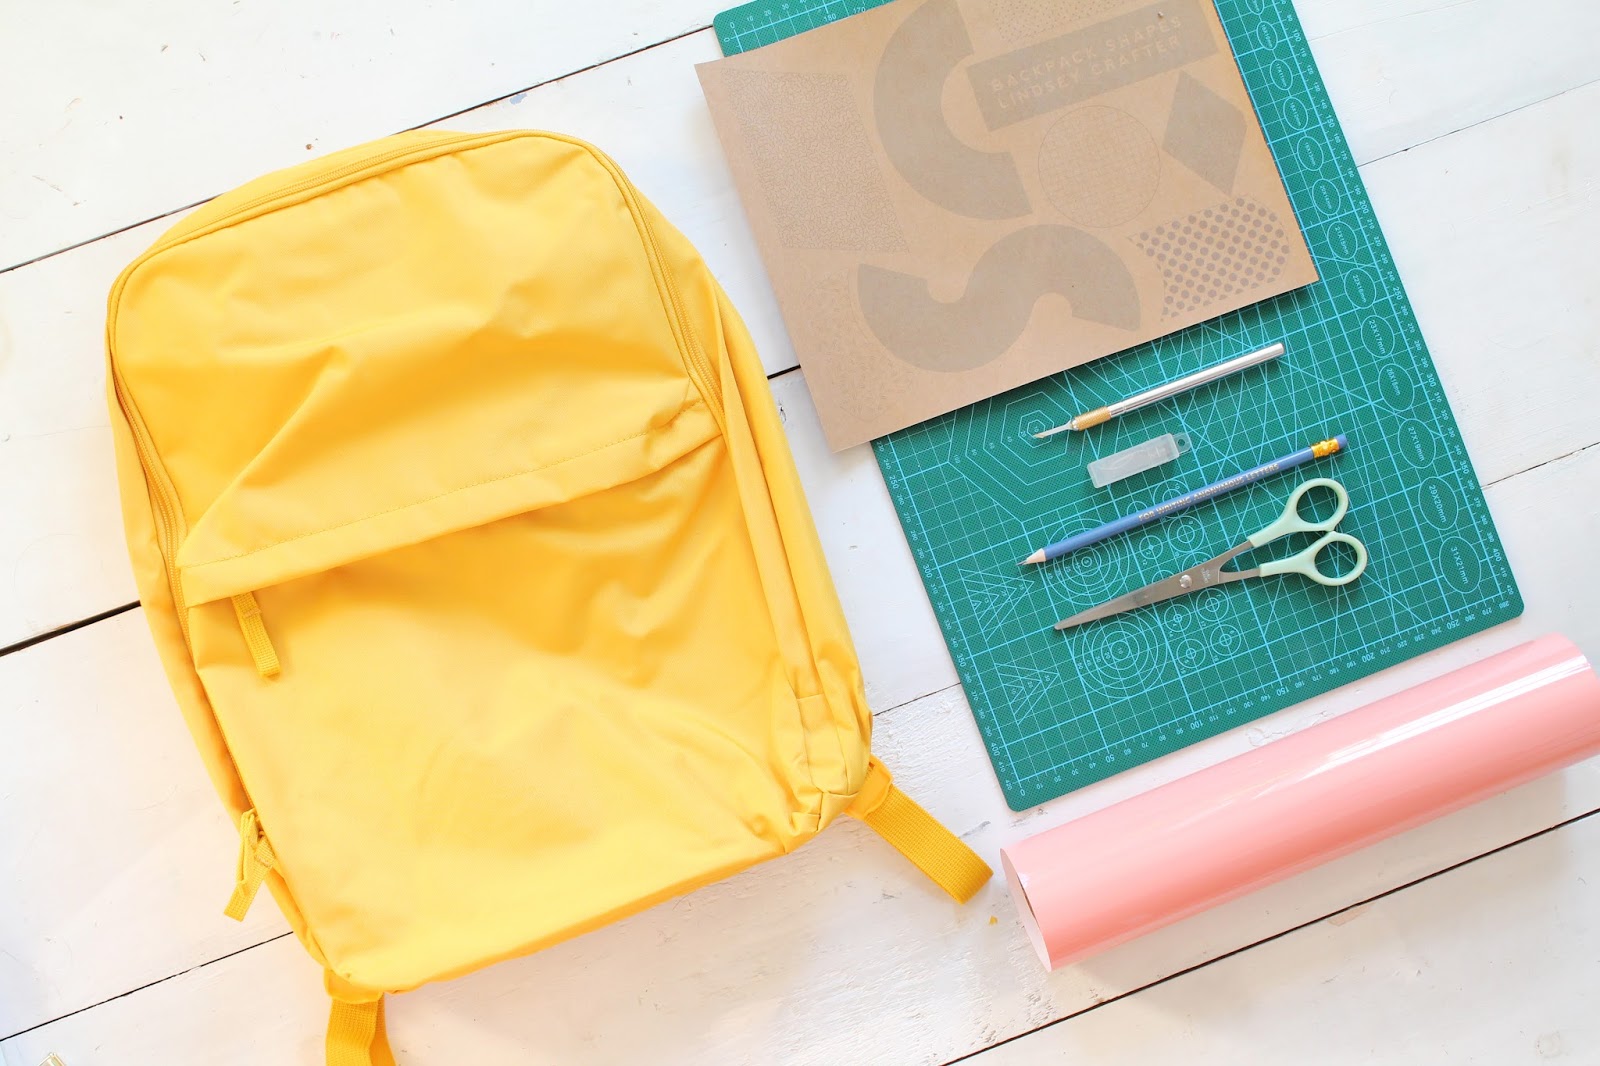
You'll Need :
X-acto Blade
Cutting Mat
Cutting Mat
Scissors
Pencil
Iron on Vinyl ( I used this brand and loved it )
Backpack (Canvas or fabric preferable)
Iron & Ironing Board
Optional: Shape patterns at the bottom of the post!
Optional: Shape patterns at the bottom of the post!
Make Your Own Geometric Shapes Backpack!
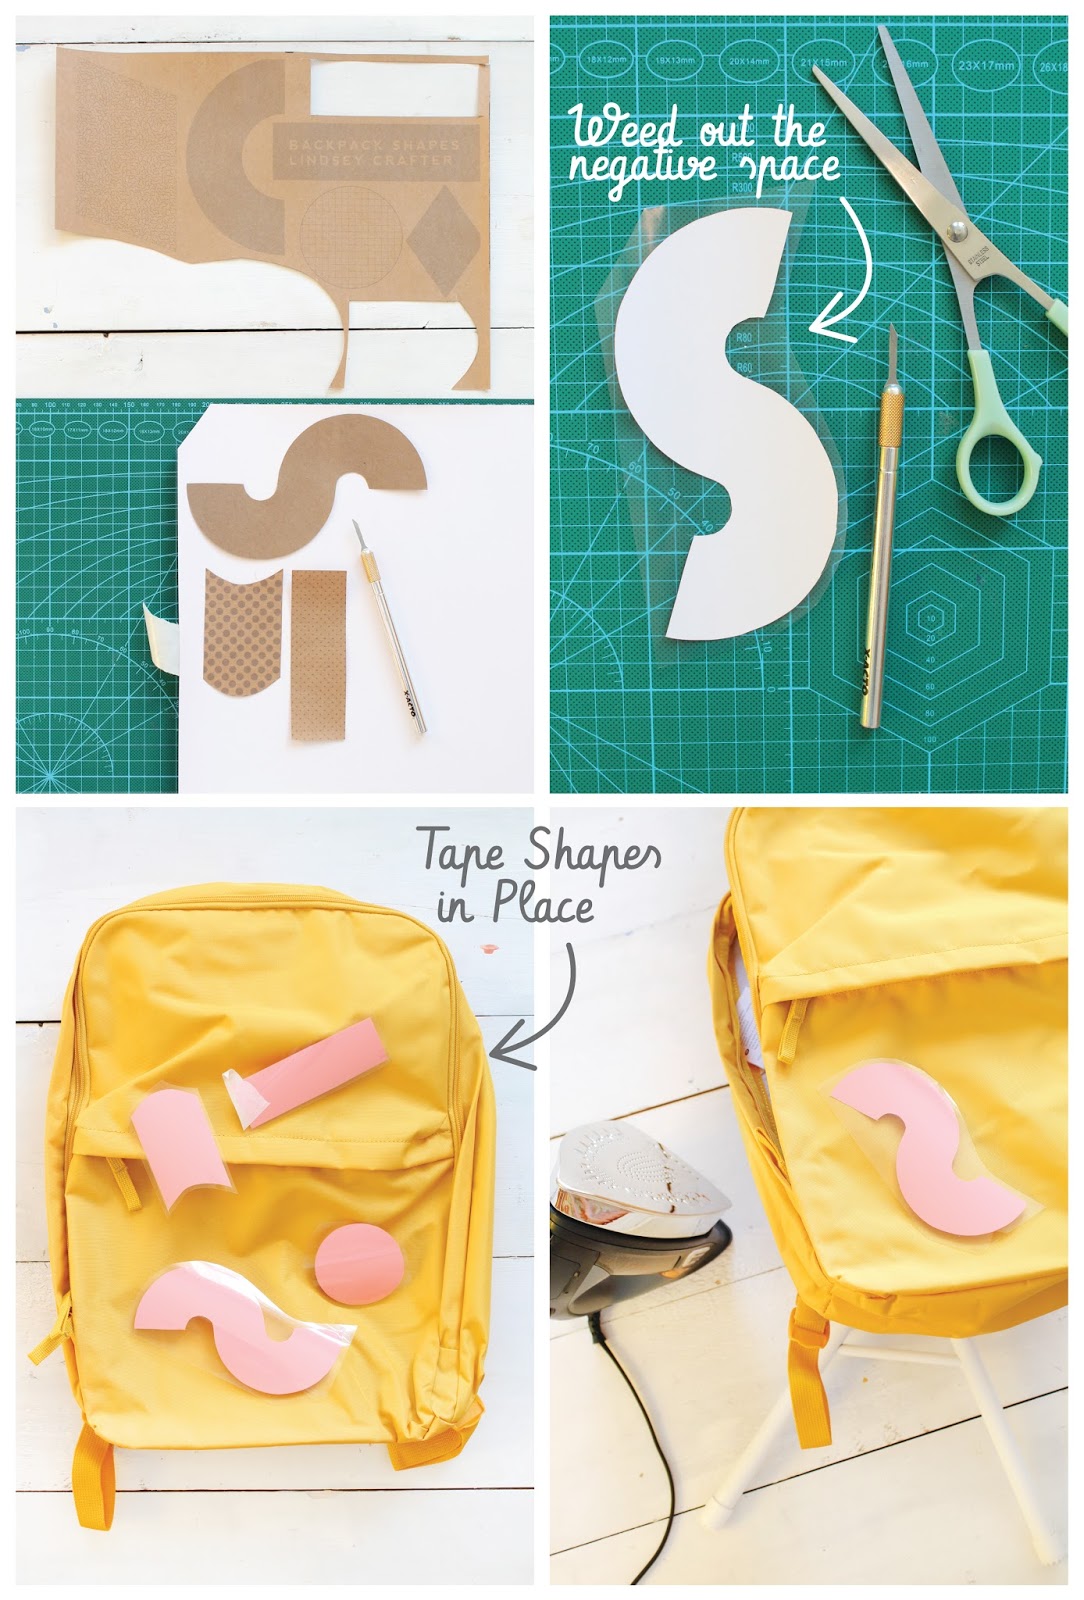
1. Trace your shapes with a pencil or trace objects around your house to create unique silhouettes. OR print out the pattern shapes printable at the bottom of the post on yardstick and cut out to create stencils.
2. Place the vinyl with the color side down on the cutting mat and use a craft knife to carefully cut around the shape template. Don't press too hard with the blade--you'll cut through the clear transfer material on the front of the vinyl. Gentle pressure will be enough to cut through the vinyl.
3. Cut out shapes leaving at least a 1/4" margin around the shapes edge and use the tip of the x-acto blade to remove/peel away the vinyl in the negative space (the technical term is "weeding")--leaving just the shape you want to transfer onto the backpack.
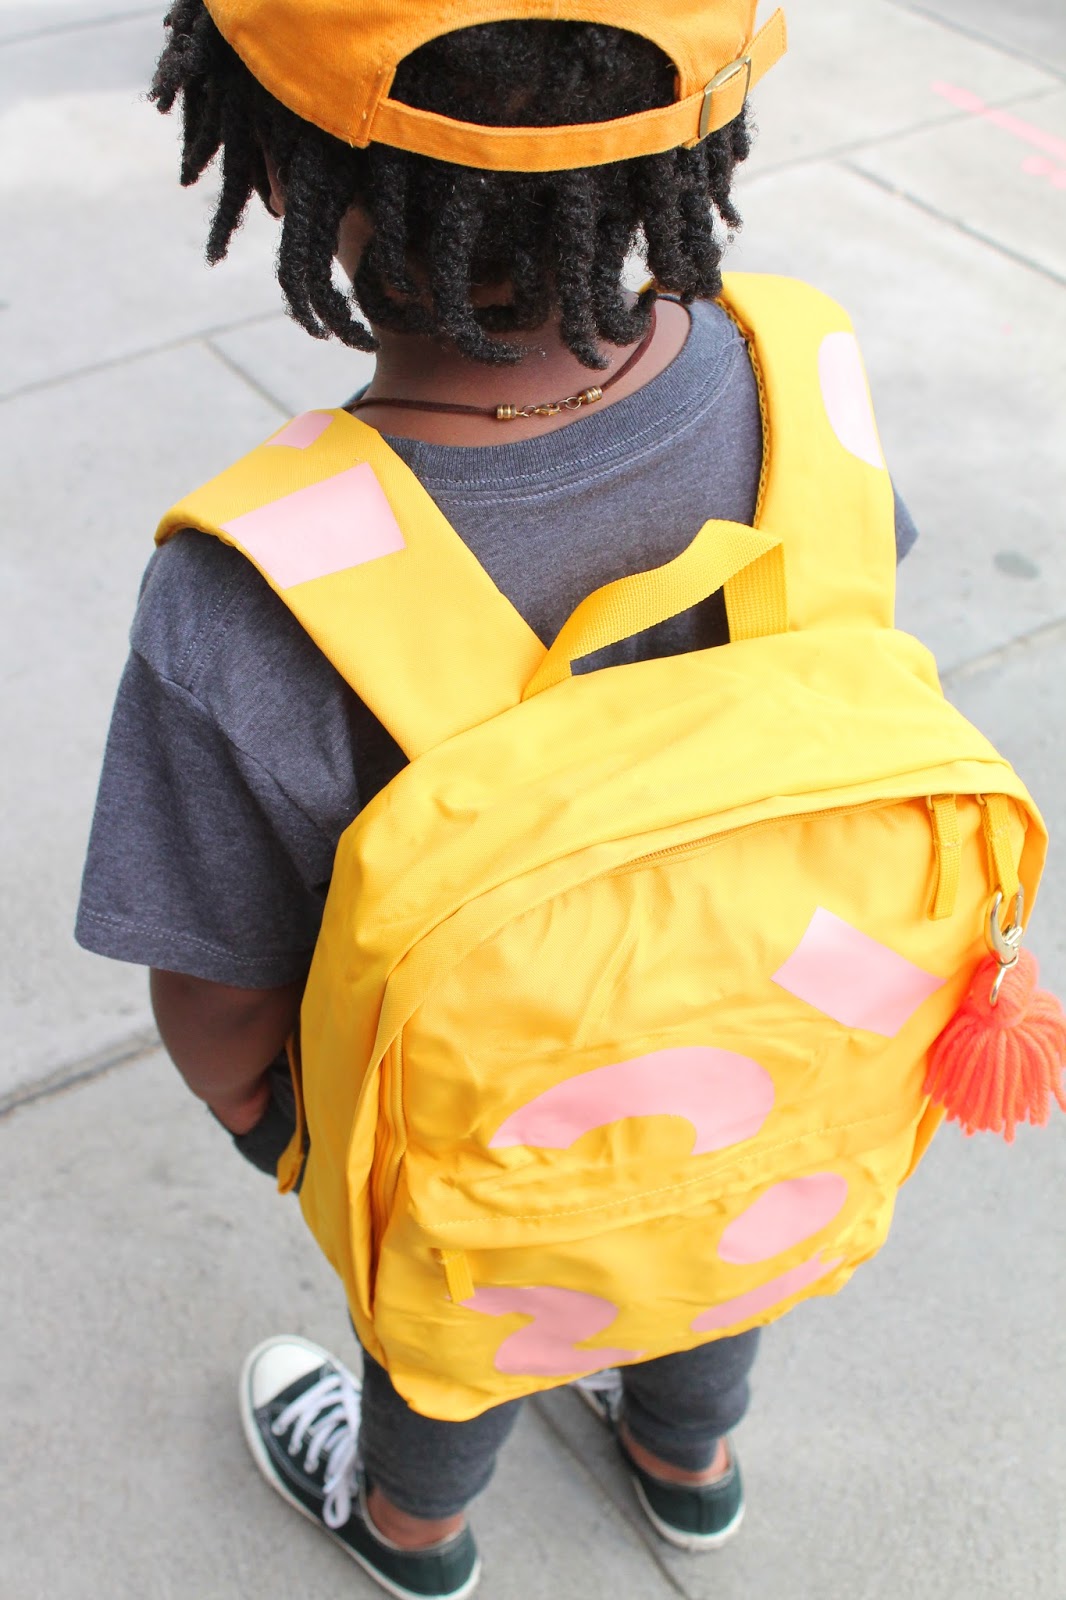
4. Place the vinyl shape on a flat section of the backpack and iron on at the directed temperature by the vinyl's manufacturer. Allow to cool before peeling off the transfer and revealing the bright shape! If working on a nylon backpack test in a inconspicuous area before applying heat with the iron--the material may melt. I'd recommend using a fabric backpack for best results!
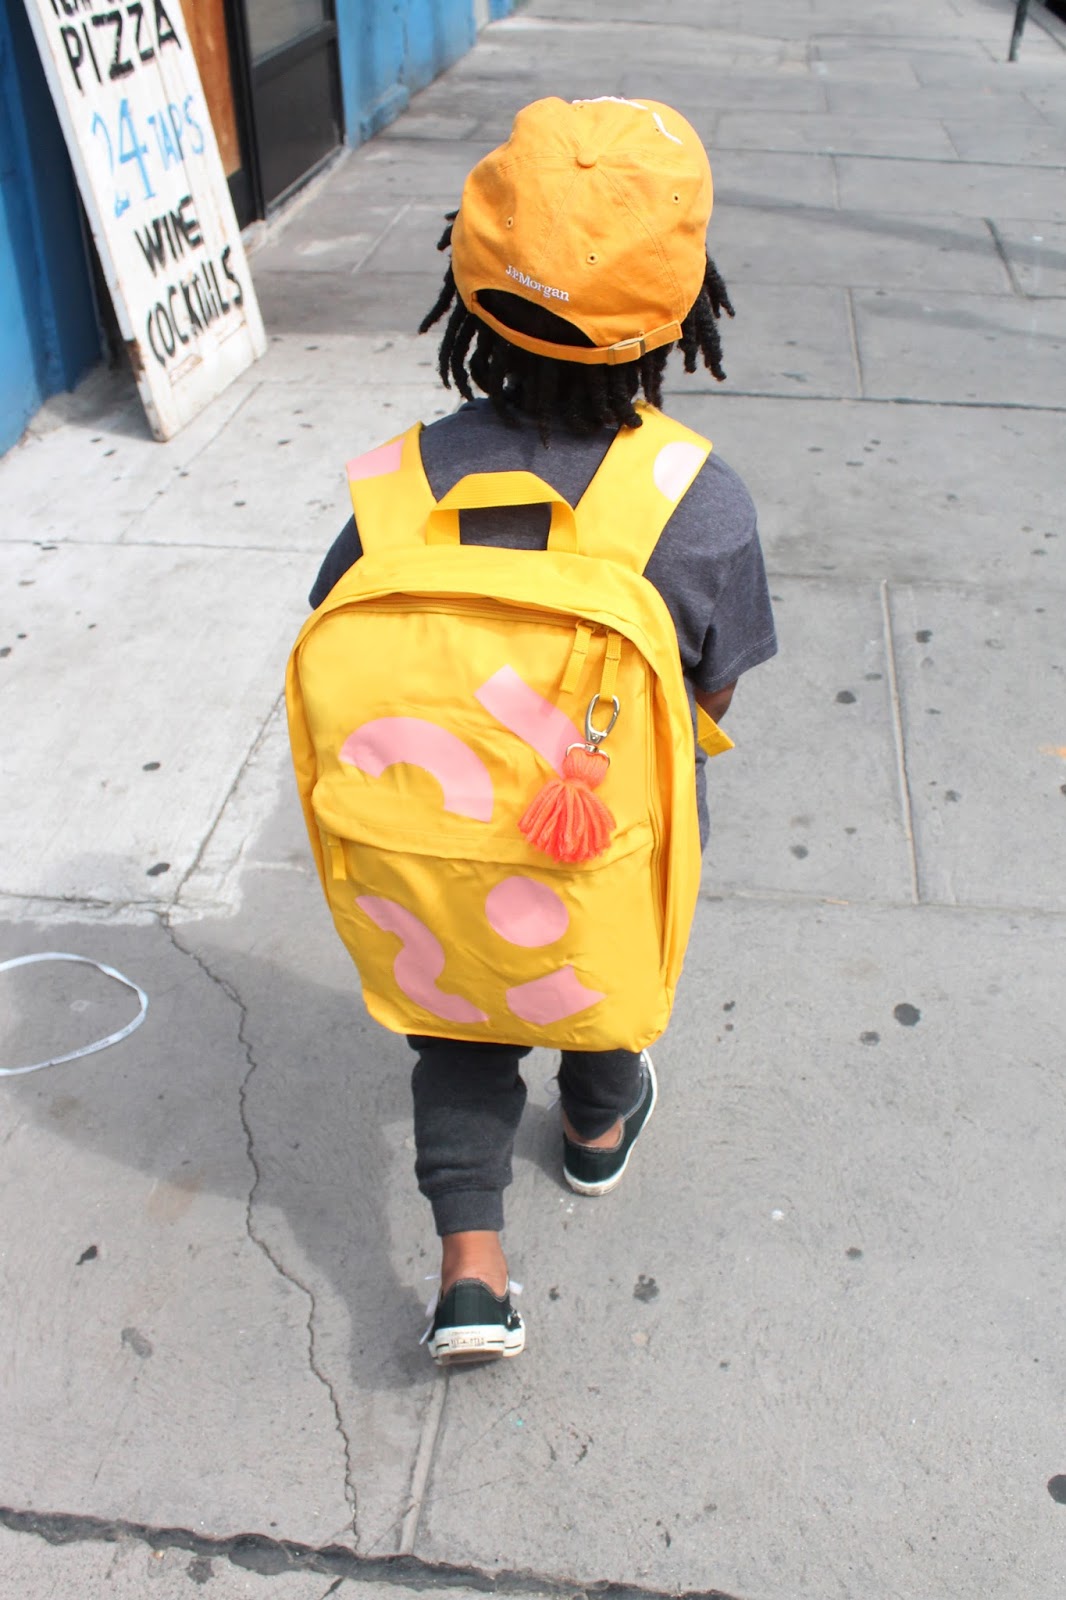
How cute would this be with lots of different colors--you can even find metallic vinyl on Amazon! I had my friend SJ (check out my friend Simone and her little fashionista Summer) take this satchel on a test drive before he starts school next week! Of course no bag is complete without a pom pom key chain!
TIP!
The backpack I used was Nylon and I had some problems with the material melting or mis-shaping with the heat of the iron. I think this project would work more easily with a fabric or canvas backpack to avoid the issue altogether!
Subscribe to:
Posts (Atom)


