12.31.2015

NYE Printable Crowns

Almost forgot to publish this AMAZING hand illustrated freebie and am composing from the car on our 14 hour drive back to Jers! Enjoy these color-in crowns to ring in the new year , and if you're a last minute party goer/thrower like me -- print a few of these out for your guests to color in before the ball drops!  
Oh man that's a good subtitle for this post " I totally dropped the ball" 


SIMPLY PRINT CROWNS ON HEAVY CARD STOCK, COLOR WITH MARKERS OR PENCILS, AND CUT OUT WITH SCISSORS.  


PUNCH OUT MARKED HOLES AND TIE ON COLORFUL STRINGS OR RIBBONS TO FASTEN BEHIND YOUR HEAD. 

SET UP A DECORATION STATION FOR PARTY GUESTS TO ADD GLITTER, RHINESTONES AND FEATHERS TO THEIR CUSTOM CROWNS.


happy new year! 

12.20.2015

Peppermint Gift Boxes

Quick! Are you in a last minute scramble to wrap your gifts? Skip the blah gift bags and make a few of these precious peppermint gift boxes!


What You'll Need 

round paper mache gift boxes in various sizes
white, red and pink acrylic paint 
paint brushes 
clear cellophane
scissors
twist ties 


Here's How 

1. paint boxes and lids with white acrylic paint.

2. starting from the center of the box , paint swirls on the lid of the box and continue the peppermint stripe down the sides. 

3. cut a large piece of cellophane 6" wider than each side of the box.  Attach one end of the cellophane to the bottom of the box with double-stick tape and wrap around the entire box.

4. gather the ends of the cellophane and secure with a twist tie before tying off with a decorative ribbon


fill with a handful of crinkle paper and your favorite goodies! 


HAPPY HOLIDAYS! 

LINDSEY CRAFTER 

12.17.2015

Free Holiday iPhone Wallpaper

Spread some holiday cheer from your home screen with this free winter florals wallpaper!
Winter leaves and berries illustrated by yours truly!


RIGHT CLICK AND SAVE 


Just save this image and upload as your smart phone's wallpaper or lock screen!
For personal use only please :)


HAPPY HOLIDAYZZZ! 
XO LINDSEY CRAFTER

12.10.2015

Gilded Wood Bowls

After finding these gorgeously gilded wood bowls on Anthropologie I haven't been able to shake them!  After perusing my local TJ Maxx I happened upon the SAME live-edge wood bowls for $10-$7 and grabbed a few to DIY! Applying gold leaf to these was challenging but added the perfect metallic detail to my coffee table setup!

What You'll Need

Live Edge Wood Bowls 
Sandpaper


Here's How: 
1. Sand down any bumpy surfaces and wipe down with a damp cloth.
2. Apply a layer of gilding adhesive to the interior of the bowl avoiding the raw edge.
3. After adhesive has dried to a tacky consistency apply gold leaf sheets with a large soft brush (my sheets often broke around the corners so I overlapped and applied the gold leaf in pieces) 
4. Brush off any extra gold leaf and apply a thin coat of decoupage to seal the gold leaf and protect it from scratching. 


Gorgeous right? Make a set for a friend for a handmade gift or style in your holiday tablescape! 

xo Lindsey Crafter 

Amazon Prime Gift Guide

Uh oh. So Christmas is comin' in HOT-- got all your gifts ready?

If not don't fret -- I've put together a handy gift guide with some presents that won't get re-gifted and should get to you free in two days or less if you have an amazon prime account! 


This read will inspire even the most clutter-proned friend to get her act together!


MY FAVORITE LIPSTICK ON THE PLANET. Just go ahead and buy yourself a few shades as well.


You've probably received four sets of copper mugs for moscow mules -- but have you ever seen these gorgeous copper martini glasses?!


For your sustainably conscious friend- a sleek compost bin that won't deface the kitchen! 


I just purchased one of these for my tablet-- and it rocks! The wireless usb port is small and fits up inside the mouse when not in use so you don't misplace it! 

Happy Holidays All! 


12.01.2015

Groovy Embellished Gloves

I snagged a few of these classic knit gloves while I was home for Thanksgiving for an impromptu crafternoon with my girls.  I found some retro flower glass beads and experimented with some non-traditional color combinations to craft these textural embellished gloves.

What You'll Need 

Knit winter gloves ( I got mine from Target) 
Seed Beads
Rhinestones
Glass Beads 
Embroidery Floss
Beading Needles


1. Lay out and attach large glass beads and rhinestones.


Be sure to cut and knot your thread after attaching each large bead to avoid long gaps of thread that can easily get snagged when you're putting on your gloves. 


2. Embellish larger glass beads by outlining with seed beads. 


3. Add decorative stitches or knots with embroidery floss.
For inspiration check out my STITCHES board on Pinterest


Buy several pairs of these gloves from the dollar section at Michaels and make embellished gloves for all your gals this Christmas!


11.21.2015

Dowel Display Tree

After hitting the mother-load of vintage ornaments last year, this holiday season I wanted to display them in the most dynamic way possible ( the fine glasswork details can get lost on a tree). Growing up my mother had a wrought iron display tree in our dining room to house her collection of childhood ornaments, so I crafted something comparable but a little more modern with wood dowels.


What You'll Need 

Wood Clock Round or Wood Disk  
1.5" Dowel 
Skinny wood dowels with a drill bit in the same diameter
Drill
Jigsaw or Circular Saw
One Wood Screw
Shop Scissors 
Sander 
Glue

1. Cut 1.5" dowel to your desired tree height ( I made mine 3')

2. Measure and mark every two inches from the base of the dowel to determine the tiers of the tree.  Rotate the dowel 45 degrees when marking each tier so each dowel will be facing out in a different direction on each level like branches. 

3. Drill through the dowel (taking care to keep the drill perpendicular) to create a through-and-through hole. Drilling through at an angle will create branches that slope up on one end and down on the other -- not ideal for hanging ornaments.  Sand off any rough edges made by the drill bit. 

4. Cut skinny wood dowels at various lengths ( I made mine between 5" and 16")  with shop scissors  and twist into the 1.5" dowel to create the branches.  If your branches are sliding around secure in place with craft glue. 

5. Drive a screw through the center of the wood round into the dowel to secure it to the base. 


6. Sand off any rough edges and style with your favorite ornaments.  Paint your tree an accent color or leave the wood natural for a scandinavian feel.


Lovely right?! Be sure to share if you try this project by tagging me on instagram @lindseycrafter !


11.16.2015

Monday Links

<a href="http://www.tomoson.com/?code=TOP8493524abcfabed734d38123614102ea" rel="nofollow"><img style="display: none" src="http://www.tomoson.com/images/front/pixel.png" /></a>


The number/scale of tasks I have to complete this week are overwhelming -- and in attempt to re-focus energy and prioritize I'm working on something COMPLETELY unrelated to said tasks -- funny how that happens right?  I'm hoping to release a couple of prints on Society 6 this month in time for the holidays -- so stay tuned for new funky floral prints! In the meantime here are some things I've found in my internet travels this a.m.

Some serious knitspiration by Eugenia Kim

The power of matcha caffiene (my free trial shown above)

This confetti chair giveaway by Studio DIY 

Where I'm doing all my holiday gift shopping 

xo Lindsey Crafter 

<a href="http://www.tomoson.com/?code=BOTTOM8493524abcfabed734d38123614102ea" rel="nofollow"><img style="display: none" src="http://www.tomoson.com/images/front/pixel.png" /></a>

11.10.2015

Homemade Lip Stain


Rescue your chapped lips from the fall chill with this homemade lip stain you can mix in your own kitchen! I have several lipsticks I don't use because they dry out my lips, so I used them along with a few natural ingredients to create a moisturizing lip stain!

What You'll Need 

Beeswax Bricks 
Coconut Oil 
Essential Oils
Measuring Spoons 
Old lipsticks or Powdered Blush
Small Glass Bowl or Glass Measuring Cup
Small Saucepan & Stovetop Access
Sharp Knife

1. Test ratios of wax and coconut oil to reach your desired consistency-- if you'd prefer it to be more of a gloss than a stain simply increase the amount of coconut oil in your recipe. I mixed batches with a 1/2 an ounce of beeswax and a large spoonful of coconut oil.

2. Melt beeswax in a small glass bowl or measuring cup by creating a double broiler in a small saucepan. Cut into smaller blocks to decrease melting time.

3. Add in coconut oil, a few drops of essential oil and 1/2 teaspoon of lip color or powdered blush -- stirring continuously.

4. Carefully pour the melted mixture into the small jars and allow to cool until hardened.


5. Print out the sticker sheet and add watercolor before cutting out labels. Apply to lids before wrapping and gifting to your friends. Keep one in your purse, car and diaper bag for on-the-go primping!

11.07.2015

Rachel's Garage Makeover

She might very well KILL me for sharing the before photos, but the AFTER was just too gorgeous not to share with all of you.  The transformation took about two days and instantly brightened up the space! Product sourcing included below!


Ian's sister Rachel just moved into a new home… and after needing to stage a few shoots in the garage for another project with Black + Decker I figured we might as well give it a facelift. I was a little concerned at first that my choice of paint would be too much of a contrast to the pre-existing faux wood veneer (I didn't want to paint the whole space), but look how amazing the two pair together--so much brighter!

Before

The paint I used was amazing, just 2 light coats and I was in business. The crates were hung from the wall to create cute entry-way catch-all cubbys (say that five times fast), I mix and matched some flea market finds with stained wood crates from Michaels.


The hook/ wire wrack system I chose only took about 30 minutes to install (once we found the wall studs) and created the perfect place to store things off of the floor.


Find the Black and Decker Article I staged the garage for Here!

Paint: Pussywillow
Paneling: pre-existing
Stain: Miniwax Classic Grey
Shelving: Kobalt K Rail System
Wire Baskets: TJ Maxx
Crate Shelving : unfinished wood crates from micheals and vintage

11.05.2015

Fifteen Minute Felt Sunglasses Case

After buying yet ANOTHER pair of sunglasses I vowed to treat them like a responsible adult should- and store them in a case to prevent crushing and scratching.  Im not crazy about hard sunglass cases and the amount of space they take up in a bag, so a simple sleeve design is what I opted for .  Currently I'm aiming to "bust my stash" and make a conciencious effort to use materials I already own, so I dug through my fabric and trim scraps and produced a few usable pieces to create a quick felt sleeve.


Here's What You'll Need 

Felt Scraps 
Scissors 
Straight Pins 
Ribbon Scraps or Trim
Sewing Machine 
1. Cut out 1 pattern piece 
(first be sure your glasses fit within my template, if not just scale it up 10% when printing)  

2. Fold and pin along edge

3. Fold a piece of ribbon or trim into a loop and pin into the side seam 
(for attaching charms or tassels!)

4. Sew along the edge
Keep the edge of the fabric lined up with the presser foot for a straight seam.

5. Trim threads and DONE. 

Make one, or five -- these make quick and economical presents or bridesmaids gifts. 


10.25.2015

PROJECT CLOSET: DRESSING ROOM

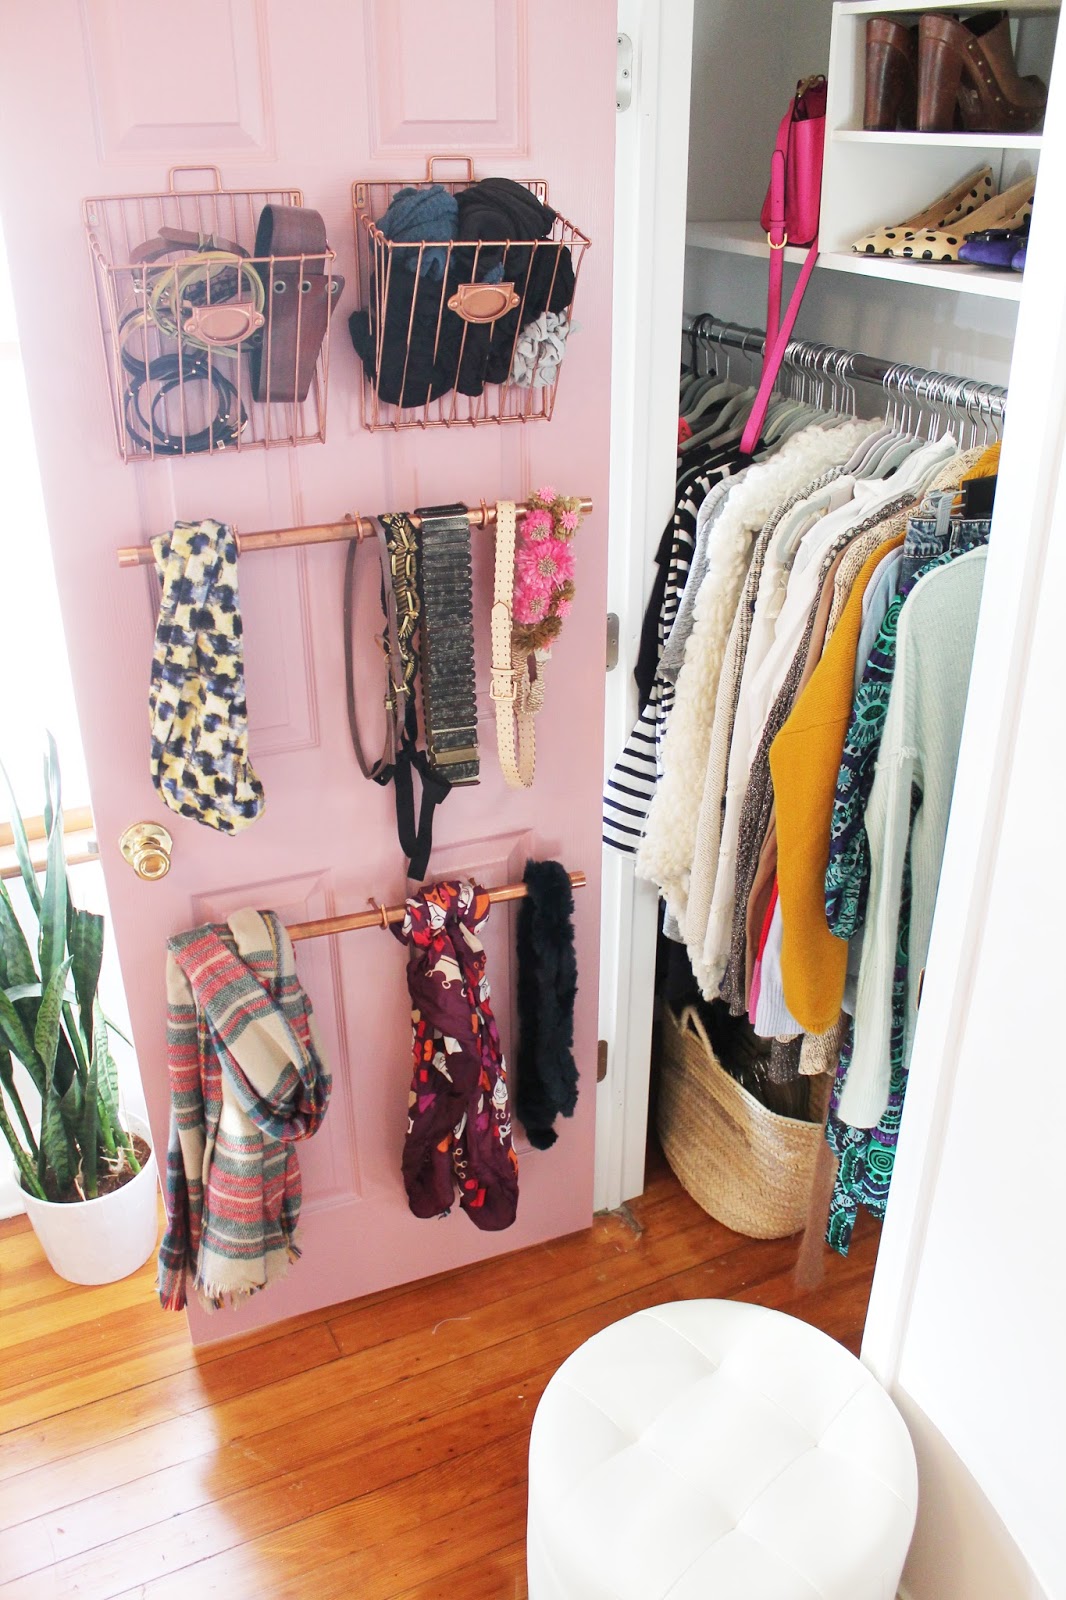
IN OUR APARTMENT OUR "DRESSING ROOM" ALSO HAPPENS TO BE OUR DINING ROOM. AS THE ONLY ROOM IN OUR SPACE THAT HAS HIS AND HERS CLOSETS, PLENTY OF FLOOR SPACE FOR CAST-OFFS AND IKEA BAGS OF CLEAN LAUNDRY, WE STRUGGLE TO KEEP IT IN A "MANAGEABLE" STATE.  AFTER MY MOST RECENT PURGE I WAS ABLE TO REALLY FIT EVERYTHING IN, BUT SOME THINGS REMAINED UNACCESSIBLE AND THEREFORE UNWORN. BOTH OF OUR CLOSETS ARE SO NARROW HANGERS ONLY FIT IN THE AREA WITH THE DOOR JAM--SO THE POCKETS ON EITHER SIDE OF THE DOOR ARE POORLY UTILIZED. MY GOAL IS TO MAXIZE MY CLOSET SPACE BY ADDING BUILT IN SHELVES, HOOKS AND CREATIVE STORAGE TO THE DOOR-- ALONG WITH A SPLASH OF COLOR FOR FUN!

Want to evaluate your closet and save money? Check out my free printable closet evaluation here and stop wasting money on impulse buys! 


Small Closet Solutions

BEFORE

small closet solutions


WHAT YOU'LL NEED: 
PAINTER'S TAPE 
SMALL SAMPLE CONTAINER OF PAINT (I USED SHERWIN WILLIAMS "MYTHIC MAUVE")
SMALL WIRE BASKETS ( I GOT MINE AT MICHAELS) 
3/4" WOOD DOWELS OR COPPER PIPE WITH CAPS
SCREW IN HOOKS
COPPER SPRAY PAINT
SHELF PAPER
WOOD (PLYWOOD AND 1x4'S)

small closet solutions

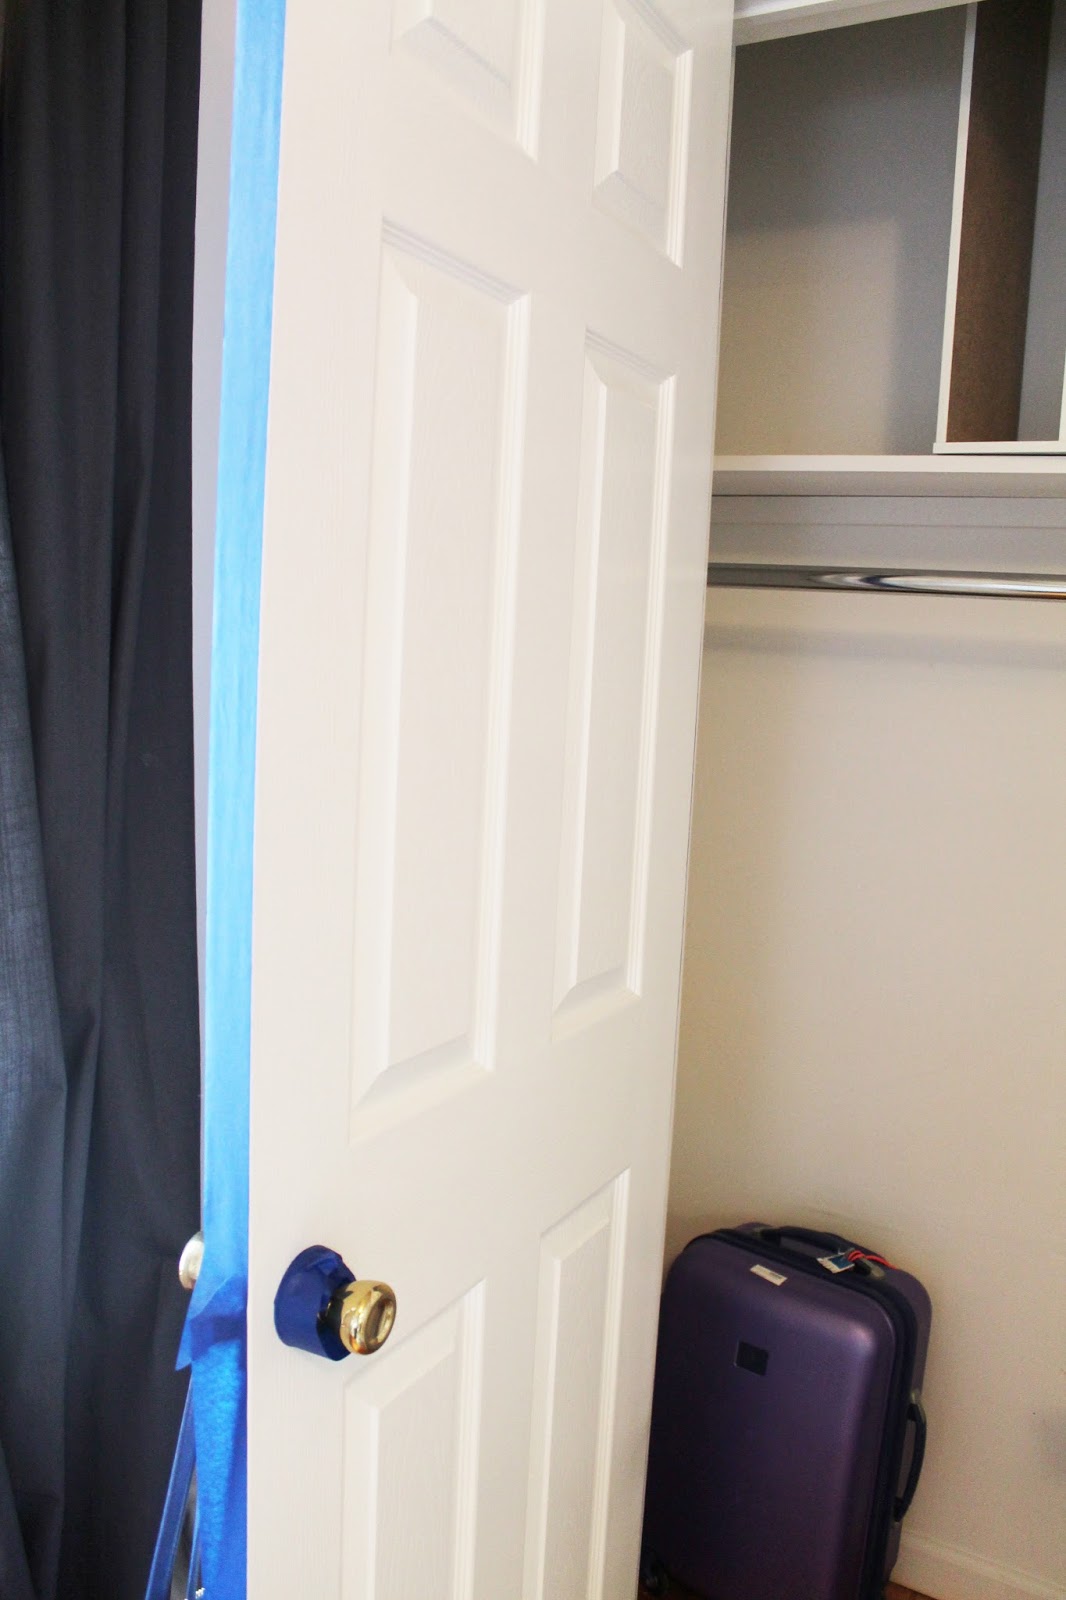
I FORGOT PROGRESS SHOTS OF THE DOOR, BUT I PAINTED THE ENTIRE THING WITH A BRUSH -- JUST TWO COATS OF FLAT INTERIOR PAINT COVERED WELL. BE SURE TO TAPE OF THE EDGES OF YOUR DOOR AND KNOB!

small closet solutions

IF YOU CHOSE COPPER PIPE SPRAY PAINT YOUR HARDWARE TO MATCH -- YOU COULD ALSO PAINT YOUR DOWELS AND HARDWARE ANOTHER ACCENT COLOR TO MATCH YOUR DECOR.

small closet solutions


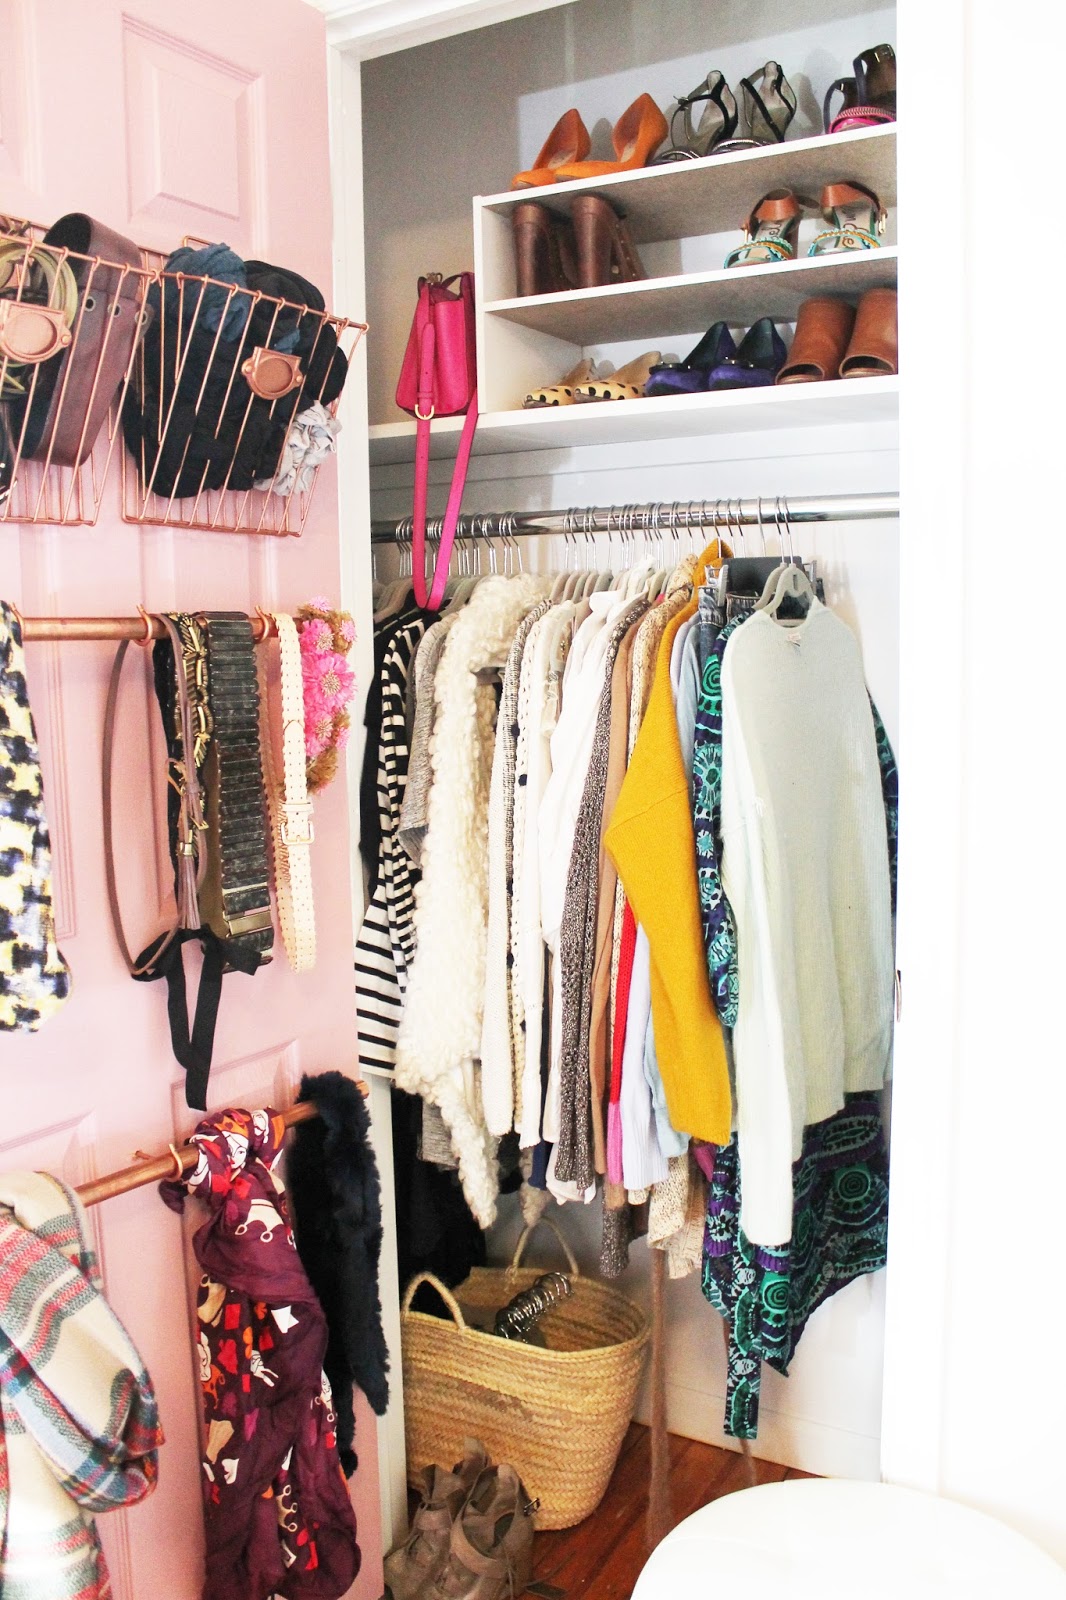
I ADDED SHALLOW BASKETS FOR HOLDING TIGHTS AND ACCESSORIES. EXTENDED COPPER RODS MAKE IT EASY TO HANG BELTS AND SCARVES WHERE YOU CAN SEE THEM. 

small closet solutions

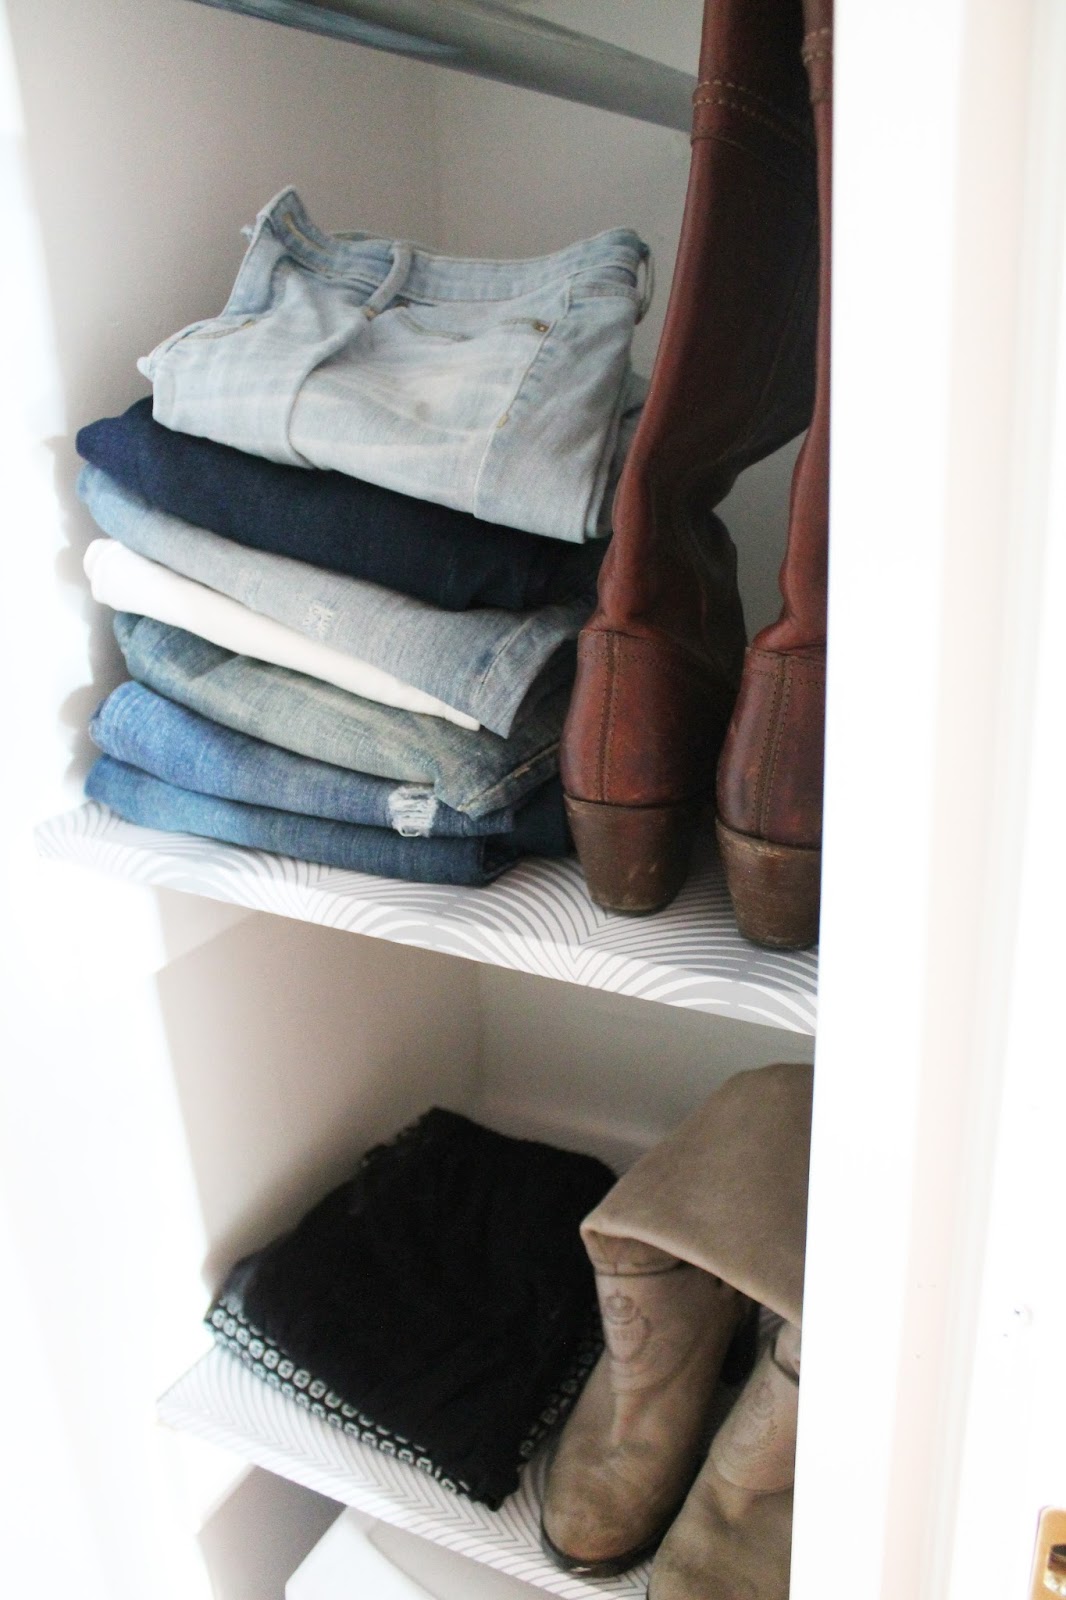
I BUILT CUBBY SHELVES INTO THE SIDES OF THE CLOSET FACING OUTWARD -- MAKING IT SUPER EASY TO REACH STACKS OF PANTS, PURSES OR BOOTS STORED THERE.  INTALL THESE SIMPLE SHELVES BY CUTTING TWO BRACES FROM 1X4'S AND SCREWING THEM INTO EITHER WALL INSIDE THE CLOSET. 

I COVERED THE PLYWOOD WITH PRINTED CONTACT PAPER FROM TJ MAXX. 

small closet solutions

MUCH BETTER RIGHT?! I CAN REACH EVERYTHING AND IT FEELS MUCH MORE SPACIOUS AND ORGANIZED. CLOSETS CAN BE BEAUTIFUL!

Want to evaluate your closet and save money? Check out my free printable closet evaluation here and stop wasting money on impulse buys! 


small closet solutions


STAY TUNED AS I TACKLE THE CRAFT CLOSETS AND PANTRY!


Latest Instagrams

© LINDSEY CRAFTER . Design by Fearne.