IN OUR APARTMENT OUR "DRESSING ROOM" ALSO HAPPENS TO BE OUR DINING ROOM. AS THE ONLY ROOM IN OUR SPACE THAT HAS HIS AND HERS CLOSETS, PLENTY OF FLOOR SPACE FOR CAST-OFFS AND IKEA BAGS OF CLEAN LAUNDRY, WE STRUGGLE TO KEEP IT IN A "MANAGEABLE" STATE. AFTER MY MOST RECENT PURGE I WAS ABLE TO REALLY FIT EVERYTHING IN, BUT SOME THINGS REMAINED UNACCESSIBLE AND THEREFORE UNWORN. BOTH OF OUR CLOSETS ARE SO NARROW HANGERS ONLY FIT IN THE AREA WITH THE DOOR JAM--SO THE POCKETS ON EITHER SIDE OF THE DOOR ARE POORLY UTILIZED. MY GOAL IS TO MAXIZE MY CLOSET SPACE BY ADDING BUILT IN SHELVES, HOOKS AND CREATIVE STORAGE TO THE DOOR-- ALONG WITH A SPLASH OF COLOR FOR FUN!
Want to evaluate your closet and save money? Check out my free printable closet evaluation here and stop wasting money on impulse buys!
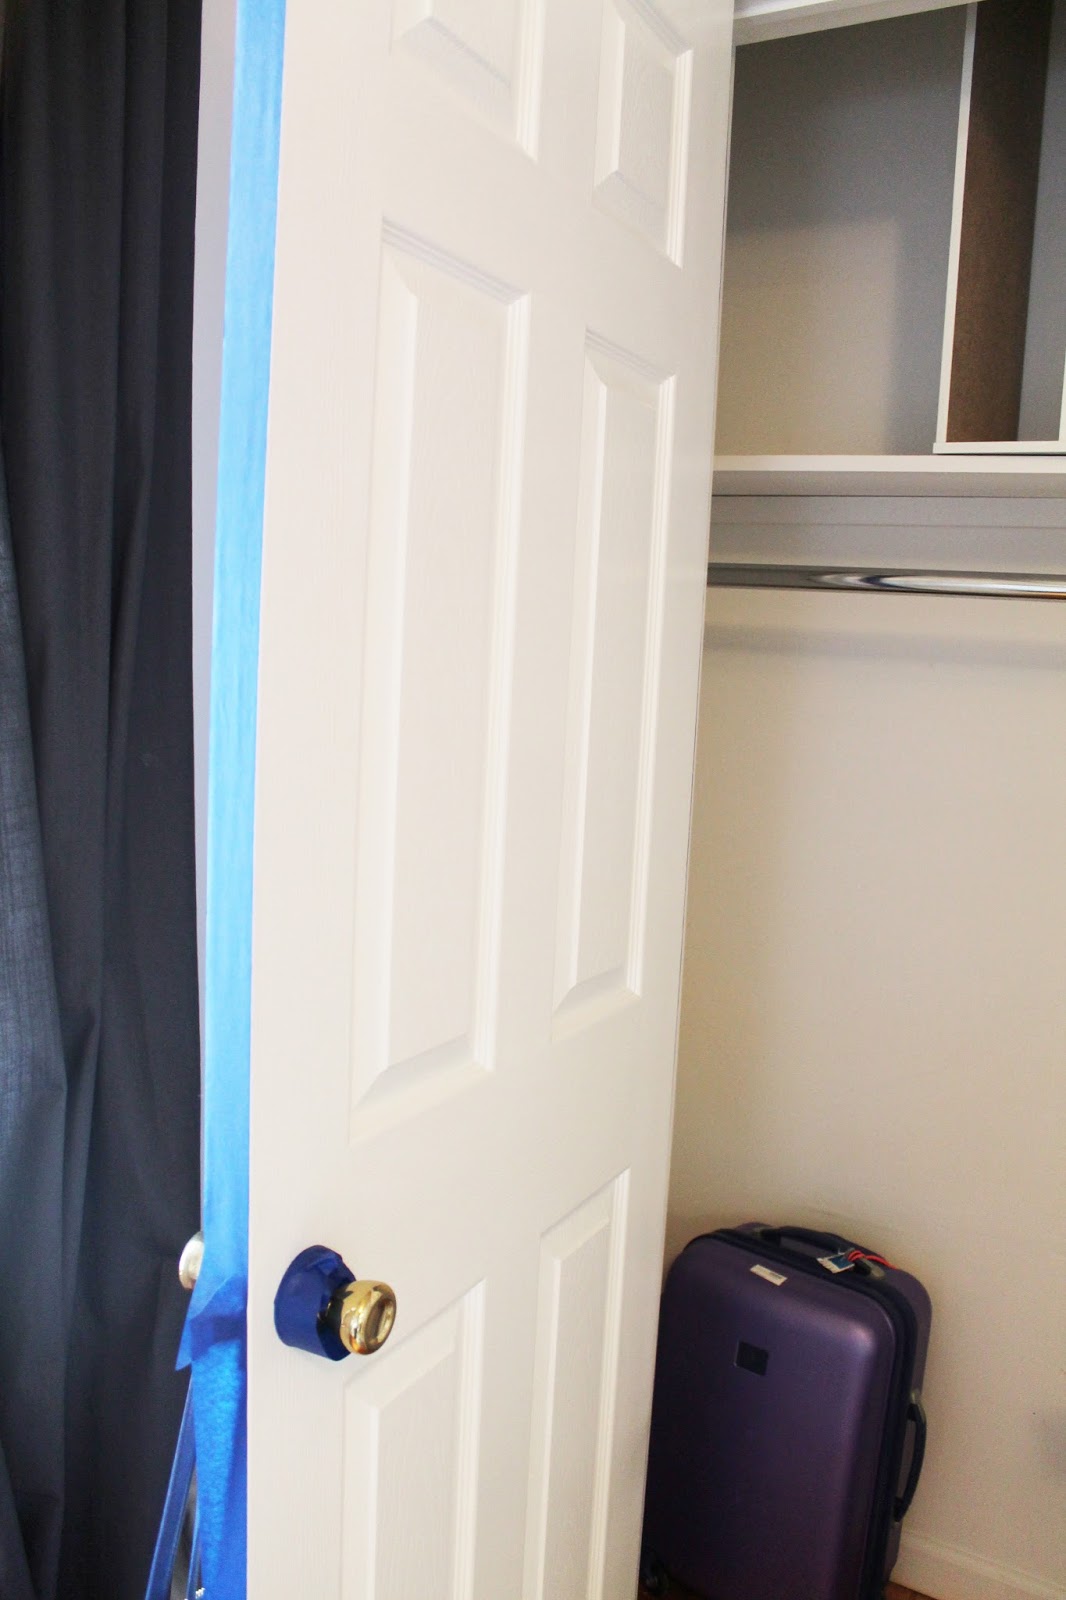
BEFORE

WHAT YOU'LL NEED:
PAINTER'S TAPE
SMALL SAMPLE CONTAINER OF PAINT (I USED SHERWIN WILLIAMS "MYTHIC MAUVE")
SMALL WIRE BASKETS ( I GOT MINE AT MICHAELS)
3/4" WOOD DOWELS OR COPPER PIPE WITH CAPS
SCREW IN HOOKS
COPPER SPRAY PAINT
SHELF PAPER
WOOD (PLYWOOD AND 1x4'S)
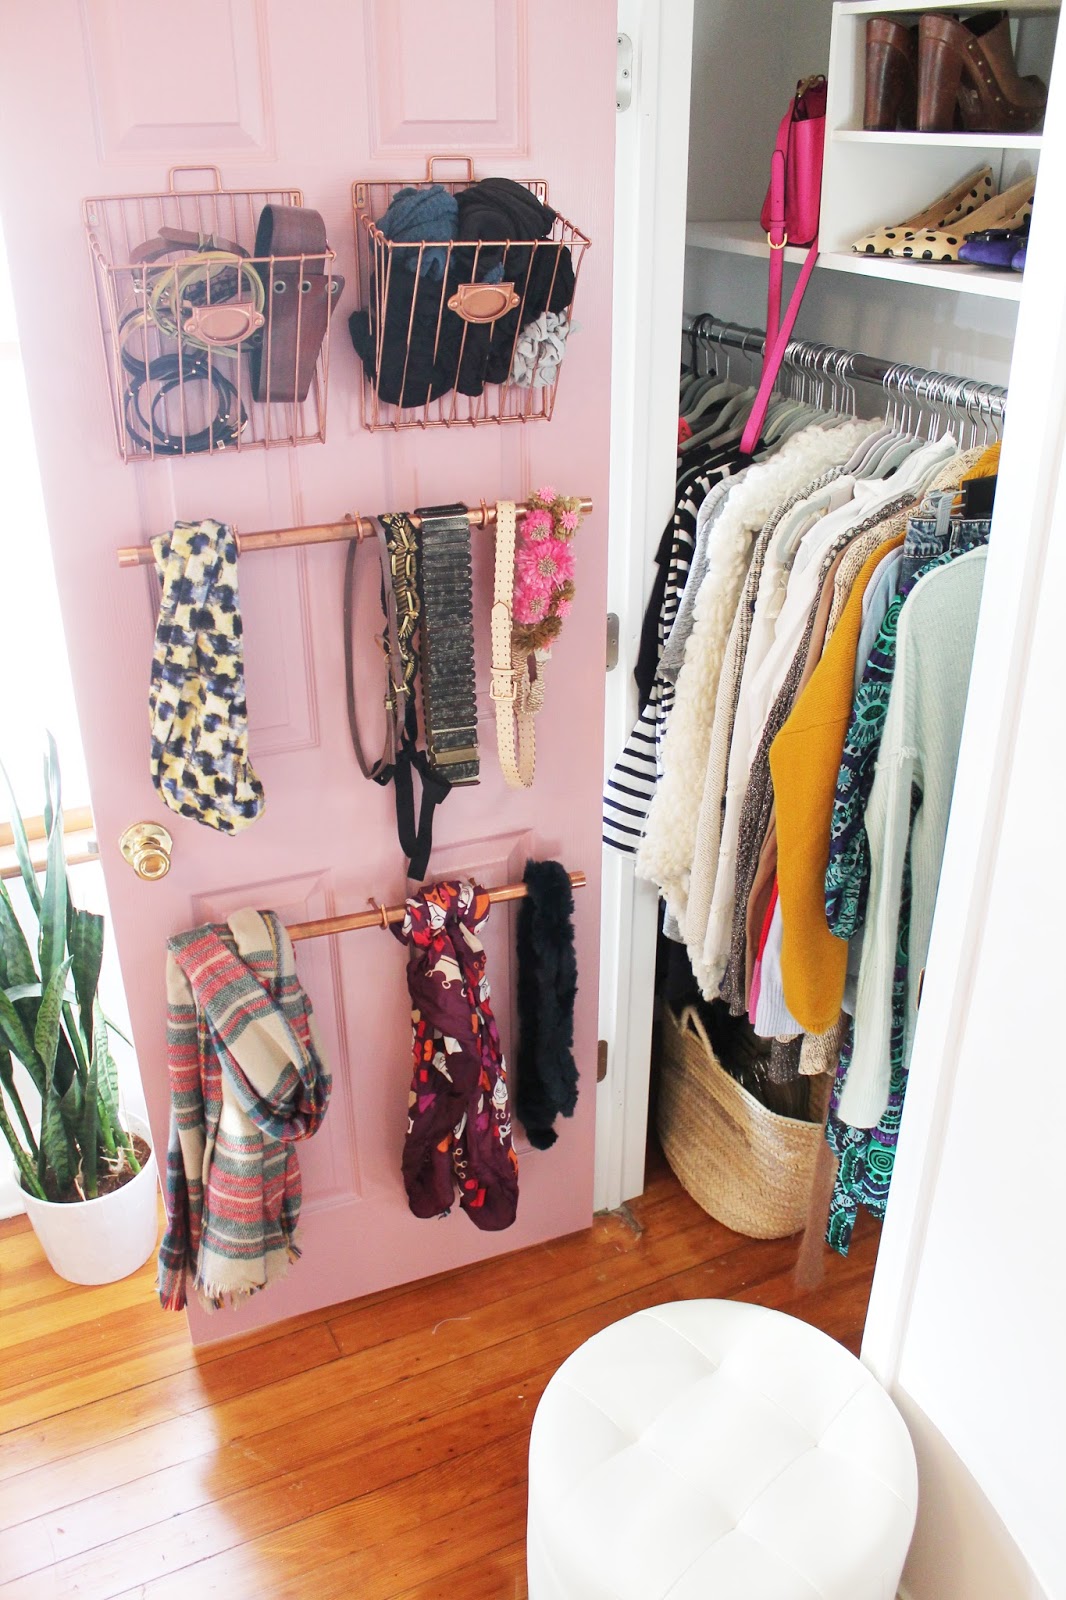
I FORGOT PROGRESS SHOTS OF THE DOOR, BUT I PAINTED THE ENTIRE THING WITH A BRUSH -- JUST TWO COATS OF FLAT INTERIOR PAINT COVERED WELL. BE SURE TO TAPE OF THE EDGES OF YOUR DOOR AND KNOB!

IF YOU CHOSE COPPER PIPE SPRAY PAINT YOUR HARDWARE TO MATCH -- YOU COULD ALSO PAINT YOUR DOWELS AND HARDWARE ANOTHER ACCENT COLOR TO MATCH YOUR DECOR.

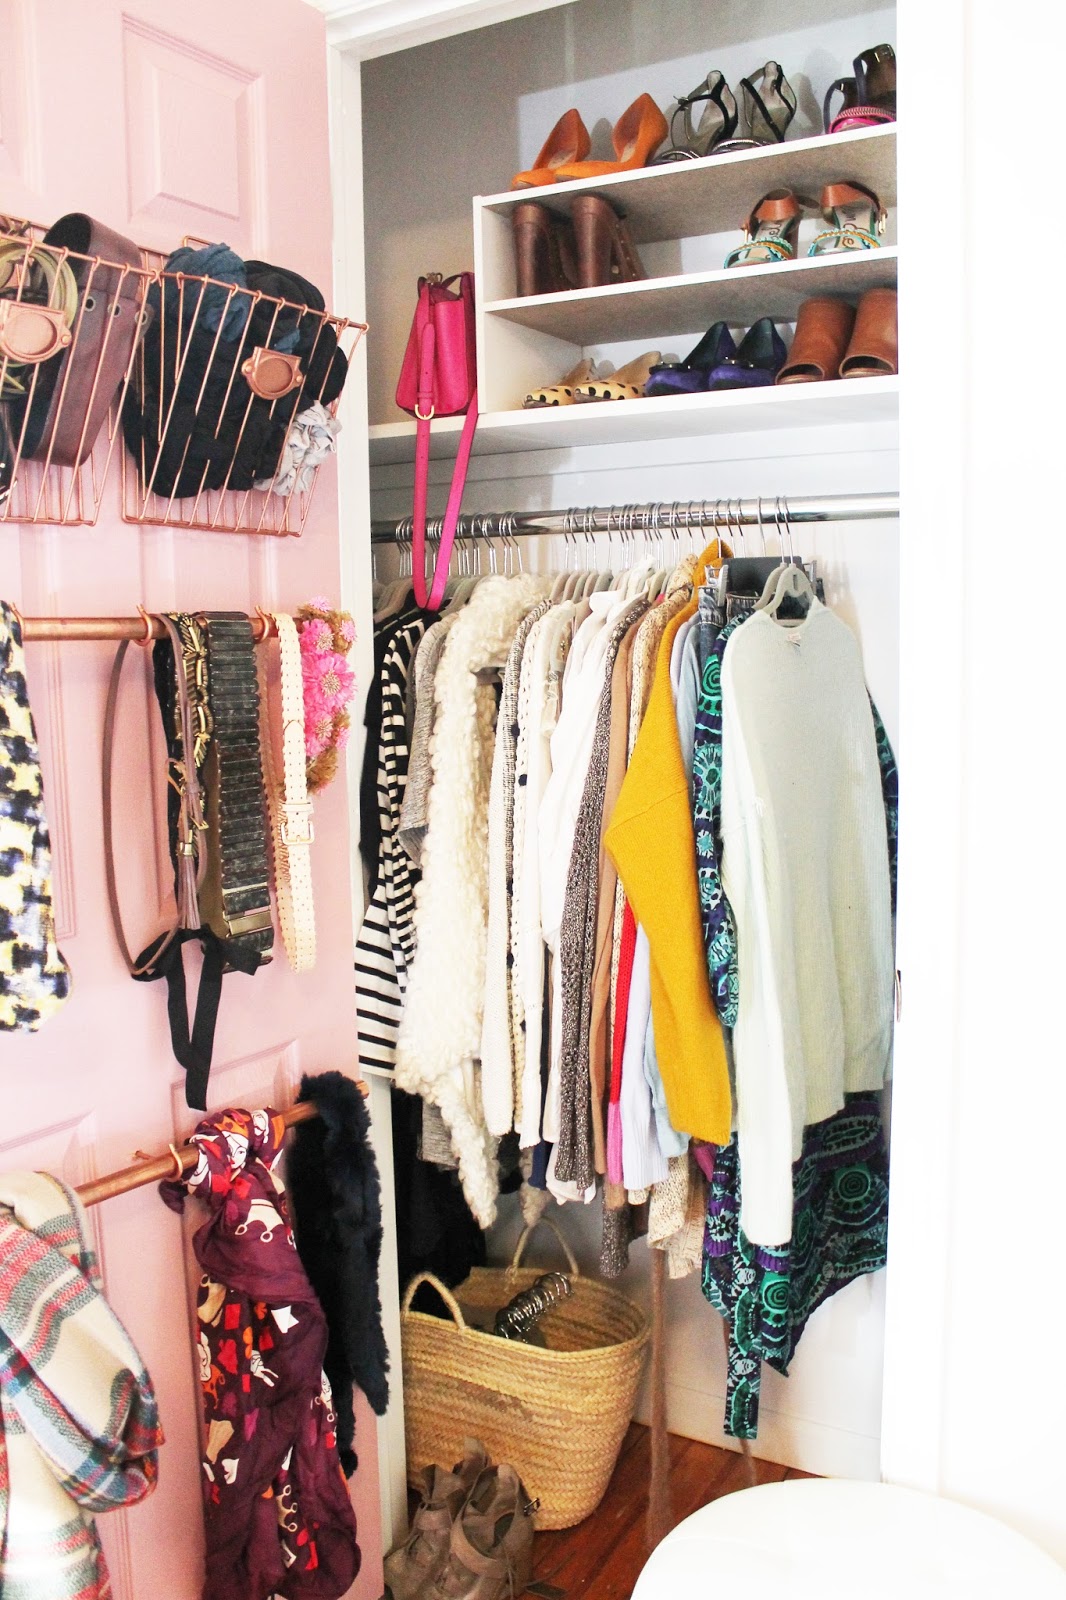
MUCH BETTER RIGHT?! I CAN REACH EVERYTHING AND IT FEELS MUCH MORE SPACIOUS AND ORGANIZED. CLOSETS CAN BE BEAUTIFUL!
SCREW IN HOOKS
COPPER SPRAY PAINT
SHELF PAPER
WOOD (PLYWOOD AND 1x4'S)
I FORGOT PROGRESS SHOTS OF THE DOOR, BUT I PAINTED THE ENTIRE THING WITH A BRUSH -- JUST TWO COATS OF FLAT INTERIOR PAINT COVERED WELL. BE SURE TO TAPE OF THE EDGES OF YOUR DOOR AND KNOB!

IF YOU CHOSE COPPER PIPE SPRAY PAINT YOUR HARDWARE TO MATCH -- YOU COULD ALSO PAINT YOUR DOWELS AND HARDWARE ANOTHER ACCENT COLOR TO MATCH YOUR DECOR.
 |
I ADDED SHALLOW BASKETS FOR HOLDING TIGHTS AND ACCESSORIES. EXTENDED COPPER RODS MAKE IT EASY TO HANG BELTS AND SCARVES WHERE YOU CAN SEE THEM.
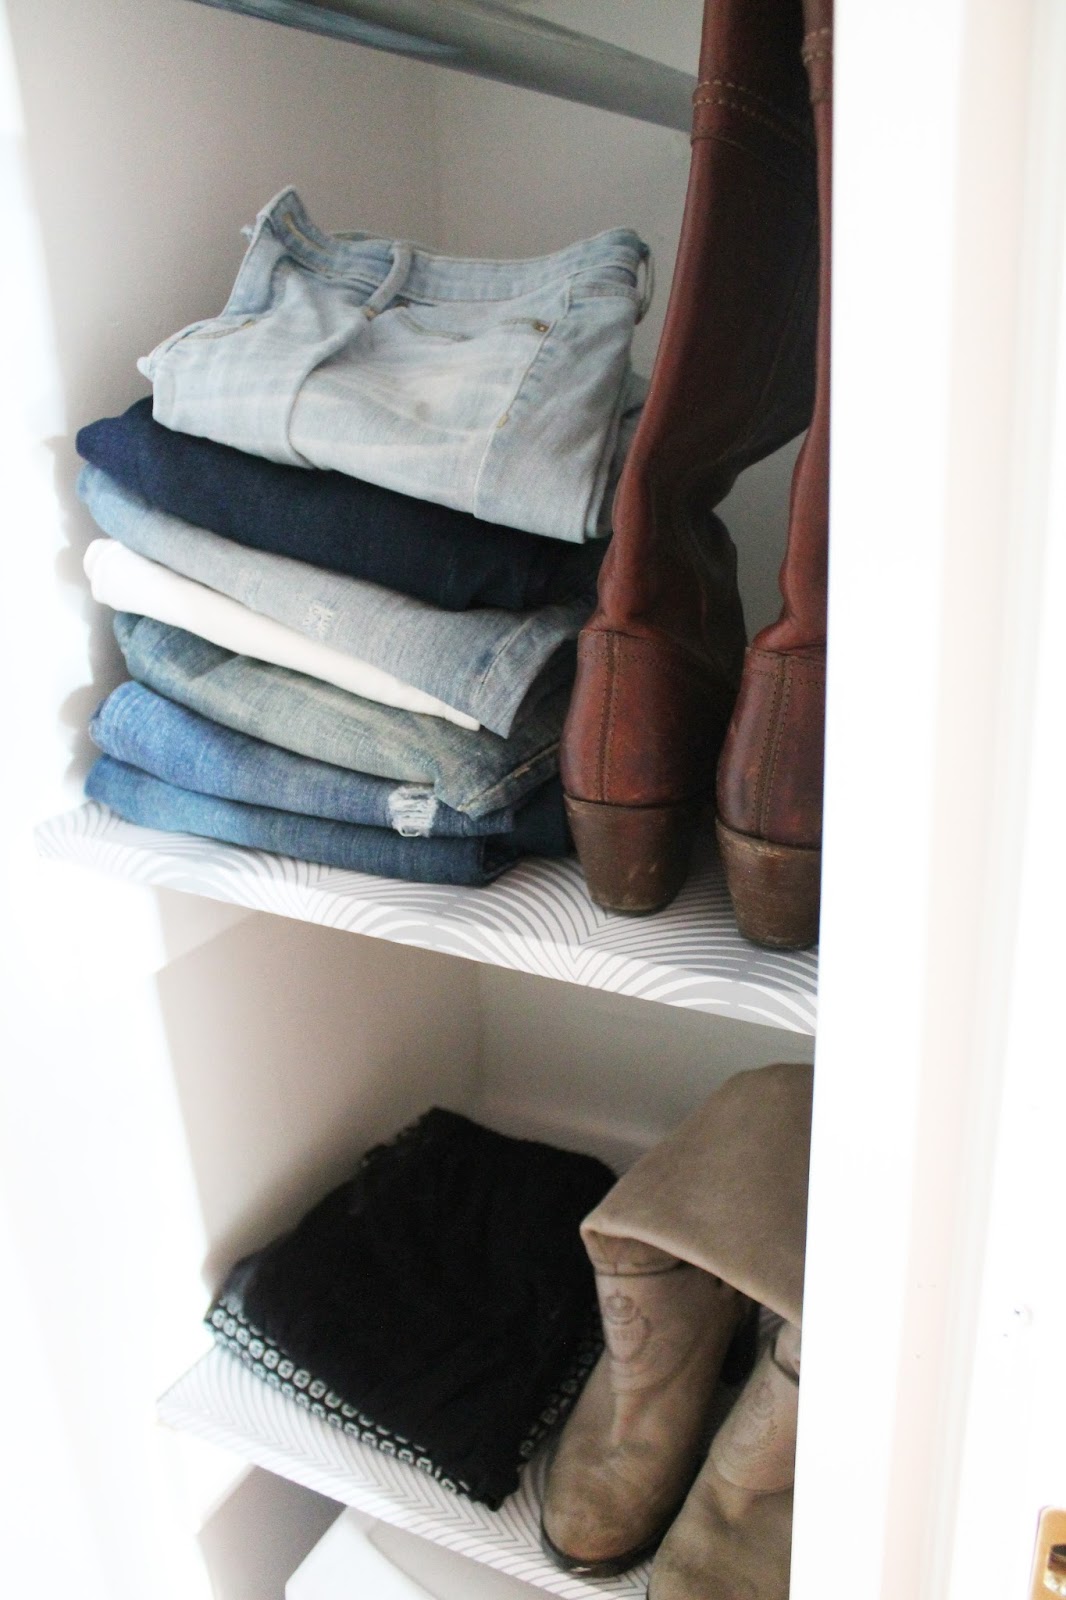
I BUILT CUBBY SHELVES INTO THE SIDES OF THE CLOSET FACING OUTWARD -- MAKING IT SUPER EASY TO REACH STACKS OF PANTS, PURSES OR BOOTS STORED THERE. INTALL THESE SIMPLE SHELVES BY CUTTING TWO BRACES FROM 1X4'S AND SCREWING THEM INTO EITHER WALL INSIDE THE CLOSET.
I COVERED THE PLYWOOD WITH PRINTED CONTACT PAPER FROM TJ MAXX.
MUCH BETTER RIGHT?! I CAN REACH EVERYTHING AND IT FEELS MUCH MORE SPACIOUS AND ORGANIZED. CLOSETS CAN BE BEAUTIFUL!
Want to evaluate your closet and save money? Check out my free printable closet evaluation here and stop wasting money on impulse buys!
STAY TUNED AS I TACKLE THE CRAFT CLOSETS AND PANTRY!