9.30.2015

Fall Finds for Family Time

I've been saving my favorite kid-friendly projects for fall and can't wait to make some of these for myself! Craft these cozy yarn and felt projects utilizing things you can find in your home or backyard. 


Yarn wrapped pinecones by A Pretty Fix are a great alternative to messy glitter and paint! 

Try making Felted and Painted Acorns to display in a jar or bowl. 

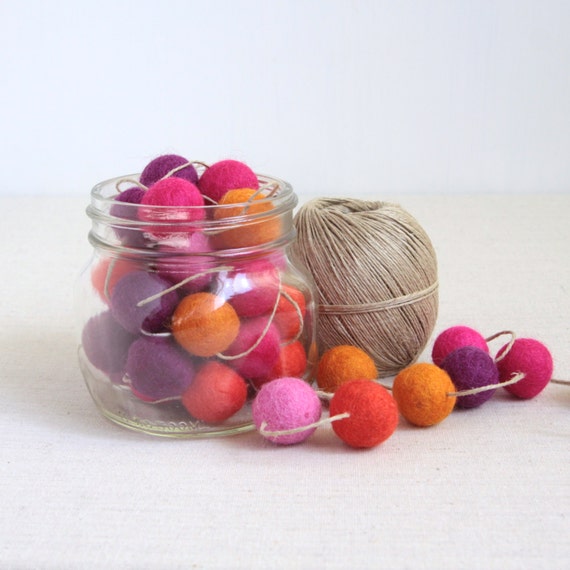
Find beautiful felt balls here at Benzie Design  -- they add the perfect touch of whimsy to plain throw pillows like these from BHG


Painted fall leaves are a great way to embellish treasure from a nature walk and look great pressed in a frame. 

Need to cozy up after a brisk fall nature walk? Try making this super easy fleece pom pom throw .

Image sources are linked above, links for painted acorns and leaves were broken via Pinterest so please comment below if you know the original author! 

9.29.2015

DIY SEED PACKETS

Summer is over. The sun is setting earlier, and we officially have lost our patio to untimely construction on our rental home.  As most of are garden lies wilting in the storage room I made one last effort to harvest the dried flowers and extract the seeds for next spring.  Storing them in a plastic baggie seemed unceremonious, so I broke out my new envelope stencils from Flying Tiger and made these gorgeous watercolor seed packets! 

WHAT YOU'LL NEED

Envelope Stencils 
Pencil 
Watercolor Palette 
Glue Stick or Double Stick Tape
Medium and Small Paintbrushes
Scissors 
Seeds
1/2" Masking Tape
Cardstock

TRACE ENVELOPE STENCILS WITH PENCIL

 TAPE OFF A SMALL SECTION FOR LABELING WITH MASKING TAPE BEFORE PAINTING

 PAINT FLOWERS, LEAVES AND ABSTRACT PATTERNS WITHIN THE TRACED BOUNDARY OF THE SEED PACKET 

Rough out flower and leaf shapes with a medium paintbrush.  Add fine details and dimension with a small paintbrush.  

 REMOVE MASKING TAPE TO REVEAL THE PERFECT SPACE FOR LABELING YOUR SEEDS

 CUT OUT ENVELOPE AND CREASE ALONG FOLD LINES

 SEAL OVERLAPPING EDGES WITH A GLUE STICK OR DOUBLE STICK TAPE

 STORE SEEDS IN PACKETS AND LABEL VARIETY 

Seal your packets with washi tape and store in a dry place while waiting for planting season.


9.28.2015

FLORAL FALL PUMPKIN

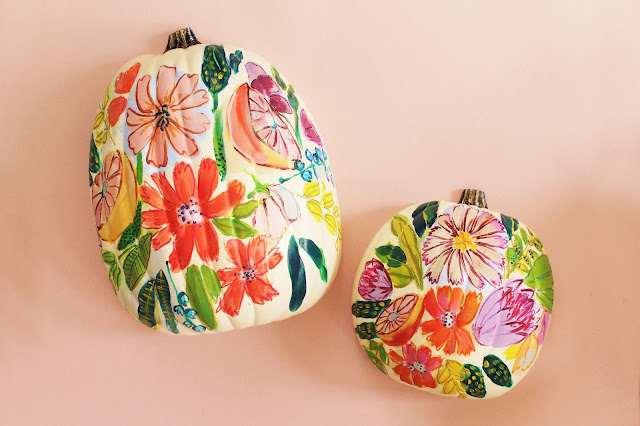
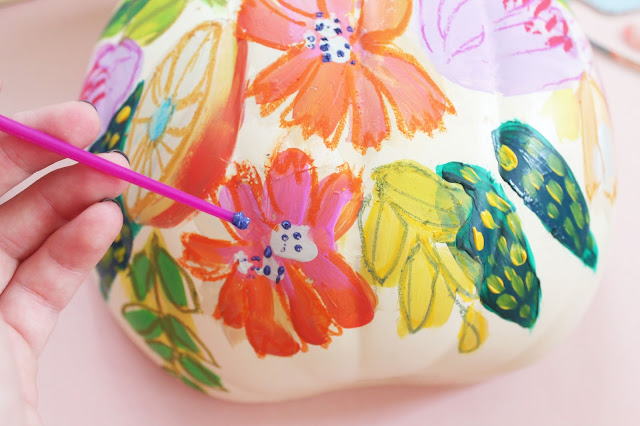
Having trouble transitioning to fall? Set aside an afternoon to sip hard cider and paint cheerful floral pumpkins with your friends. I opted for faux pumpkin halves that can easily be hung on a door or wall in place of a wreath, but you can recreate this look just as easily on real pumpkins you pick from the patch.

Easy Pumpkin Painting

What You'll Need: 

Faux white pumpkin halves ( find here
Paint brushes (medium and small for details)

Paint rough shapes

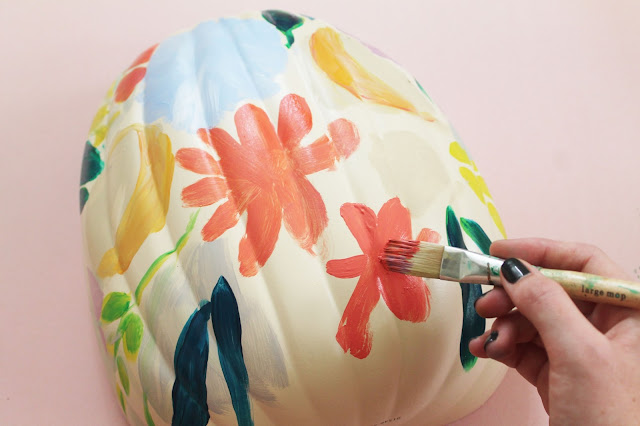
Start by roughing out petals and leaves with a medium sized paint brush.  
Include a variety of flower shapes and try not to feel restricted by typical color choices and combinations!
Easy Pumpkin Painting

Blend a second color into your flower outlines to add depth to your artwork.

Easy Pumpkin Painting

Detail flowers

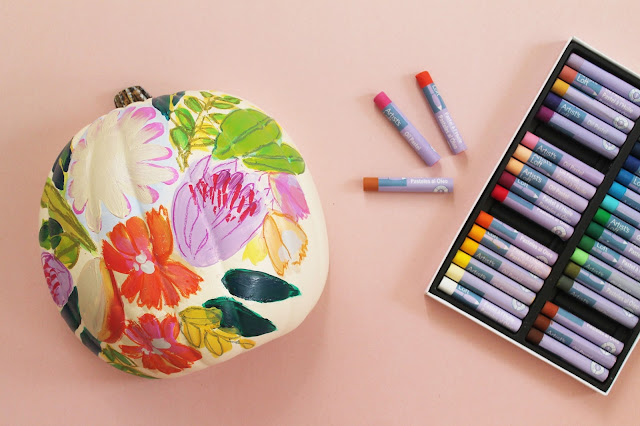
Using oil pastels, outline leaf lines and petals.  Be sure to vary the types of lines and textures you use on each flower. 

Easy Pumpkin Painting
Add caption

Use a small paintbrush to add fine details to flowers and leaves. 

Easy Pumpkin Painting

Easy Pumpkin Painting

Voila! Gorgeous floral decor for the rest of the fall season! 
xo Lindsey Crafter

Rather buy than DIY? Buy these painted pumpkins here


Easy Pumpkin Painting

This post includes affiliate links for your convenience and to keep Lindsey Crafter craftin' 

9.27.2015

Free Halloween Printables

Make Halloween party prep easy with these semi-spooky printables from Lindsey Crafter! This free Pdf includes chocolate bar wrapper, bottle tag, candied apple tag and treat bag toppers you can print from home.


Simply print, cut and attach with double stick tape! 


Tip: Steep a few black tea bags and brush over your paper for an antique look.


Dowload the Pdf Here


Happy haunting! 
xo Lindsey Crafter

9.25.2015

MAKE FANCY MATCHBOXES


Ditch the Bic and make some of these gorgeous matchboxes you can proudly display on your coffee table or vanity. With an economy pack of matches from the dollar store and a sheet of balsa wood from your local craft store you can finish a batch of these pretties for housewarming gifts for under $5!


What You'll Need:

Thin balsa wood sheet
Shop scissors
Matchboxes
Sandpaper 
E6000
Ruler
Pencil
Modge Podge or varnish in your choice of finish
Water colors, Acrylic paint (maybe a metallic or two)
Paint brushes


1.Trace two matchboxes (strikers facing out) on balsa wood and cut out top and bottom pieces with shop scissors.  File off any rough edges with sandpaper before painting.


2. Paint abstract patterns on top pieces (or both) and allow to dry before glueing.  Once dry, line up the edges of the matchboxes to the balsa wood pieces and glue on top and bottom pieces with E6000

If the printed edges of your matchbooks show you might also want to paint the boxes white for a cleaner finish.


Use a stack of books or drinking glass to keep the wood parts compressed while drying.

3. Apply several coats of varnish to create a lacquer look on your finished matchboxes. 


4. Stain the wood stems of the matches by dipping them in watered down acrylic paint or coloring them with a permanent marker.


Make several matchboxes at a time to gift along with your favorite scented candles for the holidays !
xo Lindsey Crafter 

9.23.2015

Missing Pieces

Adulting is hard, especially when your taste level has no concern for your financial situation. I've managed to furnish our apartment with out going FULL-BLOWN Ikea (you know that look), but there are still so many things I feel like are still missing or not where I want them to be design wise. DIY-ing home decor can be deceivingly expensive when tallying up receipts

My living room is lacking a substantial art piece, comfy pillows on the couch and a substantial arm chair.  The dining room could use a console and a heavy full length mirror -- as it also serves as our dressing room/closet.  Our bedroom needs a round mirror and bedside tables. Don't even get me started on the closets in the craft room. I don't think it could ever be resolved before the next move....so I'm wondering if I should even bother.

First world problems right? I acknowledge the blatant consumerism I'm spouting, but in all honesty: I WANT ALL THE THINGS. Especially these >

Apt. 2


Ivory throw pillow
onekingslane.com


Pink toss pillow
onekingslane.com


Embroidered throw pillow
onekingslane.com


Fabric home decor
dotandbo.com

Paint Chip Wall Art

Make this cheap and cheerful wall art from paint chips and masking tape!


What You'll Need: 
Paint chips 
Masking tape 
Matted frame 


After choosing your paint chip combos and practicing a little color theory--simply overlap cards, line up the middle seam, and secure in place with masking tape. 


Beach Combing Basics

Searching for sea glass became a favorite vacation pastime of mine during a family trip to the Cayman Islands.  Smooth glass pebbles of green and blue could have been made of gold the way we shrieked when spotted in the sand.  Beach combing contents were then styled in decorative glass jars along with a sweet tag to record the date and location of the treasures.  This trend stuck, and now I have moment jars for every beach I've ever walked on.  This summer I spent lots of time on the Jersey Shore, but even MORE time was spent beach combing a sad littered beach right by our house (off a shipping port) for AMAZING glass and pottery like some of the things below...


Here are some of my tips and strategy for finding sea glass and other beach combing treasure:

1. Bring a plastic container with a lid...
Baggies work too -- but a rigid container with a lid will keep shells or fragile items from getting accidentally crushed.  Your boyfriend (or girlfriend) will appreciate you not using their pockets for storage.  Sometimes I'll even pack a paper towel to cushion fragile items like crab shells or coral.

2. Bring a net...
Sometimes the best stuff is right where the waves break so visibility is limited.  Using a small net you can scoop up rocky sand and sift through it at your leisure.  Submerge the net just under the water and shake to filter out the sand and make treasure easier to find.

3. Sit, don't bend...
You'll last a lot longer if you don't spend your entire hunt bending over at the waist.  Covering ground is important, but when you reach an tide line with lots of shells and rocks sit down to sift through the treasures.

4. Rinse your finds with water when you get home...
saltwater muck gets funky QUICK especially when sitting in an sealed container


5. Research… Some people take beach combing SUPER DUPER seriously -- so there are numerous forums sharing the locations of the best beach combing locations in your area.


Looking for display ideas?

Make this shadowbox (tutorial here) or store contents in petite glass jars with a tag labeling their origins.

9.20.2015

DIY POM POM THROW

While gathering last minute camping supplies this week at Walmart I grabbed this neutral fleece throw to create a quick DIY for the trip.  You can finish this simple pom pom throw in about an hour for under $15 -- perfect for holiday gifting! 

WHAT YOU'LL NEED: 
1 SKEIN OF YARN 
SCISSORS
LARGE YARN NEEDLE

Use sharp fabric scissors to trim large pom poms made with your clover pom pom maker.  Tie poms off  with at least a 4 inch length of yarn to easily attach to your blanket.


 Space finished pom poms evenly along each edge of the blanket.  Using a metal yarn needle thread one string of extra yarn on each pom through the hem of the blanket and tie in several knots with the remaining string.


Style on the foot of the bed or drape on the couch to display your DIY finesse! 

Latest Instagrams

© LINDSEY CRAFTER . Design by Fearne.