8.31.2016

Hand Painted Accent Wall

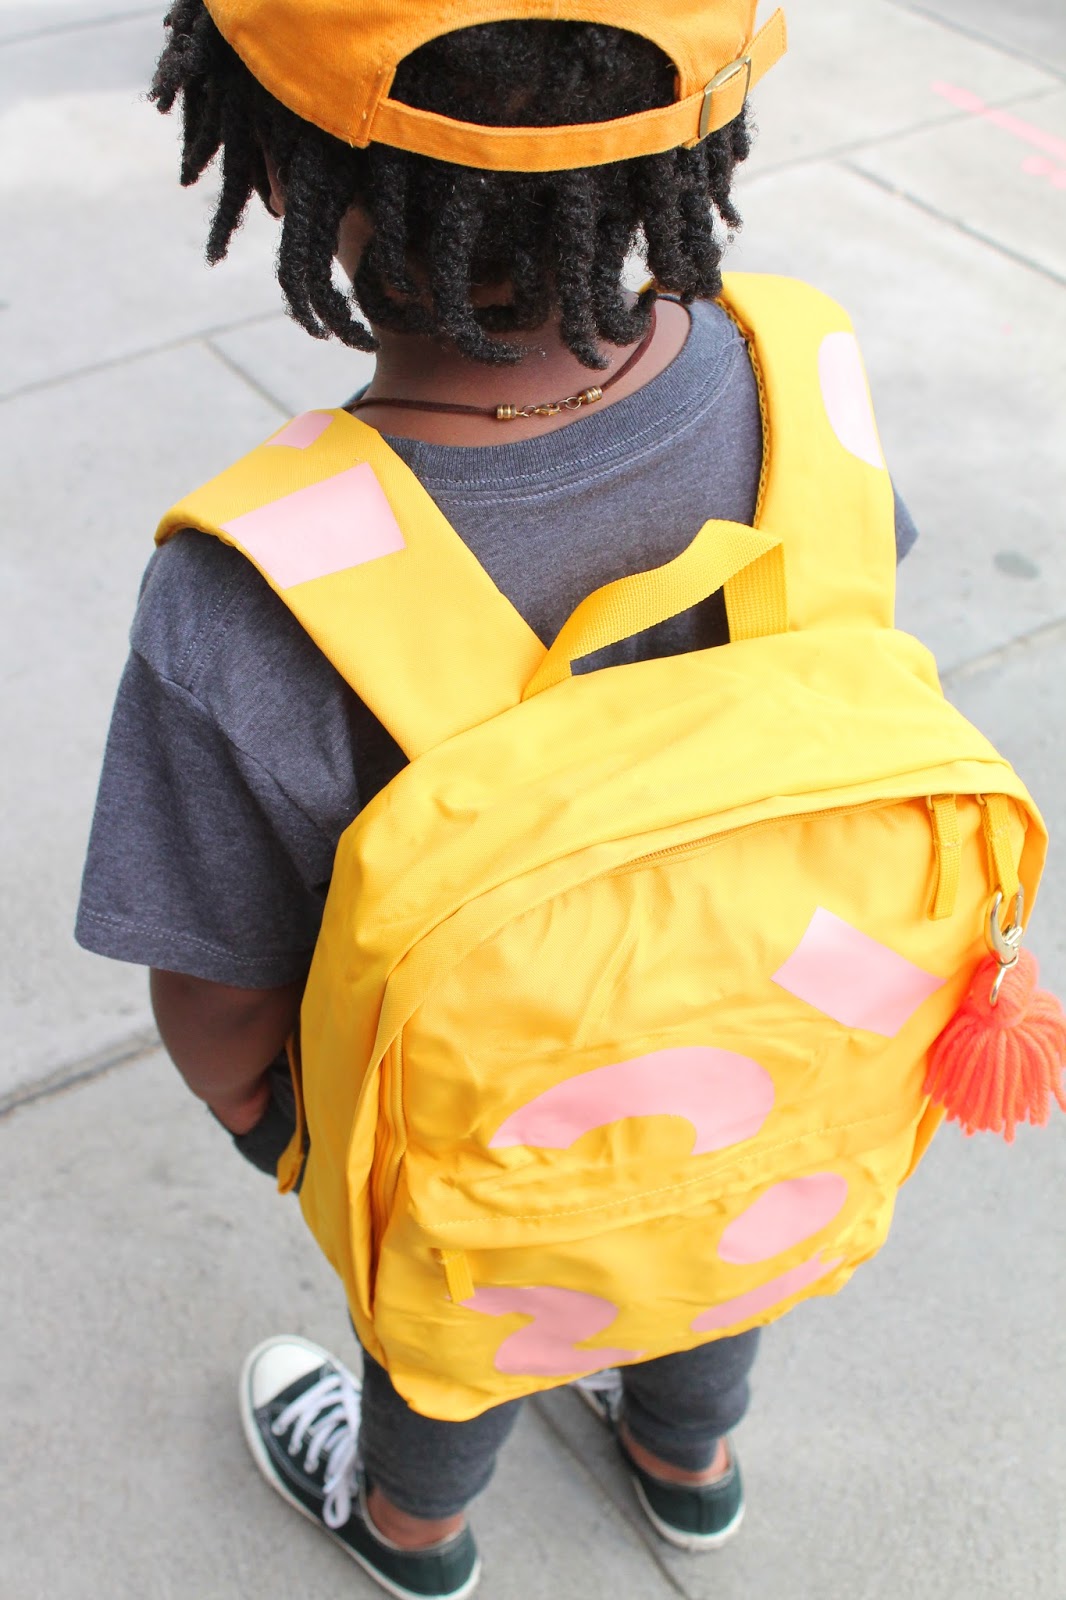
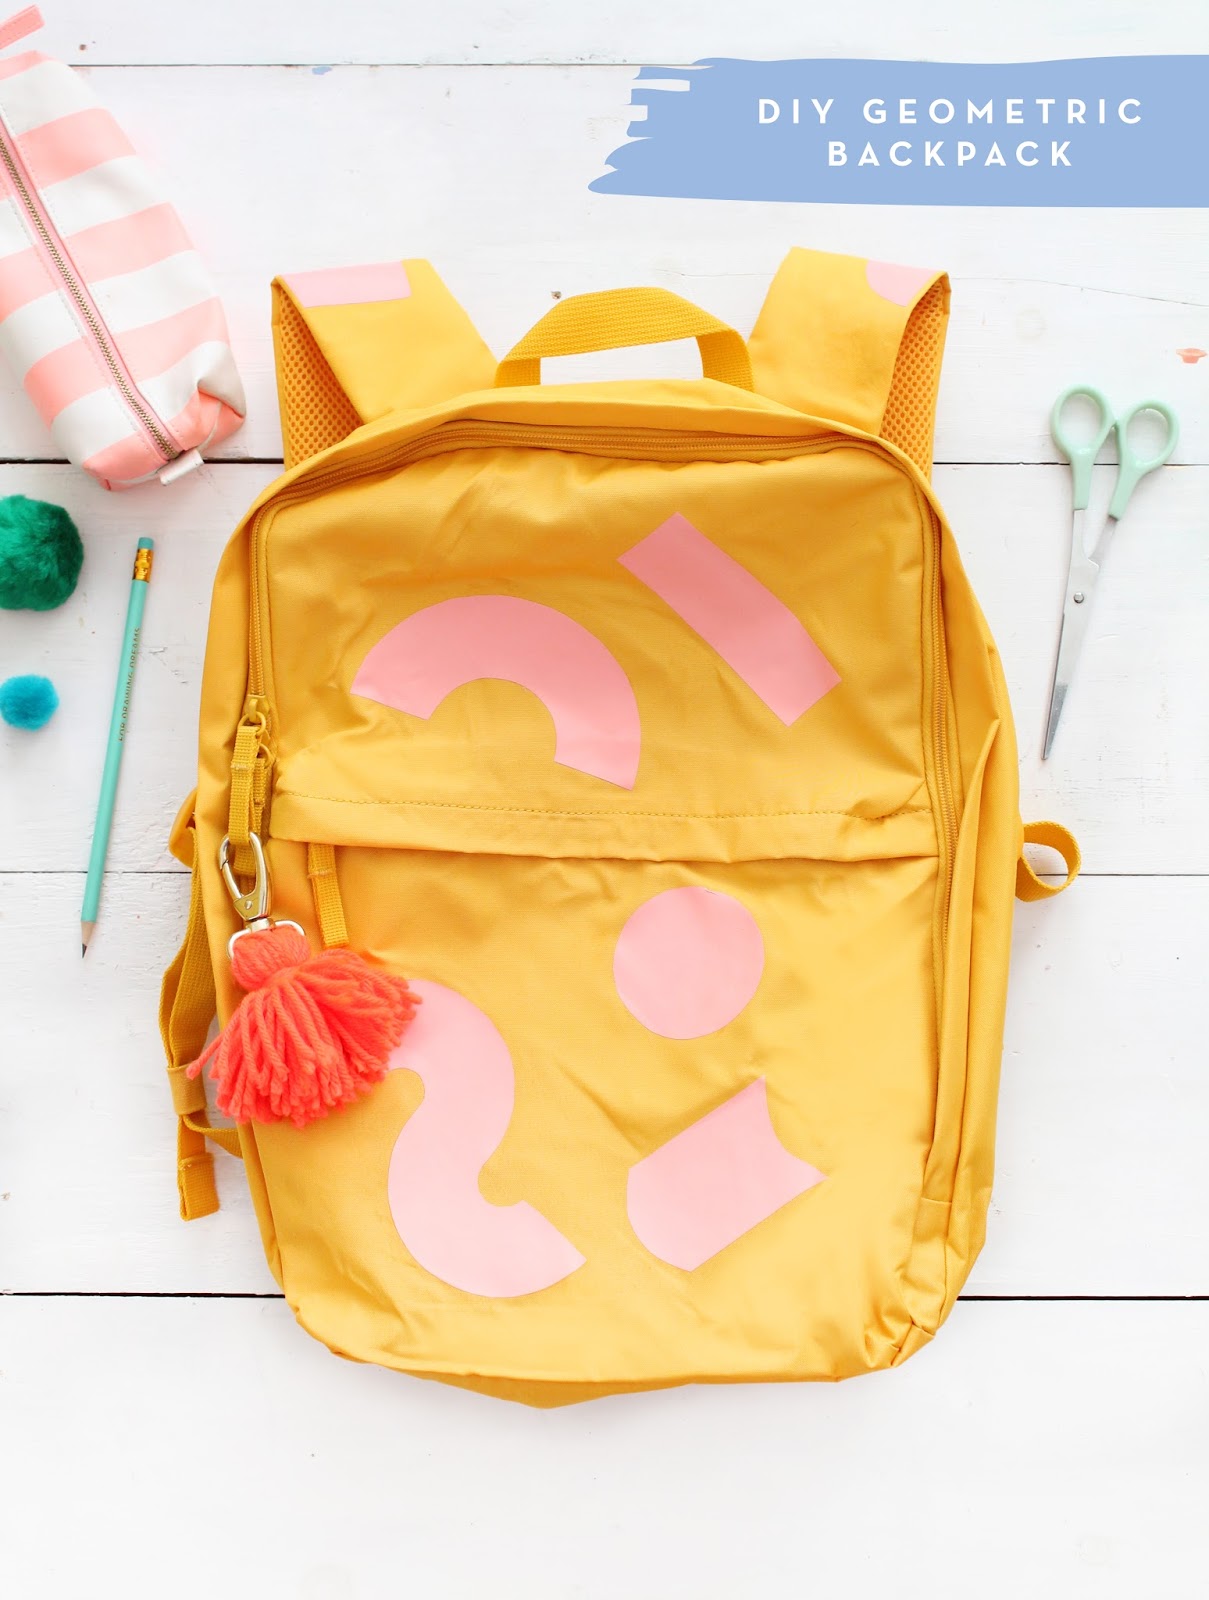
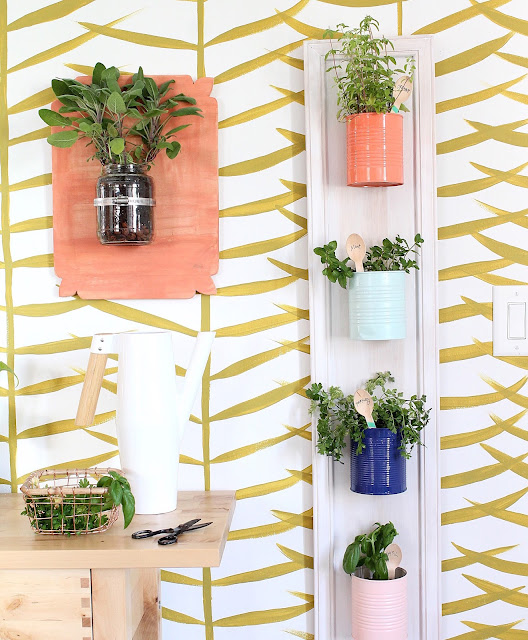
Our kitchen is LITERALLY my least favorite room in our rental apartment. Between the brown wood cabinets...dull tile and mismatched appliances I've really had it up to HERE with trying to make it work. After eliminating the potential of removable wallpaper due to cost I had a reluctant idea to hand paint a texture on the wall to just try to make it better. I'm here to say that this experiment was a HUGE success. I even like it with the brown cabinets (*shock*gasp*). See how I transformed my blah kitchen into my favorite room in the house with a hand painted accent wall--and for under $30!
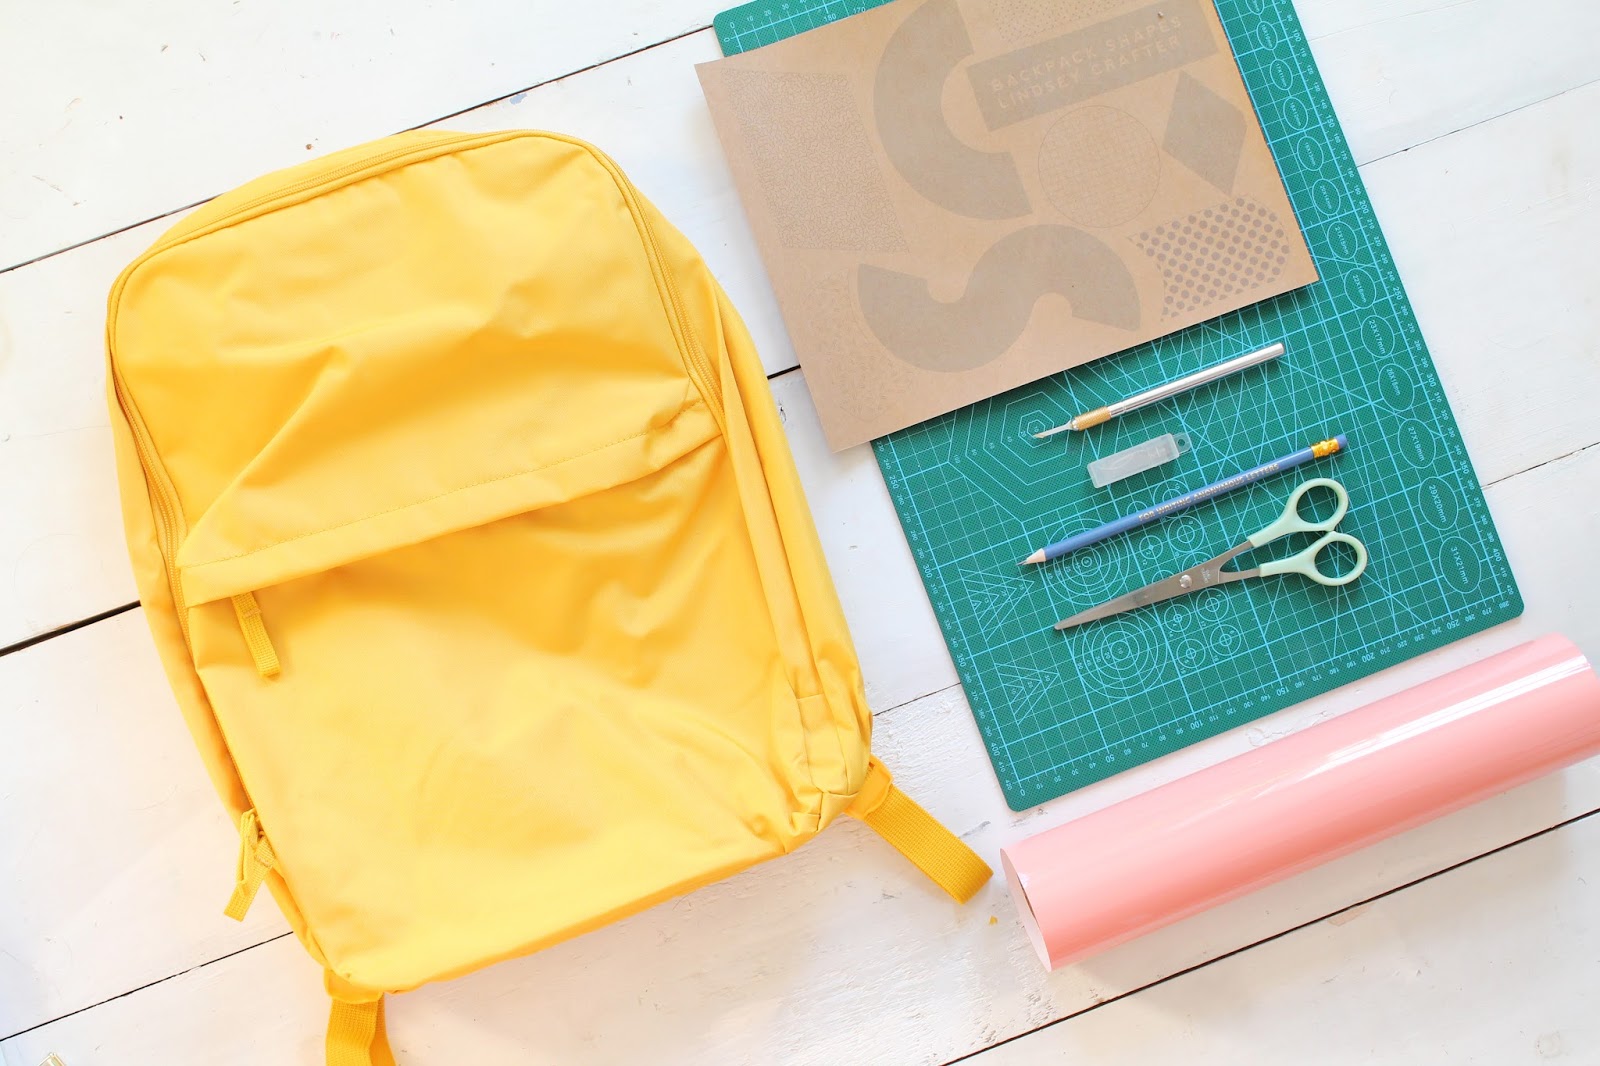
Hand Paint a Pattern Accent Wall in Your Home

Hand Paint a Pattern Accent Wall in Your Home

Things you'll Need

Medium (1/2" angled paintbrush (artists brush, not a brush from the hardware store)
Interior paint in your choice of shade (quart)
Painter's Tape
Measuring tape
Paint Rags

Hand Paint a Pattern Accent Wall in Your Home

1. Measure and Tape off Vertical Sections
Each of my sections was 13" wide. You can change the effect and how the leaves interact with each other by increasing the spacing or making smaller strokes when painting leaves. 

2. Paint "Stems"
Use a medium paint brush to paint vertical lines along the edge of the tape--don't worry if they're not perfect--a painterly effect is what we're going for . Peel off tape and touch up where needed. 

3. Paint Leaves
Practice your leaf strokes on a scrap piece of cardboard before tackling your wall. Each of my leaves crossed over one from another stem and tapers and both ends. At first I tried to make them too thick and it looked too heavy. Slender palm like leaves are easier to paint and once you get in a groove it will go quickly. I did this entire wall by eye but if you struggle with keeping your vertical spacing consistent just use a ruler to measure increments along your stem.  This entire wall took me about 6 hours and 1/2 small can of paint! Touch up with white paint where needed.

Hand Paint a Pattern Accent Wall in Your Home

How cool will this be once my kitchen refresh is completed?! I'm still on the hunt for the perfect bar stools and trying to decide on art for above the bar! I think this would look great with contrasting color combos like navy and teal or pink and brick?! 

Happy Crafting! 
xo Lindsey Crafter

8.26.2016

DIY Geometric Shapes Backpack

Back to school season means shopping for all the essentials (most likely the week before?!)--save money by customizing a basic fabric backpack with iron on vinyl-- a unique satchel that costs under $30!
Make a DIY geometric kids backpack with iron on vinyl for back to school

Make a DIY geometric kids backpack with iron on vinyl for back to school

 I made this backpack without the use of a vinyl cutting machine--so if you have one you can certainly eliminate time and steps by using one. I was a bit apprehensive about working with vinyl for the first time--and only armed with a craft knife and an iron! I can safely say this project  (errrr...experiment) was a breeze and can be tackled in about an hour!

Make a DIY geometric kids backpack with iron on vinyl for back to school

Make a DIY geometric kids backpack with iron on vinyl for back to school

Make a DIY geometric kids backpack with iron on vinyl for back to school


You'll Need :

X-acto Blade
Cutting Mat
Scissors 
Pencil
Backpack (Canvas or fabric preferable)
Iron & Ironing Board
Optional: Shape patterns at the bottom of the post!

Make a DIY geometric kids backpack with iron on vinyl for back to school

Make Your Own Geometric Shapes Backpack! 

1. Trace your shapes with a pencil or trace objects around your house to create unique silhouettes. OR print out the pattern shapes printable at the bottom of the post on yardstick and cut out to create stencils.

2. Place the vinyl with the color side down on the cutting mat and use a craft knife to carefully cut around the shape template. Don't press too hard with the blade--you'll cut through the clear transfer material on the front of the vinyl. Gentle pressure will be enough to cut through the vinyl.

3. Cut out shapes leaving at least a 1/4" margin around the shapes edge and use the tip of the x-acto blade to remove/peel away the vinyl in the negative space (the technical term is "weeding")--leaving just the shape you want to transfer onto the backpack.

4. Place the vinyl shape on a flat section of the backpack and iron on at the directed temperature by the vinyl's manufacturer. Allow to cool before peeling off the transfer and revealing the bright shape! If working on a nylon backpack test in a inconspicuous area before applying heat with the iron--the material may melt. I'd recommend using a fabric backpack for best results!

Make a DIY geometric kids backpack with iron on vinyl for back to school

How cute would this be with lots of different colors--you can even find metallic vinyl on Amazon! I had my friend SJ (check out my friend Simone and her little fashionista Summer) take this satchel on a test drive before he starts school next week! Of course no bag is complete without a pom pom key chain!

Make a DIY geometric kids backpack with iron on vinyl for back to school

TIP!

The backpack I used was Nylon and I had some problems with the material melting or mis-shaping with the heat of the iron. I think this project would work more easily with a fabric or canvas backpack to avoid the issue altogether! 

Make a DIY geometric kids backpack with iron on vinyl for back to school

Now the styling team is off to quick pizza pit stop! Happy Friday! 
xo Lindsey Crafter

Make a DIY geometric kids backpack with iron on vinyl for back to school.


8.25.2016

Back to School Style

Parents aren't the only ones back to school shopping this season--here are some of my favorite back to school picks for teachers (or multi-tasking mommas). Click through links to shop below!Back to school style for teachers
This is an easy chic piece perfect for transitioning into fall and appropriate for the classroom! 

Treat yourself to a new bauble before tackling pre-planning to motivate yourself for the new school year!

Buff away sun-damaged skin and brighten your complexion with this scrub by Korres.

This double (or triple) duty stick will eliminate products in your beauty bag and cut down time from your morning routine! Swipe on your lips, cheeks or eyes!

Take notes in a fresh journal...
...and spruce up your desk supplies with these vintage style Brass Scissors

Lug your grading and work home in style with this punchy new print by Vera Bradley--have you seen their new collection?! CUTE

Sweet messages on colorful pencils to get you through the day <3

Store your snacks and lunch in this stylish bento box and ditch the dingy tupperware. 

Hydration is key to a focused and energized day! Always keep one handy to refill at the water fountain.

Comfy flats can still be fun! Check out these laced up sneaker flats by Dr. Scholl's! 

Have a great school year! 
xo Lindsey Crafter

This post includes affiliate links for your convenience and at no extra charge to you! Thanks for supporting the brands that keep Lindsey Crafter goin'! 

8.23.2016

DIY Patterned Waterbottle + Icepack

DIY patterned water bottles for back to school

I found these amazing rectangle water bottles + ice packs at Ikea for .99 cents and couldn't pass them up for a quick DIY! I've been eyeing an expensive retail version of these for a while--square water bottles will fit nicely in a bag or purse without taking up much space. These patterned water bottles will be a hit with kids and teachers alike! 

Things You'll Need 

Water Bottle 
Paint Pens 
Masking Tape
Clear Spray Sealer
Paper Plate or Scrap Paper
DIY patterned water bottles for back to school

1. Make sure the surface of your water bottle is clean and doesn't have any residue left over from labels. If you plan on painting a design with horizontal or vertical rows use masking tape to tape off guides to help keep your artwork level. 

2. Use paint pens to design and draw a pattern on the water bottle. Keep a paper plate or scrap piece of paper handy to blot the paint pen or practice your pattern. Doodle a monogram, stripes, gems or botanical patterns! Use a q-tip dipped in fingernail polish remover to swipe away mistakes or drips. 

3. Allow paint to cure overnight before use! I'd recommend sealing your artwork with a coat of clear sealer so your pattern doesn't get scratched and you can wipe it down easily. Hand wash only!

DIY patterned water bottles for back to school

DIY patterned water bottles for back to school

DIY patterned water bottles for back to school

Happy crafting--and good luck gearing up for the new school year!
 xo Lindsey Crafter

8.17.2016

How to Wear a Bandana + a Quick DIY

This week (okay the past three) was WILD and was full of projects for my lovely clients--but woah--seriously neglected Lindsey Crafter. I decompressed from a packed week by painting an adorable daisy-print bandana--my favorite summer/fall accessory! 

how to wear a bandana

how to wear a bandana

how to wear a bandana

All you'll need is a bandana blank, fabric paint and a skinny paintbrush--all can be found at your local craft store! 

Line your work surface with wax paper, add a little water to liquify the fabric paint for a smoother line quality, and paint your design. 1, 2, 3 DONE! Wasn't that super easy? Wash the bandana and air dry to soften the fabric. 


Here are some other adorable ways to style a square scarf or bandana! 


1. On your wrist (via pinterest, original source not credited)


2. In your hair (source)


3. Wrapped around your bun (source)


4. 'Round your neck! (source)


5. Plus the classic cowboy look! (source)

Have a great weekend--I'm going to be snoozing on the beach! 
xo Lindsey Crafter

Latest Instagrams

© LINDSEY CRAFTER . Design by Fearne.