
I made this backpack without the use of a vinyl cutting machine--so if you have one you can certainly eliminate time and steps by using one. I was a bit apprehensive about working with vinyl for the first time--and only armed with a craft knife and an iron! I can safely say this project (errrr...experiment) was a breeze and can be tackled in about an hour!


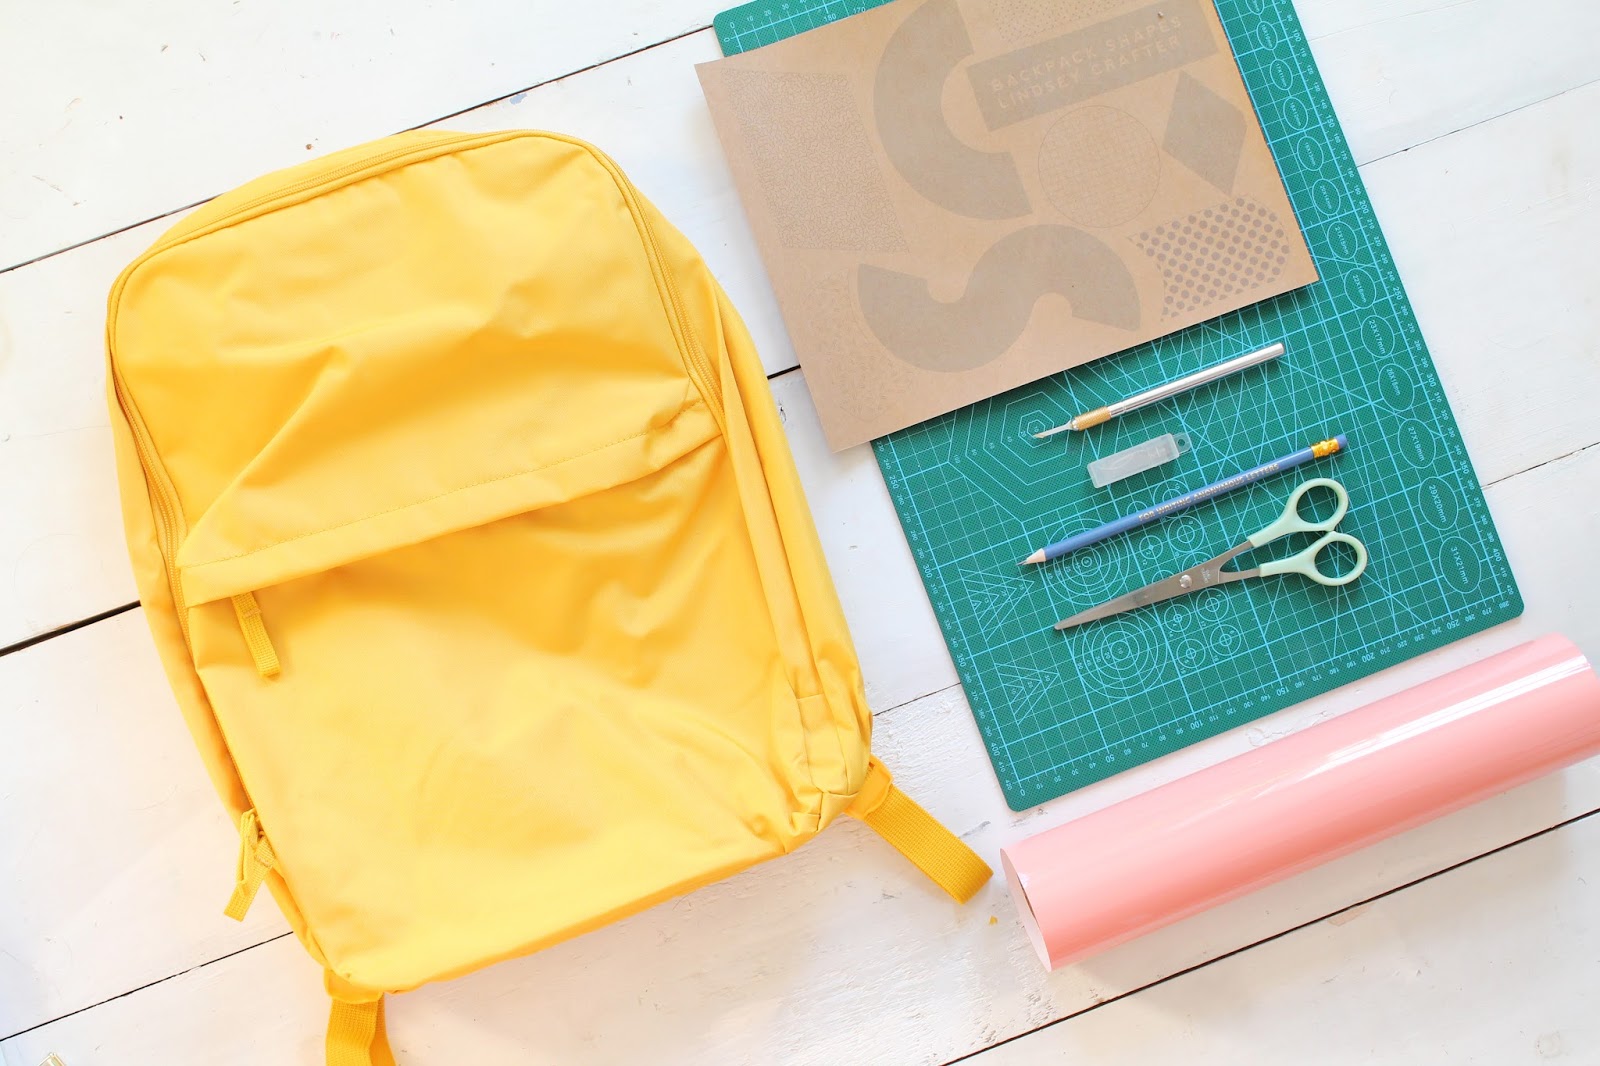
You'll Need :
X-acto Blade
Cutting Mat
Cutting Mat
Scissors
Pencil
Iron on Vinyl ( I used this brand and loved it )
Backpack (Canvas or fabric preferable)
Iron & Ironing Board
Optional: Shape patterns at the bottom of the post!
Optional: Shape patterns at the bottom of the post!
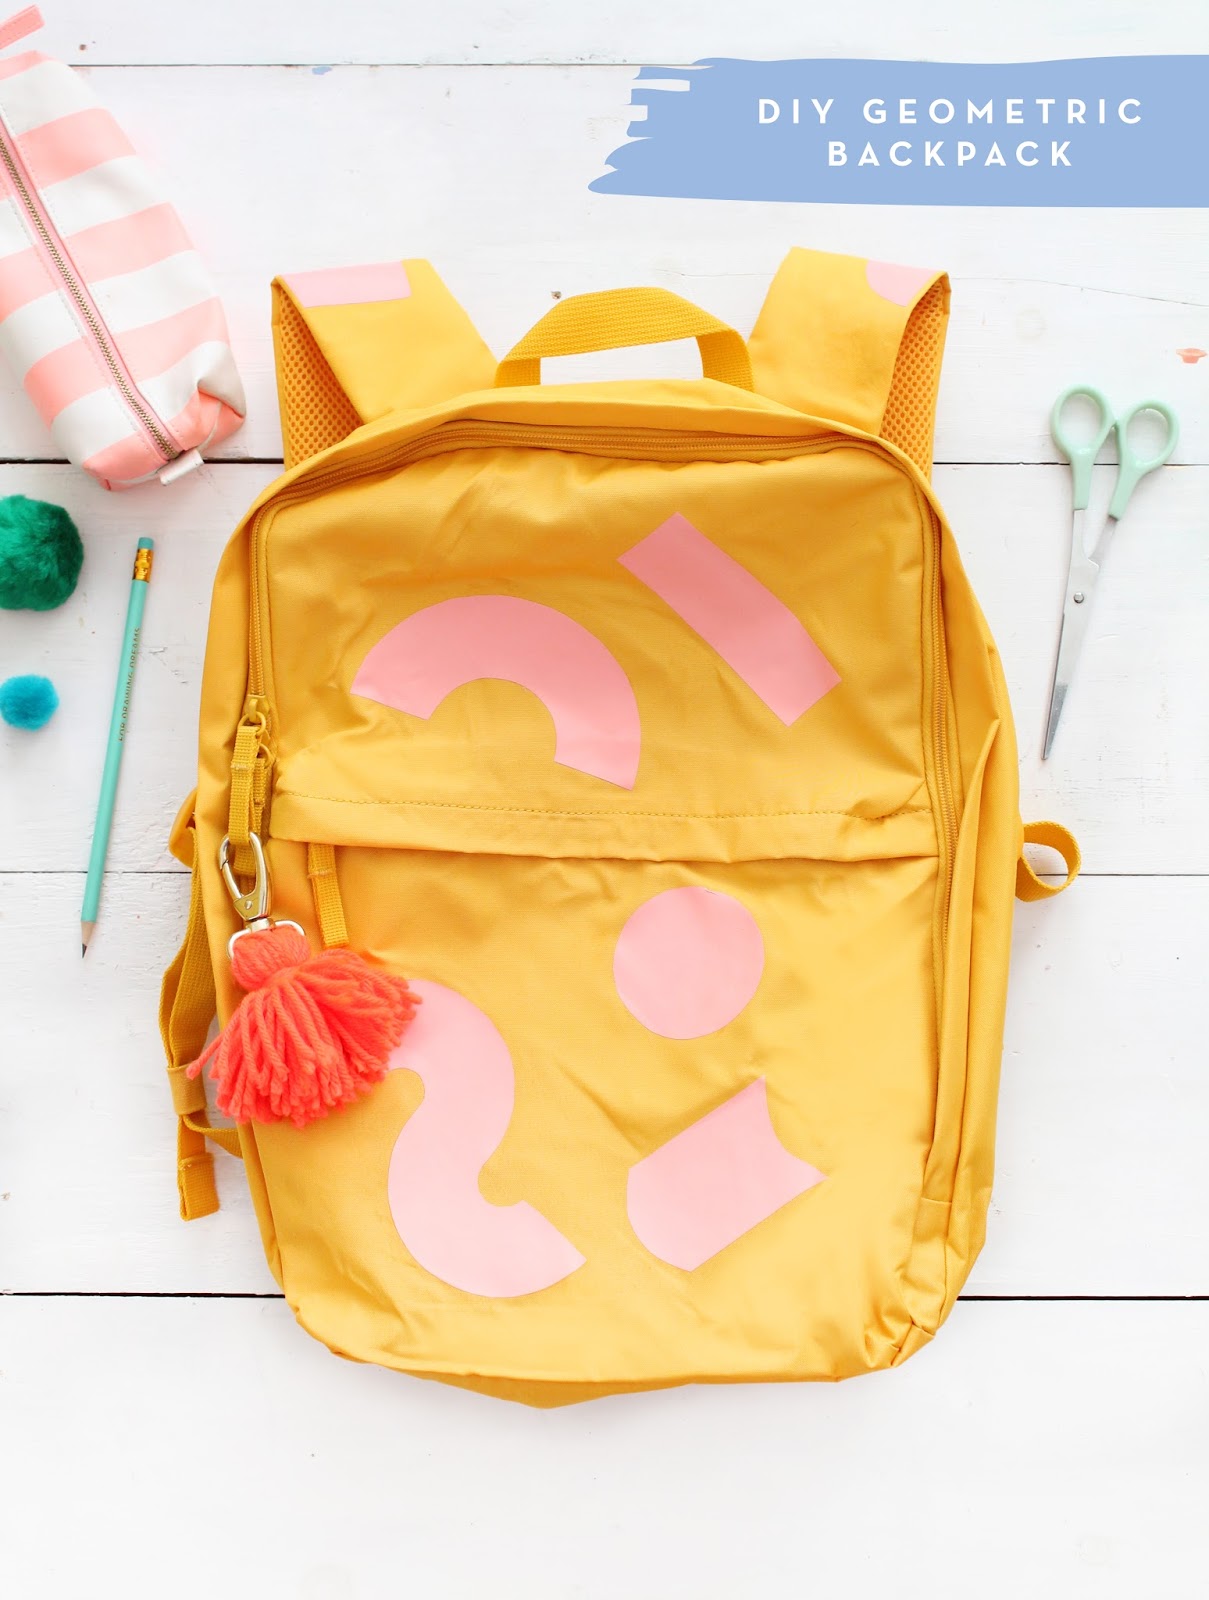
Make Your Own Geometric Shapes Backpack!
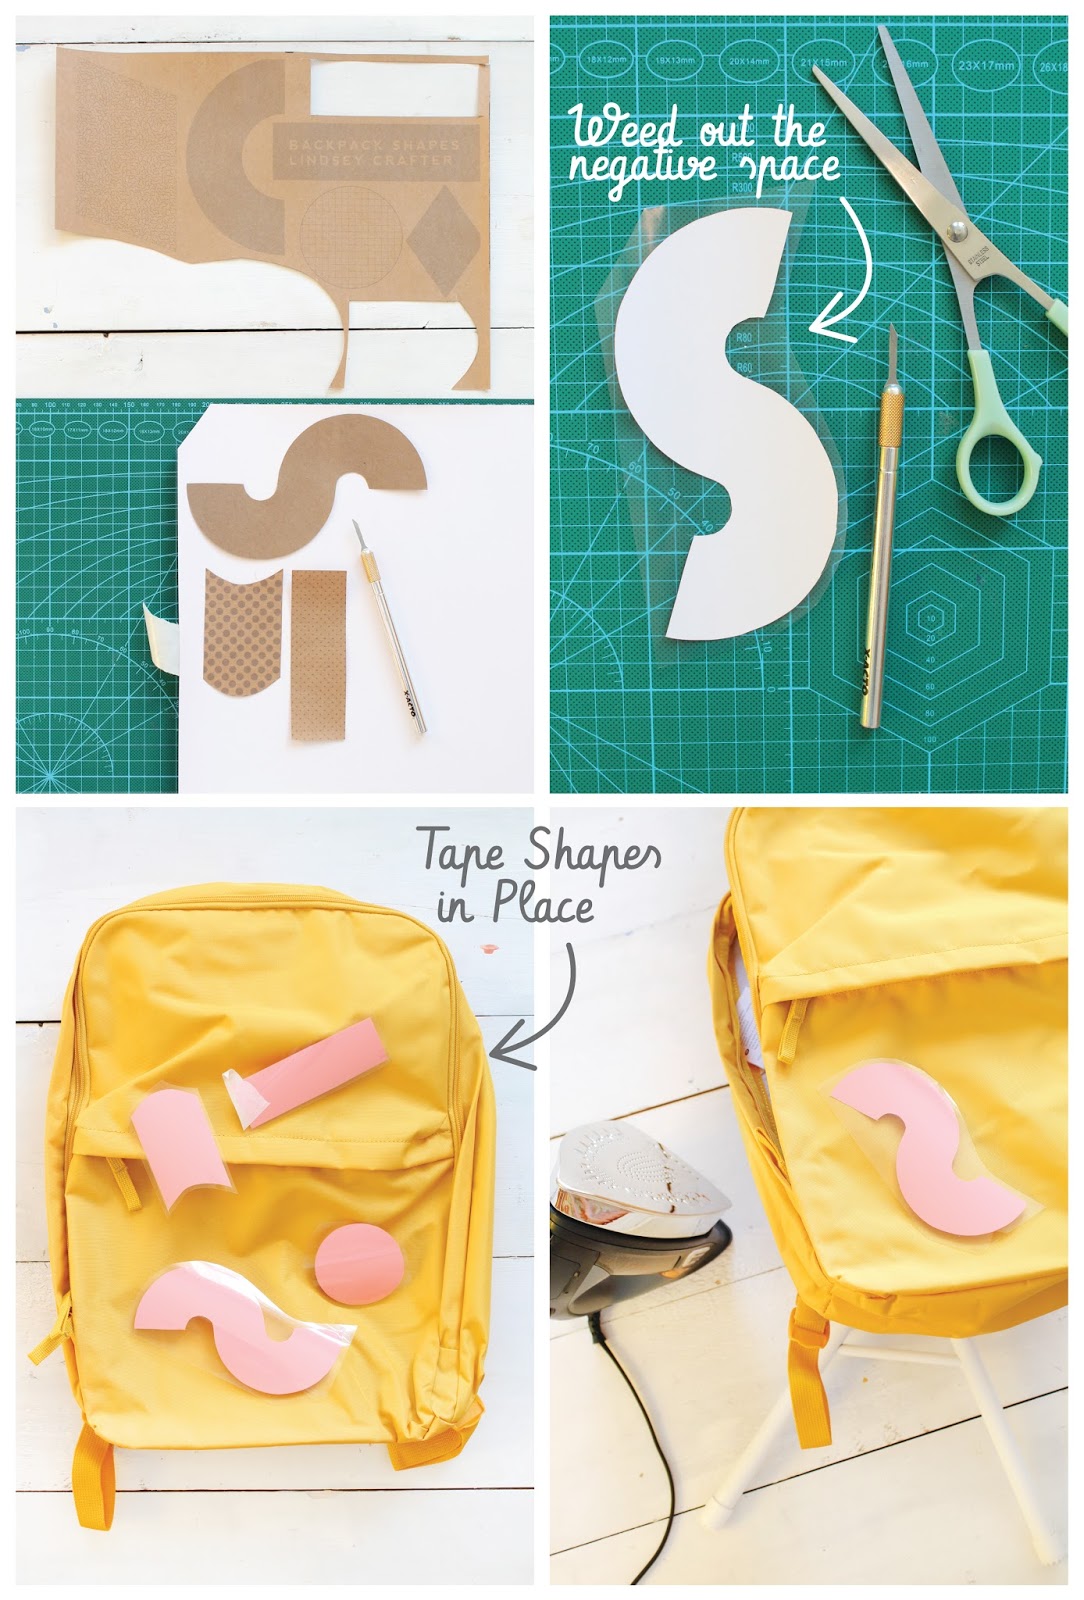
1. Trace your shapes with a pencil or trace objects around your house to create unique silhouettes. OR print out the pattern shapes printable at the bottom of the post on yardstick and cut out to create stencils.
2. Place the vinyl with the color side down on the cutting mat and use a craft knife to carefully cut around the shape template. Don't press too hard with the blade--you'll cut through the clear transfer material on the front of the vinyl. Gentle pressure will be enough to cut through the vinyl.
3. Cut out shapes leaving at least a 1/4" margin around the shapes edge and use the tip of the x-acto blade to remove/peel away the vinyl in the negative space (the technical term is "weeding")--leaving just the shape you want to transfer onto the backpack.
4. Place the vinyl shape on a flat section of the backpack and iron on at the directed temperature by the vinyl's manufacturer. Allow to cool before peeling off the transfer and revealing the bright shape! If working on a nylon backpack test in a inconspicuous area before applying heat with the iron--the material may melt. I'd recommend using a fabric backpack for best results!

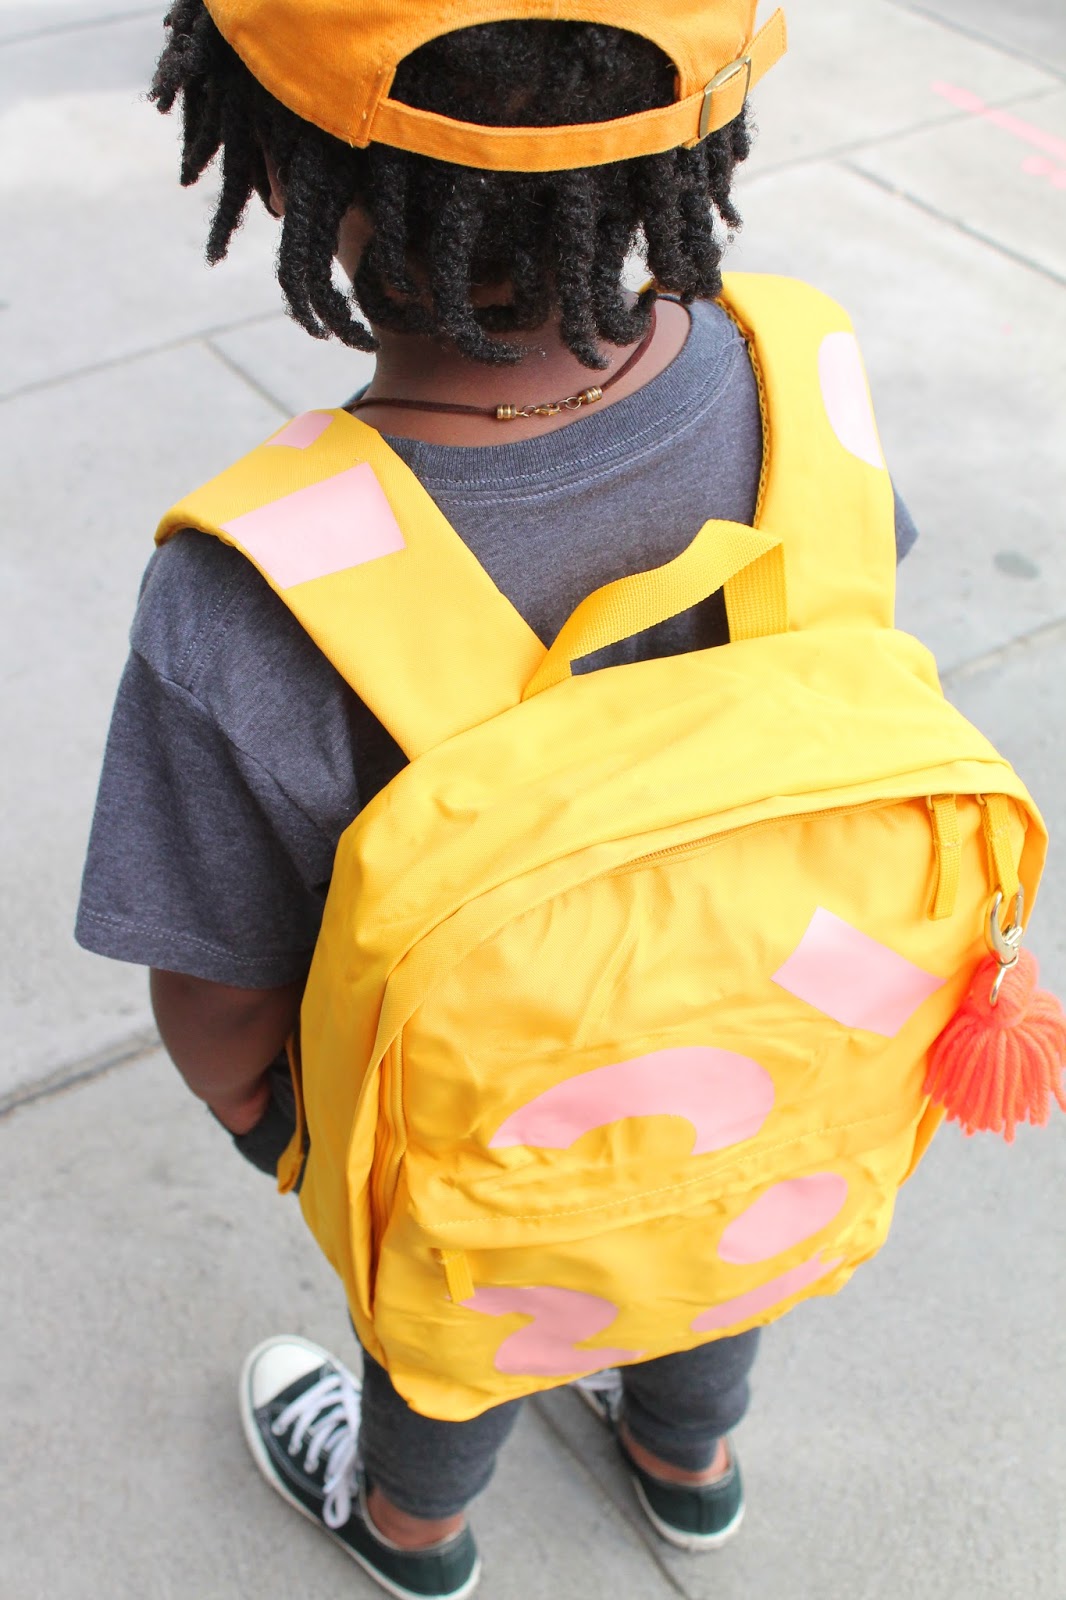
How cute would this be with lots of different colors--you can even find metallic vinyl on Amazon! I had my friend SJ (check out my friend Simone and her little fashionista Summer) take this satchel on a test drive before he starts school next week! Of course no bag is complete without a pom pom key chain!

TIP!
The backpack I used was Nylon and I had some problems with the material melting or mis-shaping with the heat of the iron. I think this project would work more easily with a fabric or canvas backpack to avoid the issue altogether!
How cute would this be with lots of different colors--you can even find metallic vinyl on Amazon! I had my friend SJ (check out my friend Simone and her little fashionista Summer) take this satchel on a test drive before he starts school next week! Of course no bag is complete without a pom pom key chain!
TIP!
The backpack I used was Nylon and I had some problems with the material melting or mis-shaping with the heat of the iron. I think this project would work more easily with a fabric or canvas backpack to avoid the issue altogether!
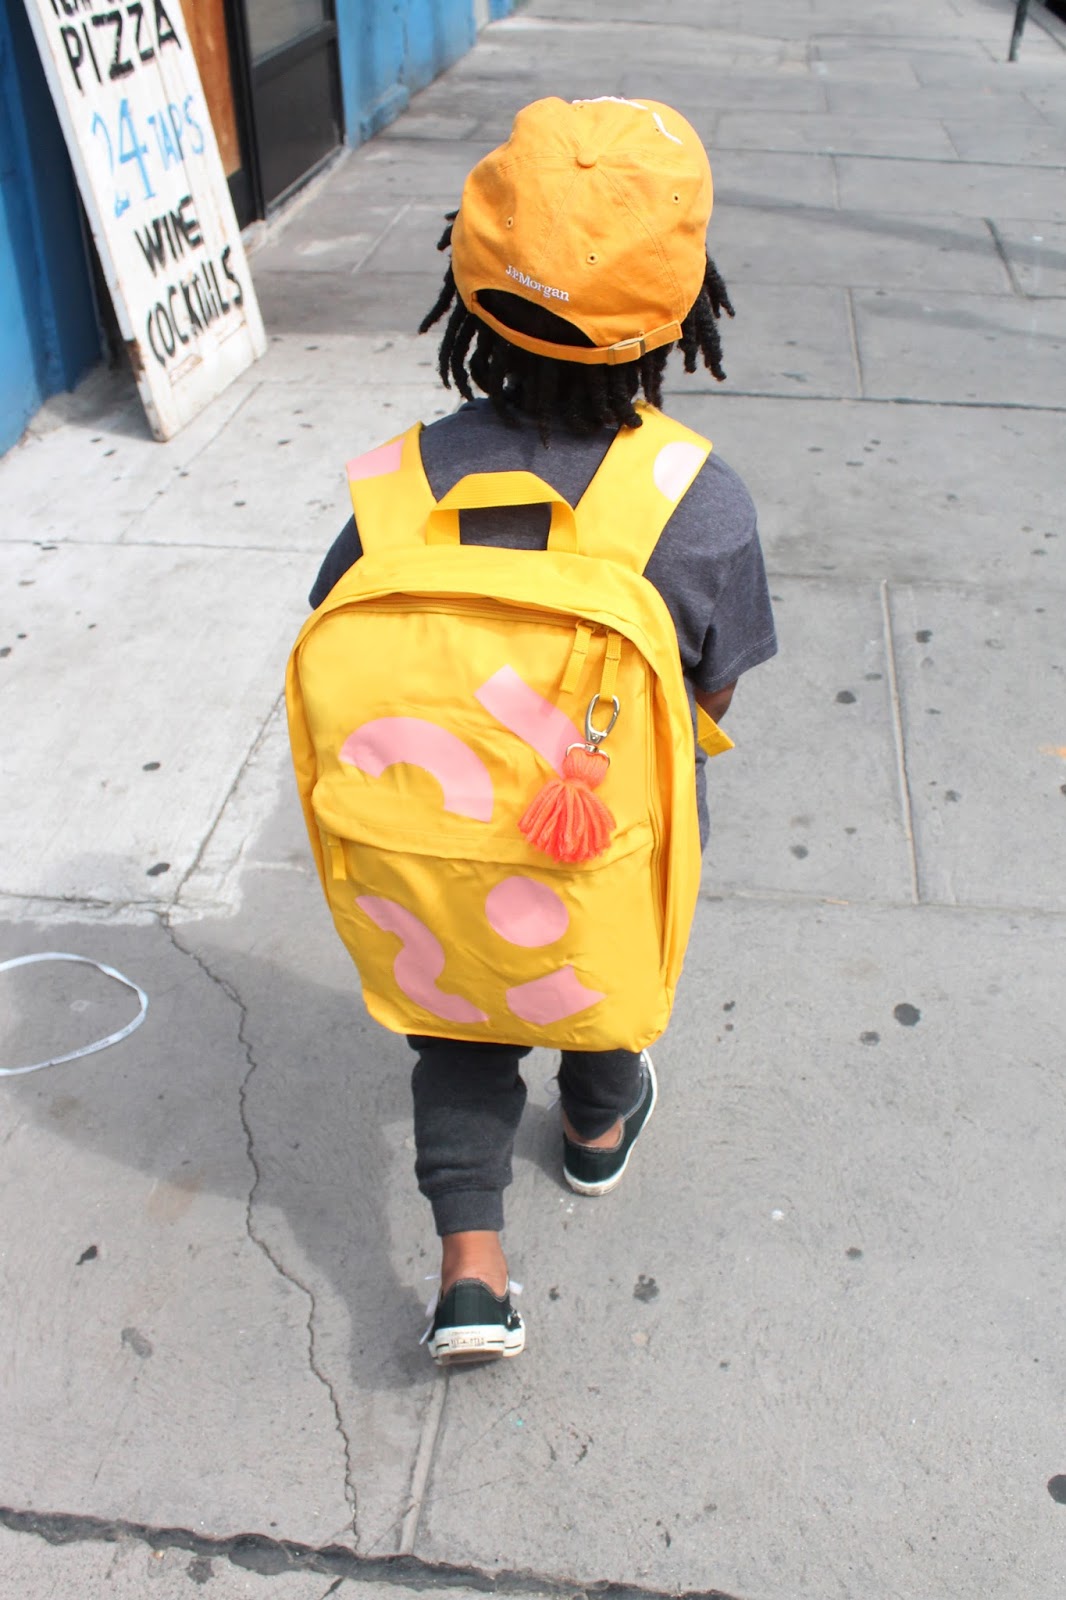
Now the styling team is off to quick pizza pit stop! Happy Friday!
xo Lindsey Crafter


I am unquestionably making the most of your site You unquestionably have some extraordinary knowledge and incredible stories .
ReplyDelete