9.21.2016

Indian Summer Style

Fall starts tomorrow but it's still HOT HOT HOT. Here are some things to help you transition into fall without breaking a sweat! Shop through links below...
What to wear for Fall

These wide leg Pilcros from Anthro are going to be my capsule wardrobe purchase for fall! I love the silhouette and posh wrap belt. 

This subtle liquid color is the perfect partner to your beachy glow.

I love the alternative shape of this watch and the warm rose gold is perfect for accessorizing your cozy pre-fall outfits.

The sun is still shining bright-- protect your eyes while apple picking, hiking or picnicking with these posh sunnies!

Pack for a quick getaway in this utilitarian tote...durable and ample packing space for your straightener and a few wardrobe changes.

Woven wall hangings have taken over the internet...but I love seeing the traditional texture applied to other surfaces and accessories like this Fossil Wallet/Clutch.

Layer these two lovely long necklaces for extra texture and eclectic accessorizing. 

9. Clogs 
These aubergine wooden clogs are as comfy as they are chic! Wear with dresses, colorful tights or with wide leg jeans like the pair I'm crushing on above ^

Almost as good as the real thing? 

11. Blanket
The temperature is starting to drop at night! Be sure to pack a cozy blanket for early fall outings! 

12. Hammock 
Enjoy watching the changing  of the leaves while relaxing in this retro macrame hammock.

Happy Fall Y'all! - Lindsey Crafter 

This post includes affiliate links for your convenience and at no extra charge to you! Thanks for supporting the brands that keep Lindsey Crafter goin'! 

SaveSave

9.14.2016

Recycled Plastic Lunch Sacks with SToK Coffee

This shop has been compensated by Collective Bias, Inc. and its advertiser. All opinions are mine alone. #SToKCoffee #cbias #CollectiveBias. Thanks for supporting the brands that keep Lindsey Crafter's content fresh and creative! 

As a crafter and content creator working from home requires serious focus and several "boosts" throughout the day -- most of this time this meant taking quick trips out to a coffee shop for a mediocre iced latte and a fresh magazine! I'd tried making iced coffee at home and trying cold brews from the grocery store but none of them were cutting it. About a month ago Ian brought home a new iced coffee to try and I haven't looked back! After switching to SToK I've saved cash, time and consumer waste ( all those plastic cups)--and that means more money to do the things I really love! 

Make a dyed lunch sack from recycled plastic bags.

We do our best to remember our reusable shopping bags when getting our weekly essentials...but sometimes we slip and end up with 5,000 plastic shopping bags. They're great to have around the house in small quantities for cleaning up messes--but I like to challenge myself on how they can be repurposed into crafting materials. I've used plastic bags to fill floor poufs and seen other crafters create plastic "plarn" for crocheted baskets--but my FAVORITE repurposing technique has been creating plastic textiles for making water resistant totes and bags. See how I crafted these dyed plastic lunch sacks from recycled plastic bags below!


Make a dyed lunch sack from recycled plastic bags.


Things You'll Need 

20-30 white plastic bags 
Iron 
Parchment Paper 
Scissors 
Sewing machine & Serger
Coordinating thread
Ruler or Square
Pen
Rit DyeMore (for dyeing plastic)
Plastic Container for dyeing 

Here's How 
Make a dyed lunch sack from recycled plastic bags.
1. Select several clean, white plastic shopping bags and cut off the bottom seam and handles to create a large rectangle. Layer 4-5 pieces of plastic in between two pieces of parchment paper and use an iron on medium heat to fuse the pieces together. The plastic will shrink significantly with the application of heat--if the iron is too hot you'll have lots of ripples and texture in your completed textile. 

2. Cut the following pieces to create a medium sized lunch sack: 
Trace the pieces onto the plastic with a square edge and pen before cutting out pieces with sharp scissors.

3. Place each piece in a dye bath to create fun colors! Gradually add water to increase the depth and lighten the color for an ombre effect. Follow the manufacturer's instructions for dyeing plastic--I expedited the process by transferring dye to the stovetop to encourage more of a color transfer. The color didn't turn out as BOLD as I had liked...but I still like watercolor look instead of a plain white bag. Alternatively you could decorate your plastic material with fabric paint and stamps!

4. After you've rinsed and dried all the pieces, serge the raw edges with a coordinating thread to reinforce the material. 

6. Stitch all of the pieces together 1/4" away from the edge, trim away stray threads and you're done!  If you want to keep your sack closed you can quickly stitch a small tab of velcro to the edge of the opening.


Make a dyed lunch sack from recycled plastic bags.

SToK™ is pure coffee with no weird ingredients or flavors-- I fill up my favorite travel mug with ice, a little half and half, and a LOT of SToK before hitting up the flea market, the beach or just working on home improvement projects around the house! 


Make a dyed lunch sack from recycled plastic bags.

Haven't seen this goodness in stores? Find it in the coffee/tea cooler at Walmart! My favorite SToK™ is the red bottle with just a touch of sweet!

xo Lindsey Crafter


9.12.2016

DIY Diffuser Keychains with Nature's Truth Essential Oils

This shop has been compensated by Collective Bias, Inc. and its advertiser. All opinions are mine alone. #StimulateTheSenses #CollectiveBias . Thanks for supporting the brands That keep Lindsey Crafter's content fresh and creative!

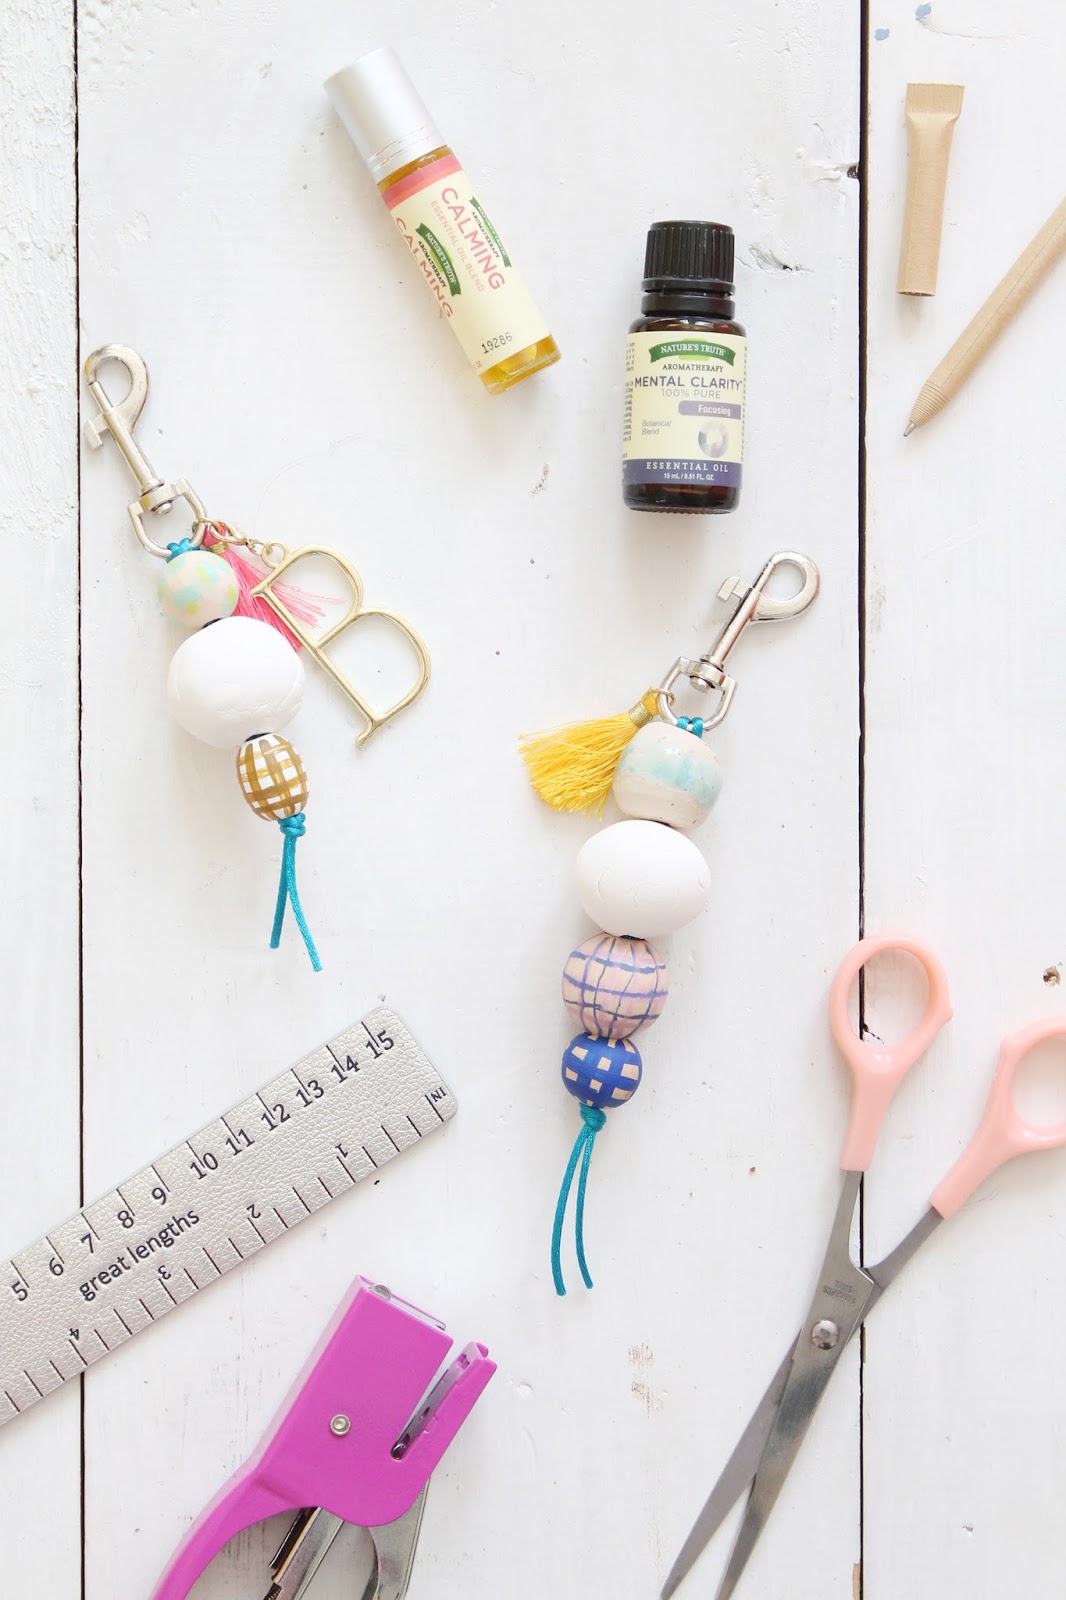
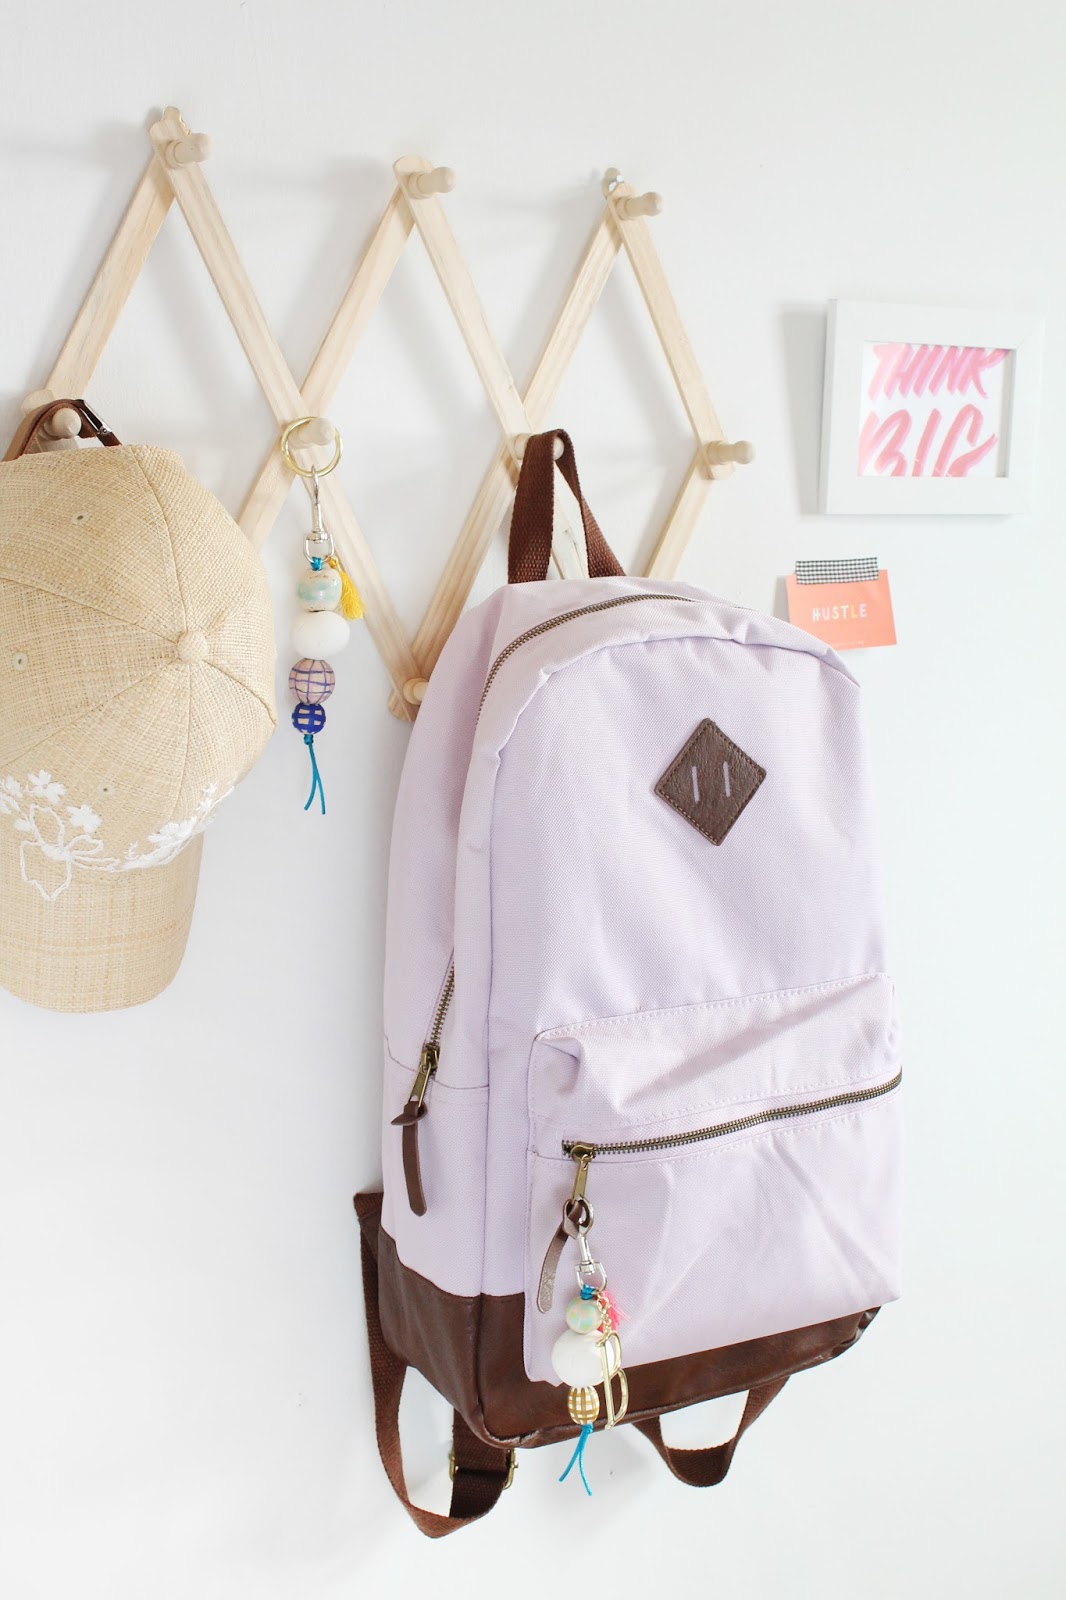
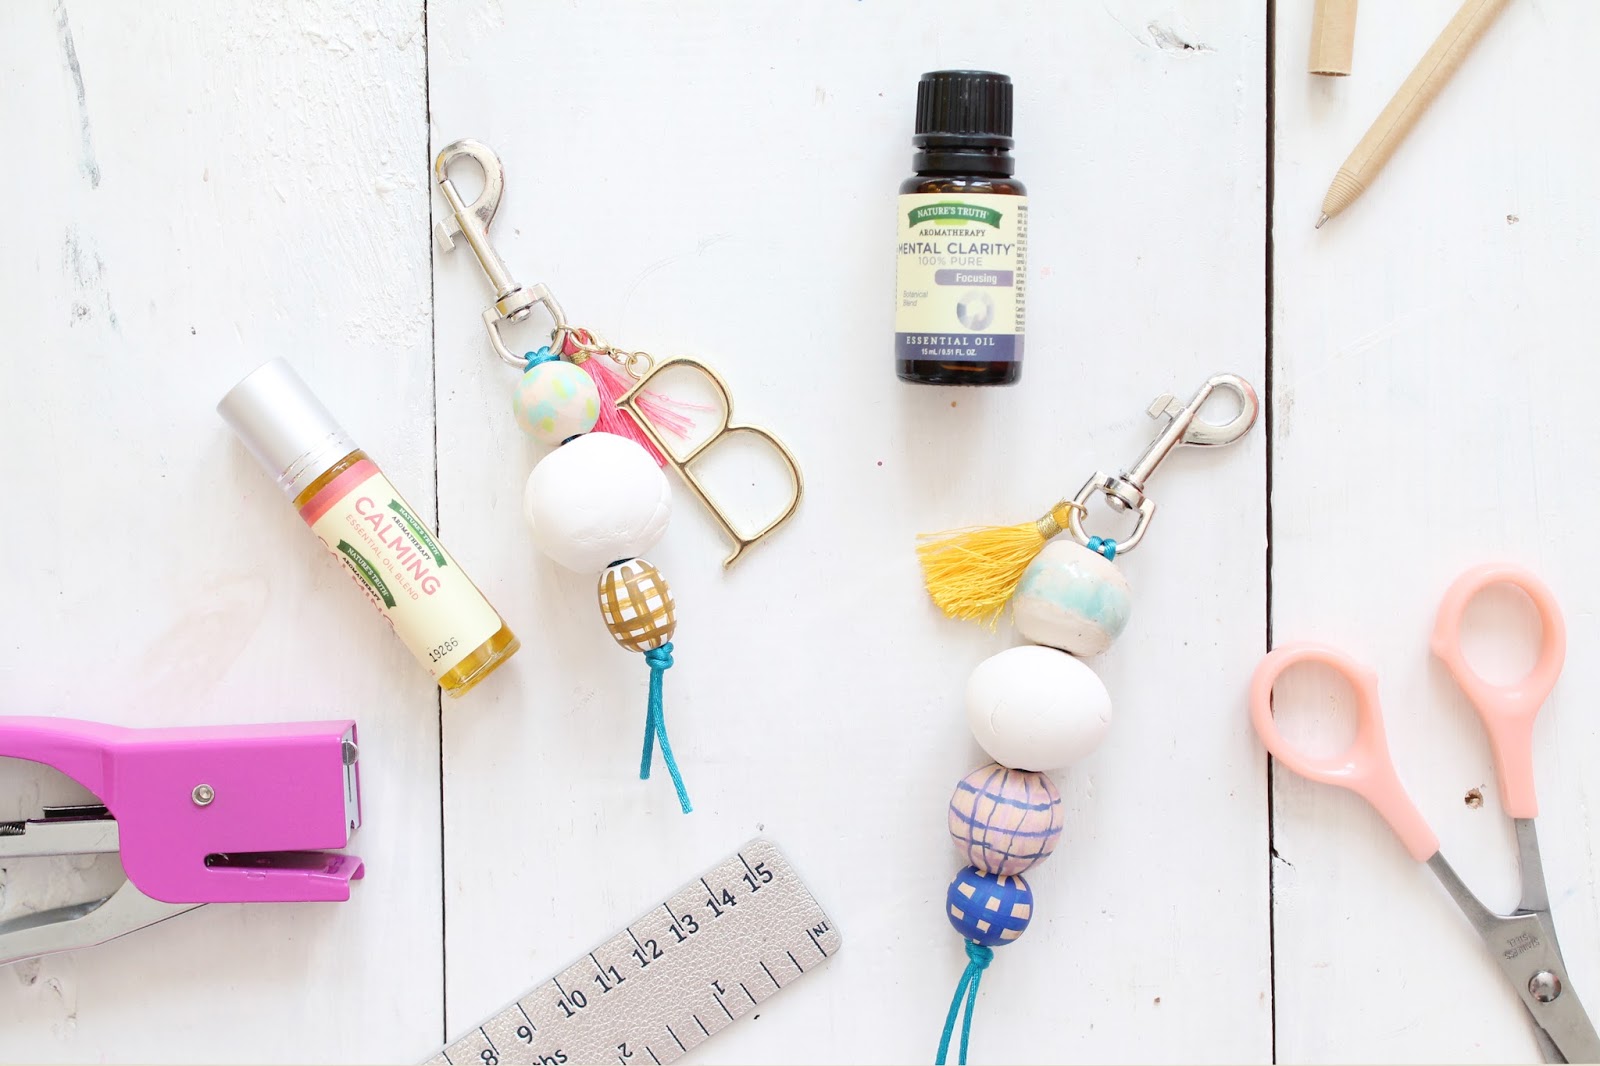
I've been using essential oils in diffusers and to boost homemade cleaners for years-- so I was thrilled to create a back to school DIY in partnership with Nature's Truth Essential Oils! These diffuser keychains are perfect for clipping on a book bag or hanging on your dorm room door to refresh your space (and your mind) while emitting soothing and stimulating scents throughout the day! 


Make a Diffuser Keychain for Essential Oils

Make a Diffuser Keychain for Essential Oils


Make a Diffuser Keychain for Essential Oils

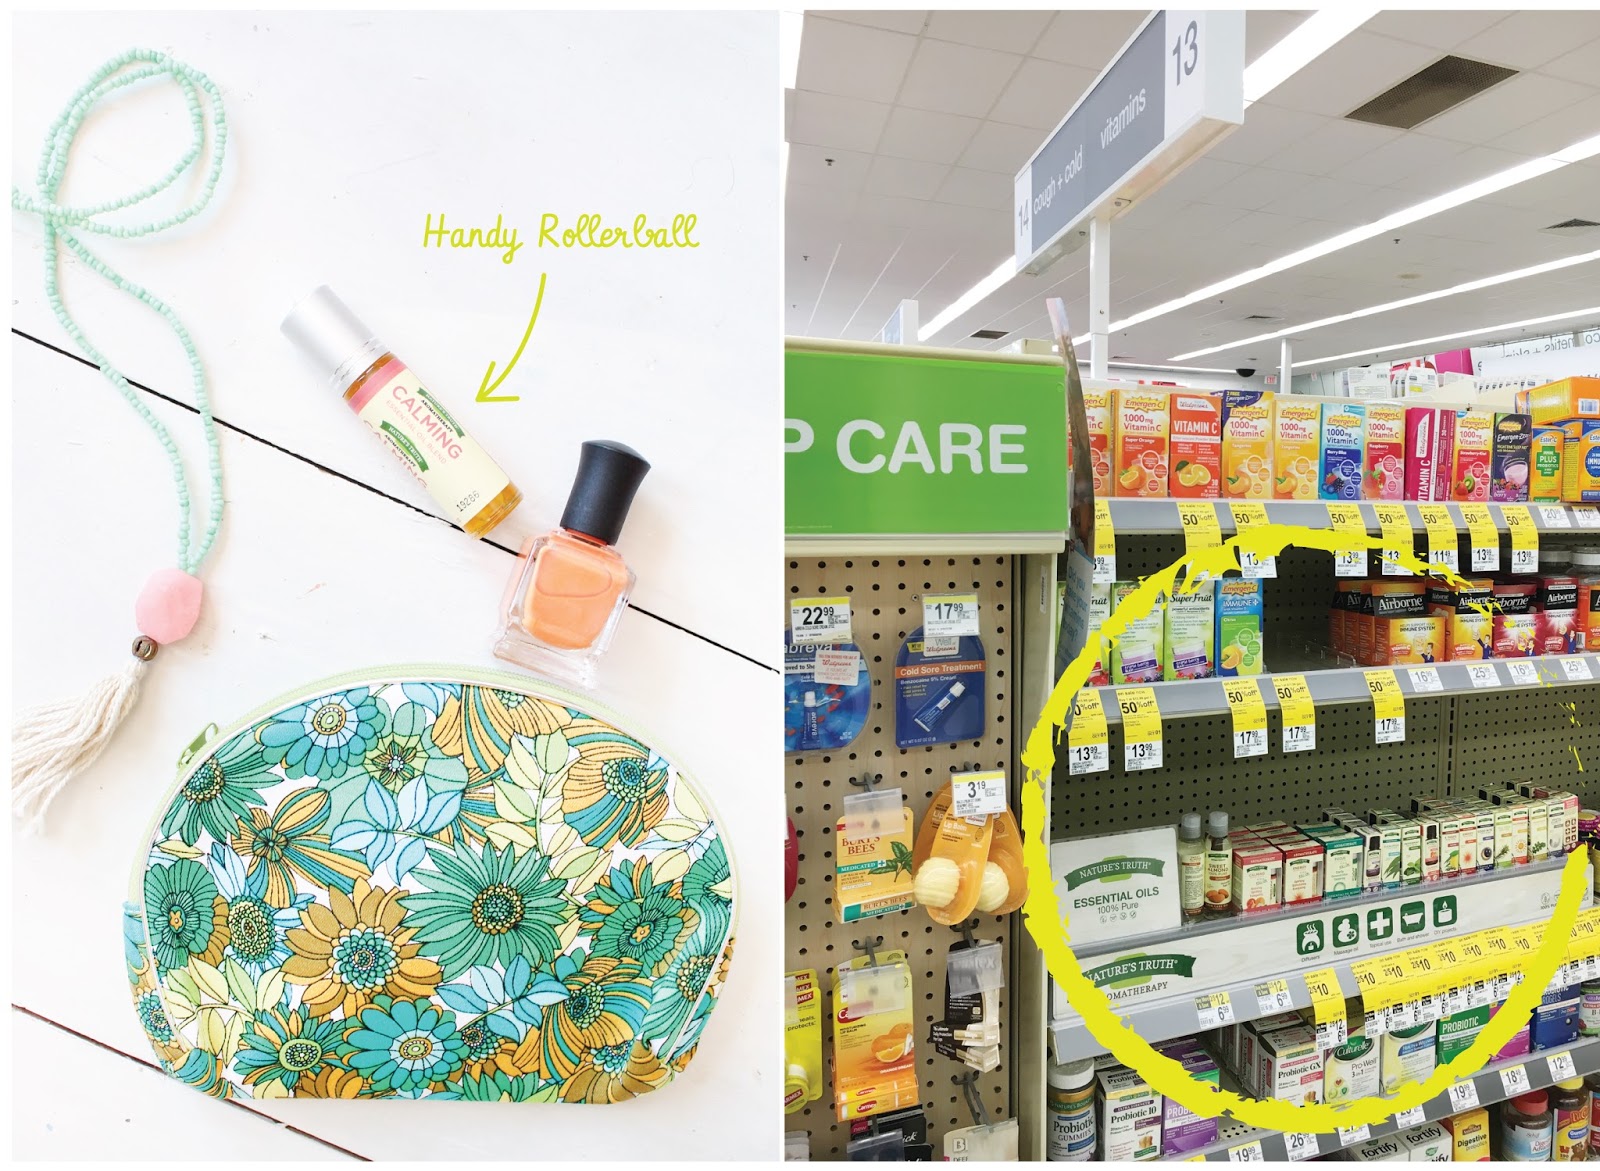
Nature's Truth Essential Oils are available in the vitamin aisle--I chose Calming, Mental Clarity, and Purify to be used on the diffuser interchangeably and to meet each user's individual needs. Keep the handy rollerball in your makeup bag or pencil pouch for spill-free application!
Make a Diffuser Keychain for Essential Oils


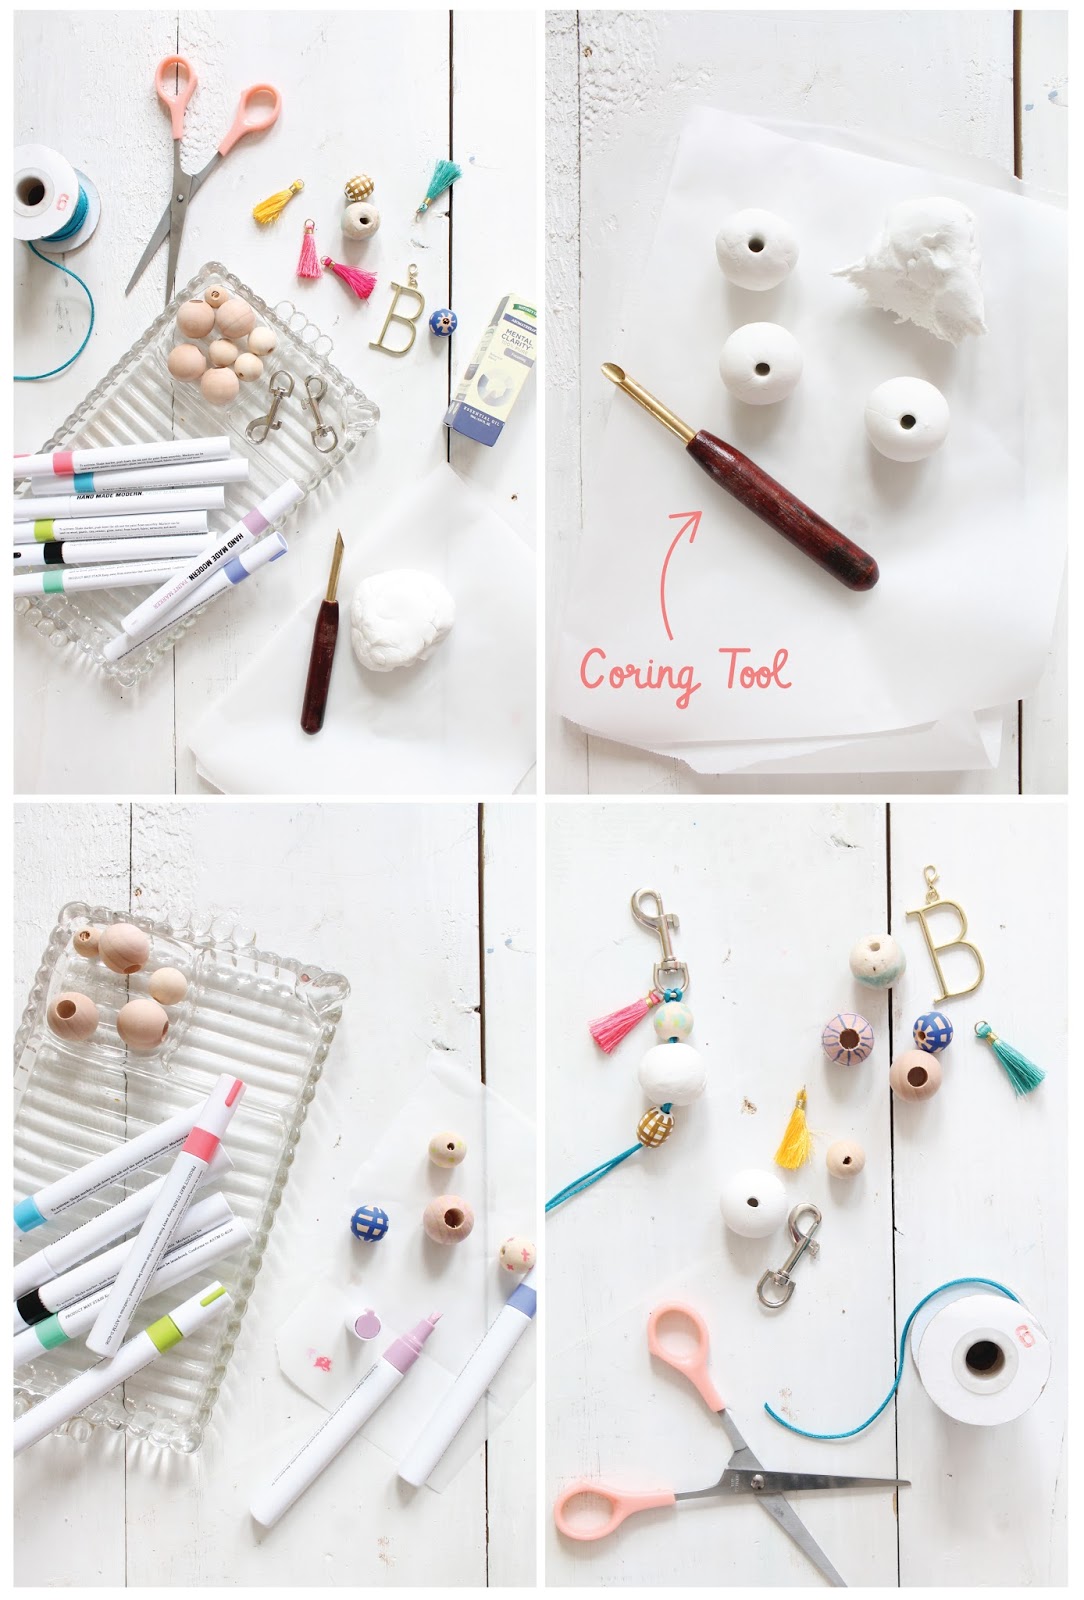
Things You'll Need

Air Dry Clay 
Coring Tool for Clay Modeling
Sanding Block 
Assorted Wood Beads 
Paint Pens
Cotton Cord 
Key Chain Hook or Ring
Your Favorite Nature's Truth Essential Oils 

* Be sure the air dry clay you purchase is natural clay and not a plant based modeling medium like paper clay!


Make a Diffuser Keychain for Essential Oils

1. Make Clay Beads
 Pinch off a small amount of clay (about 1") and roll between your palms to create a smooth ball. Use a coring tool or wood skewer to core the bead--creating a clean hole through the center of the ball. Place on a piece of wax paper to dry overnight. 

2. Sand Clay Beads 
After your beads have dried completely (they'll no longer feel cool to the touch) use a 120 grit sanding block to smooth the bead.

3. Paint Wood Beads
While you're waiting on the clay beads to dry, decorate large wood beads with a paint pen and 

3. Thread Beads on Cotton Cord
Loop a 12-14" length of cord through a keychain hook or clasp so that two strands of cord are hanging down. Thread on beads, tassels and charms before knotting at the bottom bead. Trim off excess cord and burn the ends to prevent fraying.

4. Add Drops of Essential Oil
Add a few drops of essential oil to the clay bead to diffuse throughout the day. Clip on a purse, backpack or pin on a bulletin board as a inspirational (and scent-sational) charm!


Make a Diffuser Keychain for Essential Oils


Make a Diffuser Keychain for Essential Oils

Make a Diffuser Keychain for Essential Oils

Want more ideas on how to use essential oils in your home? Check out Nature's Truth's Social Hub to get inspiration for a myriad of uses! First time user? Get your $1.00 off coupon here and try a scent or two!


xo Lindsey Crafter
SaveSave

9.08.2016

Hand Printed Textiles with Scotchgard™


    This shop has been compensated by Collective Bias, Inc. and its advertiser. All opinions are mine alone. #ProtectYourEverything #CollectiveBias . Thanks for supporting the brands that keep Lindsey Crafter's content fresh and creative! 

    Make Your Own Printed Fabrics for DIY Upholstery Projects
    I'm notorious for accumulating dumpster dive furniture and stockpiling scrap fabrics in hopes of having a spare second to refurbish them into fresh pieces to incorporate into my space. I've partnered with Scotchgard™ Brand to share an inexpensive way to print your own fabrics with recycled materials and how to keep them looking their best with their Scotchgard™ Fabric Protector. 


    Make Your Own Printed Fabrics for DIY Upholstery Projects

    I mixed my own shades of trendy paint colors with standard colors from the craft store...use contrasting hues to print fabrics for upholstery projects, zipper pouches or pillows! 

    What You'll Need :

    Cotton Canvas Fabric  (at least 1 yard)
    Fabric Paint 
    Staple Gun
    Hot Glue Gun
    Scissors
    Yarn, Rubber Bands, Recycled Cardboard Tubes
    Foam Sheet or Shapes
    Scrap Paper or Cardboard 
    Paintbrushes
    Optional: Sewing Machine
    Furniture and Cushion you Plan to Upholster

    Here's How :

    Make Your Own Printed Fabrics for DIY Upholstery Projects

    1. Iron a large section of canvas fabric and lie flat on your work surface. Be sure to Line your work area with scraps of cardboard or paper to protect your surfaces from paint. 

    2. Wrap cardboard tubes with rubber bands or yarn to create abstract stamps. Gather other lost items you could use to make marks or prints on the fabric like erasers and corks and employ them to create unique textures on your fabric. I used a hot glue gun to create a raised texture on a tube and let the glue cool before using as a rolling stamp. 

    3. Brush fabric paint onto your stamp with a paint brush and practice your marks on a scrap piece of paper. Use a dowel rod or your hands to roll the stamp across the fabric to create your pattern. Design your fabric with your finished project in mind! Get creative with layering stamps and textures to create a dimensional print. 

    4. Keep your hand-printed artwork pristine by protecting it from daily use with Scotchgard™ Fabric Protector. Allow the fabric paint to dry overnight before following the manufacturer's instructions to treat the fabric. 

    5. After protecting your fabric cut pieces to size and use a staple gun to secure your upholstery project to the base. I did a little cutting and sewing to cover a square cushion for a piano bench I found on the side of the street in Brooklyn! Simply measure each side of the cushion to make pattern pieces and add 1/2" seam allowance to all edges before piecing together on your sewing machine.

    Make Your Own Printed Fabrics for DIY Upholstery Projects

    I got bold and used this sweet fabric covered bench as a coffee table! Scotchgard™ Fabric Protector repels liquids and blocks stains without affecting the feel of the fabricSimply add a stack of your favorite magazines, a succulent in a fun pot and a hot cup of coffee to complete your cozy little nook!

    Make Your Own Printed Fabrics for DIY Upholstery Projects

    Make Your Own Printed Fabrics for DIY Upholstery Projects

    Make Your Own Printed Fabrics for DIY Upholstery Projects
    Find more ways to use Scotchgard Fabric Protector in your home here and protect your everything from spills, stains and just everyday life!

    I picked up a can at Target with this coupon along with a few other fun decor items to spruce up my bedroom for Fall! Have any fun upholstery projects you've completed recently? Share your tutorials in the comments below! 

    xo Lindsey Crafter


    9.01.2016

    Fall Fairy Garden

    Not-so-spooky pumpkins are my favorite DIYs for Fall--they transition easily from summer to fall and stay cheery well through the changing of the leaves. After the success of my floral pumpkins last season I had to stick with the theme this year--see how I crafted this darling Fall Fairy Garden in a faux pumpkin below!

    Make a Fall Fairy Garden in a Faux Pumpkin

    Make a Fall Fairy Garden in a Faux Pumpkin

    What You'll Need 

    Faux Pumpkin ( I used this diorama pumpkin
    Acrylic Paint 
    Paint Brushes 
    Potting Soil
    Decorative Moss
    Small Gravel or Colored Sand 
    Several Succulents in Various Sizes 
    Spoon 
    Miniature Fairy Garden Accessories

    Make a Fall Fairy Garden in a Faux Pumpkin


    1. If desired, spray painted the inside and outside of the faux pumpkin with a light color and let dry--be sure to tape off the stem with masking tape to protect it from overspray. Add a hand painted leaf pattern on the interior with a contrasting terra cotta chalk paint and a small round paint brush for a little pizazz! Let dry completely before planting.

    2. Fill the bottom of the pumpkin with 3" of potting soil. Use a spoon to help position succulents and distribute soil where needed. Use varying heights of succulents--with the taller plants in the back as "trees" and shorter/smaller succulents as bushes in the foreground. 

    3. Add moss ( found in the floral section of most craft stores) around the base of the plants for lush "grass". Pour fine gravel or colored sand down the middle of the garden to create a path! 

    4. Place miniature furniture and props in your garden to inspire imagination. Prop small birds up on taller succulents with floral wire so they look like they're sitting up in a tree!

    Make a Fall Fairy Garden in a Faux Pumpkin

    Customize the colors to coordinate with the rest of your seasonal decor! Be sure to place your pumpkin in a sunny spot and water your succulents periodically! How cute would this be with some  battery powered LED fairy lights on your front porch at night?!

     xo Lindsey Crafter

    Latest Instagrams

    © LINDSEY CRAFTER . Design by Fearne.