3.31.2016

PROPAGATING PHILODENDRON - THE HARDIEST HOUSEPLANT EVER

Propagating Philodendron

Our house (more like greenhouse) is home to several beautiful plants hanging on through winter and struggling through a season of limited light and cold windowsills. Our fiddle leaf fig is prospering, but our palms are pretty much dead and my new adorable kangaroo fern is brittle and looking sad. One plant I've seemed to religiously neglect and NEVER come close to killing is my 5 year old Philodendron planted in a ceramic fish I picked up off the streets of Brooklyn.

Propagating Philodendron

I purchased it at Home Depot in Manhattan circa 2011, watered it irregularly and NEVER pruned it. It's lived in four different apartments and pretty much convinced me its invincible to anything life has to throw at it. I love rooting plants in water and watching the tiny tendrils develop. We've started happy basil plants from cuttings and rooted a mystery tree in a tall vase from spiral cuttings salvaged from a grocery store flower arrangement. So why  has it never occurred to me to cut my philodendron?! After five minutes of research I realized it's basically as easy as the maintanece of the plant, and considering I've got the BEST mother plant it's time for her to propagate!

All you need to do is cut off a 5-6" stem about a fingertip away from the root nodes (the brown bumpy bits).  Put the stem in a CLEAR vase filled with water or a recycled glass jar, remove any leaves that might become submerged, and sit in a warm sunny spot. BOOM your work is done, let nature do the rest!


There are now cuttings all over the house (including the bathroom) I'll keep you posted as they take root!


Affiliate links are included for your convenience and to keep Lindsey Crafter craftin' 

3.30.2016

How to Find and Frame Affordable Artwork for Your Home

This post has been updated 02/12/2018 with fresh art picks and framing tips!

When furnishing or redecorating your living space, dressing the walls is a final touch that is easy to overlook, but when completed makes a room look completely polished. I've noticed the gallery wall look is slowly becoming replaced by large format posters and prints, but the scale in size also usually comes with a scale in price. Instead of paying $100+ for large prints try finding a smaller high-quality prints or canvases and matting it yourself in an oversized frame.  This will get you a luxe look without making 20+ holes in your wall trying to make a visual impact! 

Wallpapered entryway with artwork by Lindsey Crafter

Artwork | Wallpaper | Similar Hook | Thrifted Frame 

My favorite technique for saving money when framing art is to collect vintage frames from thrift stores and auctions and replacing the content with a fresh mat and artwork! It's easy to remove the paper backing, pull out staples and thoroughly clean the glass before measuring for your new mat. In most cases you can get professional results for under $50 (most custom framing jobs run upwards of $100).

Original watercolor artwork by Lindsey Crafter

Original watercolor by Lindsey Crafter available here

Wallpapered entryway with artwork by Lindsey Crafter

Mats can be purchased in a variety of colors and textures at most craft stores that have a framing department. If you can use a coupon you can get most large standard mats for under $20. 

After you get back to a clean workspace make sure you've removed all lint and dust from the inside of the frame's glass before inserting the mat and artwork. Bend back staples or tabs to hold the backing and mat in place with scissors or pliers.

The finishing touch is replacing the paper you removed from the back by spreading glue around the back edge of the frame and smoothing down a scrap piece of wrapping paper or kraft paper to conceal the backing. Use an x-acto knife to cut off the excess paper once the glue is dry--it's how the pro's do it! 

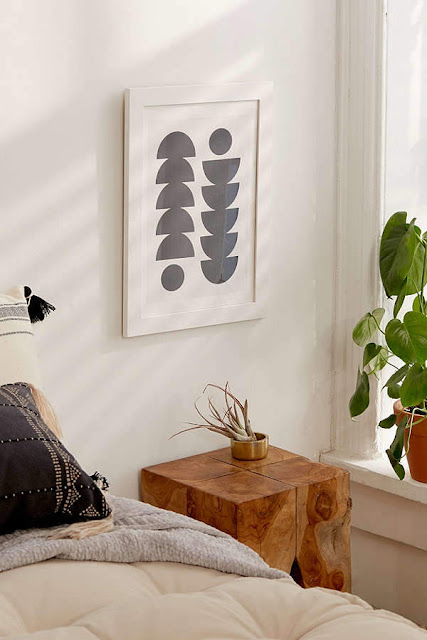
I've picked a few pieces from my favorite affordable art sources to get you started (may include affiliate links)
Affordable Art for Your Home

Affordable Art for Your Home


Affordable Art for Your Home


Affordable Art for Your Home


Affordable Art for Your Home


Affordable Art for Your Home


Affordable Art for Your Home

Affordable Art for Your Home


Affordable Art for Your Home

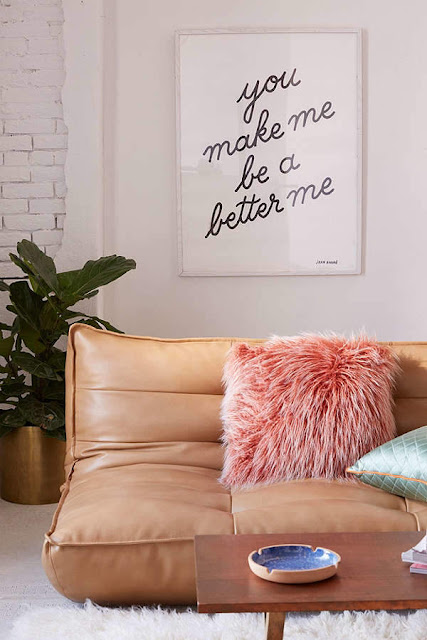
Jean Andre You Make Me Be A Better Me Art Print | $19.00


Don't be afraid to mix styles of frames--a contrast between subject matter and the style of the frame can add more interest to the mix! What are your framing tips? Share in the comments below! 

-Lindsey Crafter


3.24.2016

Macrame Easter Eggs

Looking to cut out EGG-CESS in your life? Skip the Easter basket this year and make a few macrame prize egg holders instead! Hang from a doorknob for kids to find when they wake up Easter morning or use as seasonal decor--you can easily switch out the egg for a vase of spring buds. I used cotton cord I already had at home, but you could use any yarn or thick string you have on hand. 

Modern Easter Egg


How to knot

1. Loop four strands of cotton cord (2 1/2 ft or longer) around a wood ring or tie in a loop creating 8 single strands. 

2. Knot each set of consecutive cords in a single knot keeping them aligned in a row. 

3. Separate the sets of cords and tie each single cord to the one next to it creating a knotted cage. 

4. Knot a second row two or three inches down from the first row, separating the cords resulting from each knot and tying each cord to it's neighbor. 

5. Place the egg within the cage and gather the cords at the base of the egg--tie them all in a single knot so that the remaining strands hang down like a tassel.

6. Trim the cords and fill your egg with candy or other goodies! 

7. Use wood beads to create beaded name tags and tassel charms.  

Macrame Easter Egg

Easy right? I made these two in under 15 minutes with precious gold eggs from Target! 

Modern Easter Egg
Happy Easter! 
xo Lindsey Crafter

3.15.2016

Lindsey Crafter's Little Casa: Inspiration & Felted Arm Chair

Felted Dollhouse Furniture

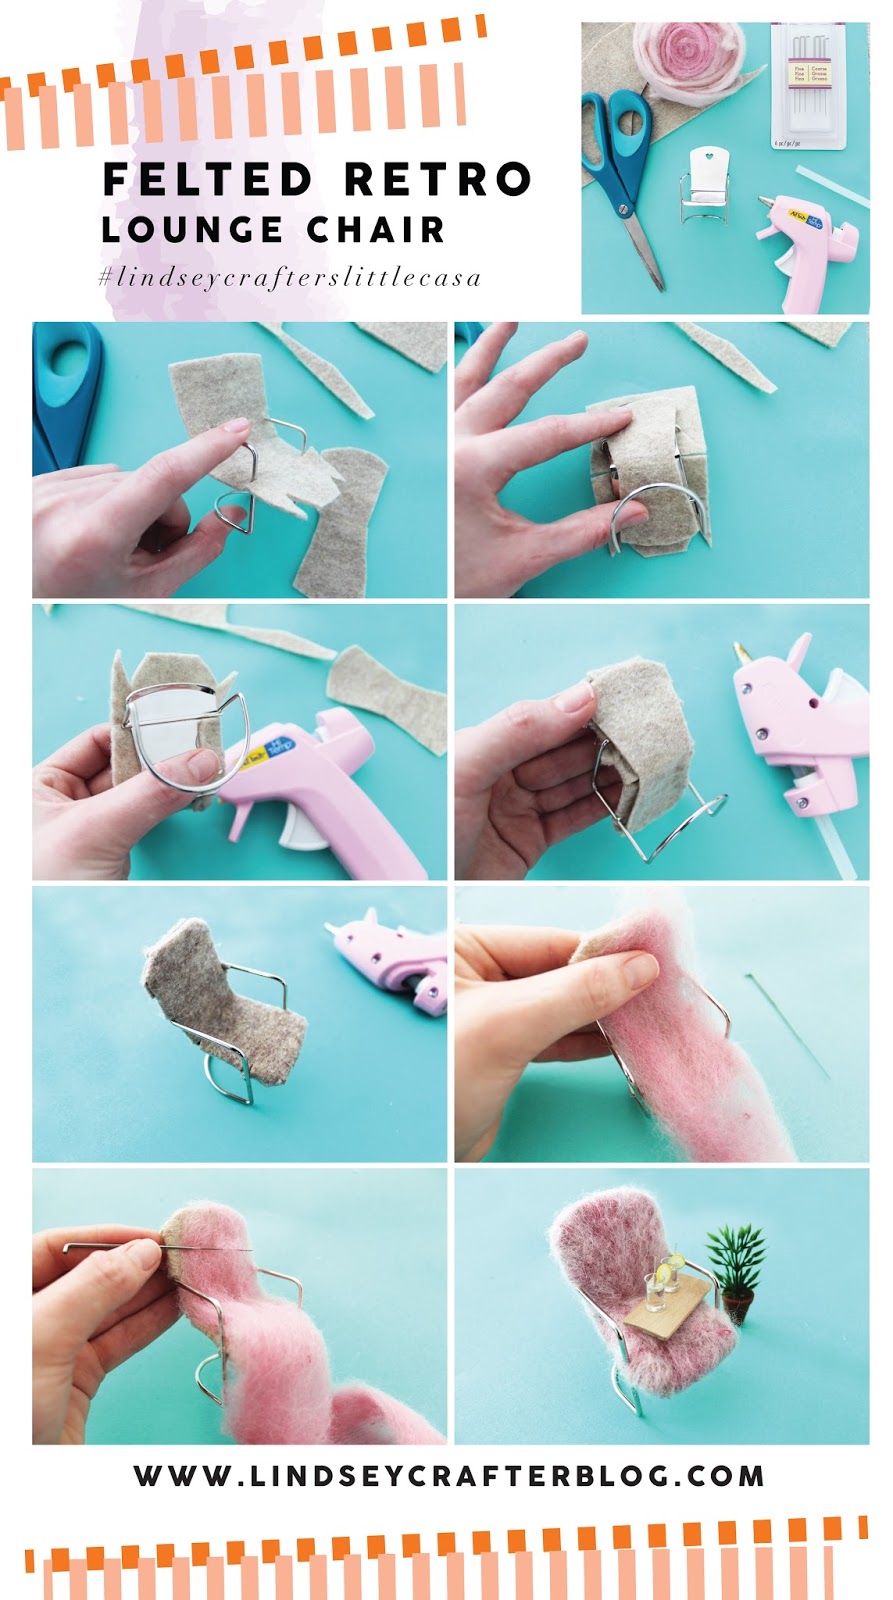
 Last weekend I picked up the most DARLING wall mounted dollhouse at the flea market--for six bucks! Coincidentally I had just discovered Mandi's Dollhouse --a seriously inspiring modern take on a classic hobby -- so snatching it up and adopting another hobby was a no-brainer.  After some initial research I discovered how pricey pre-fab dollhouse materials were --  YIKES. So a lot of the projects I'm going to tackle will involve serious improvisation and re-purposing items.  After a run through the craft store I selected a few pieces just as "filler" items while I do major construction on the floors and facade of the house.  See how I transformed a plain metal chair into a fluffy felt lounge below! 

Here's my inspiration for the interior of my dollhouse "remodel". I've found planning out the rooms of this mini dream home TOTALLY satisfies my need to flip a real house (HA). There's still some serious cleaning, sanding and window installation to complete--but I'm looking forward to sharing the entire process with you and hopefully encouraging you to try building one of your own!


Here's how I turned an a plain metal lawn chair into a chic felted lounge chair! 

You'll Need: 
Felt Sheet 
Scissors 
Hot Glue Gun


Felted Dollhouse Furniture


1. Upholstering your metal chair in inexpensive sheet felt will make felting the cushions SUPER easy. Cut sheet felt to fit over the seat and back of the chair leaving at least a 1/2 inch extra on all sides. Snip the felt to fit around the metal arms and legs to create tabs to easily glue down felt to the back of the chair. Cut a second piece for the back of the chair to cover the tabs and exposed metal. 

2. Glue down the felt pieces to the chair with small dots of hot glue. Trim off any excess felt. 

3. Choose a color of wool felt roving and use felting needles to shape the wool into the cushions of the chair. Poke the wool fibers into the sheet felt with the needle--hold it parallel to the surface you're felting to keep the needle from snapping off. Here's a great intro to felting by Living Felt 

4. After covering the entire seat with wool roving use diluted dish soap and running water to agitate the fibers with your fingers and create a more matted felt. Rinse out all dish soap and dry thoroughly with a dish towel-- I sat my chair in the sun to dry completely. 

5. Style your finished chair with your favorite mini accessories! I found these darling glasses of lemonade at Michaels! 

Follow my Grown Up Dollhouse Pinterest board to keep 
up with the reno and see my favorite eBay and etsy sources for vintage dollhouse furniture and accessories. 

xo Lindsey Crafter

This post includes affiliate links for your convenience and to keep Lindsey craftin'


3.04.2016

How to Organize Your Closet + Printable Closet Evaluation

This post was updated on Jan. 2, 2018 with more helpful tips! 


If you haven't read The Life-Changing Magic of Tidying Up you might not know what someone means when they said they've Kondo-ed their closet. In a nutshell, Marie Kondo guides you through each room (and drawer) in your house and tells you how to get rid of stuff that doesn't make you happy. Sounds easy enough, but the psychological attachments and justifications we've applied to our clutter requires some guidance from the tidying up guru. I've applied organizational methods of Kondo's to cluttered spaces in my apartment and consolidated considerably. It's taken a while to feel capable of letting go of items I might have paid a lot for but haven't worn yet (like two years)-- but I've done the following to make cleaning out my closet and organizing it way less painful: 

(update--over 2 years later and this book still changed my entire outlook on clothing purchases, my carbon footprint, and what truly brings me joy. I typically only purchase one new clothing item i.e. shirts/jeans every 2-3 months. I use Kondo's methods regularly with clients to help them whip their spaces into shape as well. See a tidied up example below. Want to hire me to shuffle, spruce and style your space? Visit www.lindseycrafter.com to learn more!)


organize your closet


1. Empty it Out

Remove ALL clothing items indiscriminately and throw them on the bed (this is Kondo's system). Viewing the sheer mass of fabric you wrestle on a daily basis in one spot will inspire you to cut down on pieces. While your closet/shelf/dresser is empty you can visualize and install more effective storage systems, bins and rails to house your items in an accessible and attractive manner. Closets CAN be fun you know! Here are some options below (affiliate links).


2. Take notes 

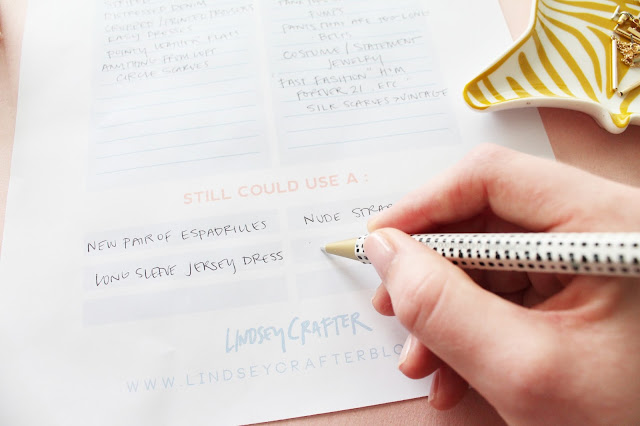
On your phone or on paper-- write out two lists (or use this free printout I made below): Things you love to buy and wear, and Things you love to buy and NEVER wear. This will help you take an objective look at your closet and decide where you're loosing money--and space. When you're choosing items to give away jot down what it is. It's okay to like certain items, but be honest with yourself if it's a category of clothing you never wear, like skirts. Keep your notes handy when you're shopping and before you head to the register take a look at your "List". You'll maker smarter buys and won't end up with another ADORABLE cardigan you'll never wear because you pretty much never layer. Yes I'm talking about myself! Cardigans are my kryptonite but I NEVER wear them. Ever. (Update....2018 and I still haven't bought a cardigan!)

I've put this into practice and am doing a GREAT job holding myself accountable. Appreciate items in the store or online but don't feel pressure to OWN it. You can apply this same principle to beauty products and makeup-- it's just as effective. For example: I only wear Bite lipsticks so I'm never tempted to buy chapsticks or lip balms in check-out lines.


Organize Your Closet


2. Sell it

Make it sting less by listing items on a resale app like Poshmark.  You can earn back the money you wasted on impulse buys and put it towards more quality items you'll wear more often and will last longer. Be sure to photograph items in natural light on a white poster board or against a wall-- they'll translate as more expensive and sell more quickly. I like to prop my "set" with plants or accessories to make my gallery feel more like a boutique. My favorite free editing app for photos is A Color Story--just a few tweaks make my photos look bright and crisp. Don't want to use an app? Research consignment stores in your area and drop off a batch of higher-quality pieces.

Here are some products to get you started:


3. Get it O.U.T. 

Don't hesitate to take it all in garbage bags and donate it if #2 is slowing you down. It's far more important to remove it from your "holding area" as quickly as possible to avoid apprehension and generating further clutter and chaos.  Sometimes having an extra pair of hands makes the job easier, which is why many opt to hire a professional organizer!

Have a organizational method you know WORKS?! Share your ideas below!

xo Lindsey Crafter 


This post contains affiliate links for your convenience and to help Lindsey Crafter keep on Craftin'

3.01.2016

Naturally Dyed Easter Eggs

Naturally Dyed Easter Eggs

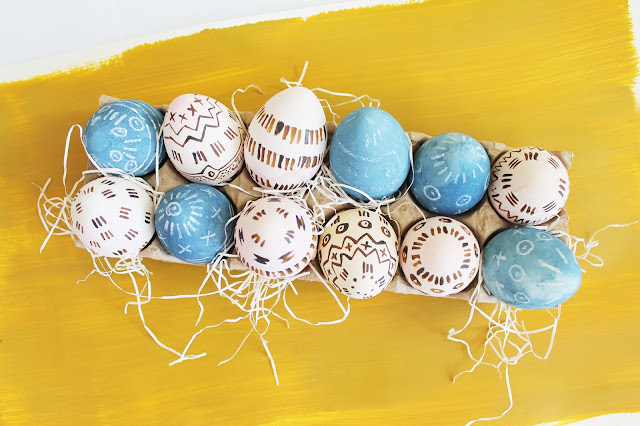
Lately I've been enamored with dyeing-- especially with naturally occurring colors.  I thought it would be fun to test some of the materials I've seen during my research on these crafting eggs I bought last year on clearance. These eggs are a lot more hardy than eggshells and won't spoil-- meaning you can invest a little more effort to decorating them knowing you can decorate with them year after year! However they'll NEVER compete with my childhood egg collection of blown/dyed eggs from our farm back in GA -- gorgeous hues displayed in a glass vase on the dining room table <3

What You'll Need 

Ground tumeric 
Red beets 
Ground coffee 
Indigo dye
Vinegar
Blown eggs or faux eggs like these 
Small saucepans and glass bowls for dyeing 
White wax crayon
Watercolors
Small paintbrush 
Spoon
Rubber gloves

1. MIXING DYES
Most of these dyes, although natural, will stain clothing, hands and surfaces. Cover your work surfaces adequately and wear gloves! 


Cut up several red beets and simmer on low heat for an hour with 2 cups of water to create purple/fuchsia hue (add more water as needed). Coloration can vary based on the beet! Strain the liquid into a bowl for dyeing and toss your cooked beets in the compost! Indigo is an extremely saturated dye-- mix a pinch of the dried indigo into a cup of water to create denim blue dye. The kids will love seeing their eggs turn from gold to royal blue as the dye oxidizes. Add more water to the ratio for varying shades of blue. Mix ground turmeric and vinegar to make canary yellow and use your forgotten pot of coffee to create a soft brown. There are MANY other items in the grocery store you can use -- red cabbage, blueberries, grape juice and onion skins!

2. CREATE A PATTERN

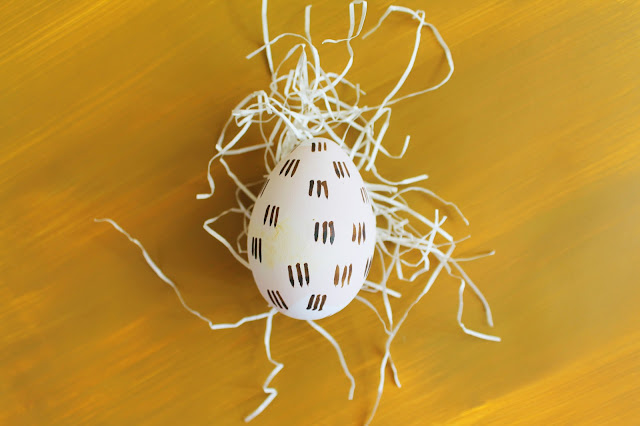
Draw geometric lines or patterns with a white wax crayon onto the surface of your egg to achieve a batique/wax resist effect. Dye won't penetrate the wax and will remain brilliant white or the natural color of the egg.  Use small hair elastics around the circumference of your eggs to create stripes. After your eggs have dried you can paint on a similar pattern on solid dyed eggs with a contrasting ink or watercolors.


3. DYE EGGS

Submerge the eggs into the liquid dyes with a spoon. Check periodically to achieve different saturations of color before removing from the dye bath and placing on a cooling rack to dry.  When dyeing with Indigo, remove the egg and run under cold water to wash off the excess dye film. I kept my soaking times short to achieve pastel hues (but honestly I'm just impatient). Using vinegar in your dyes will also increase vibrancy.

Naturally Dyed Easter Eggs

How gorgeous are these dyed with indigo? This was my first experiment with dried indigo and it was WEIRD--but awesome, as well as being inexpensive enough to just try! Can't wait to use what's leftover to dye some T-shirts or pillows! 

Indigo Dyed Easter Eggs

I used a teeny brush and my watercolor palette to paint on patterns and texture to my pastel eggs.

Naturally Dyed Easter Eggs

Gorgeous right? Share yours by tagging me on instagram @lindseycrafter! 

This post may include affiliate links for your convenience and to keep Lindsey Crafter makin' stuff! 


Latest Instagrams

© LINDSEY CRAFTER . Design by Fearne.