REDO! This post has been updated with better photography and perfected methodology because sometimes it takes lots of prototypes to get a DIY right!
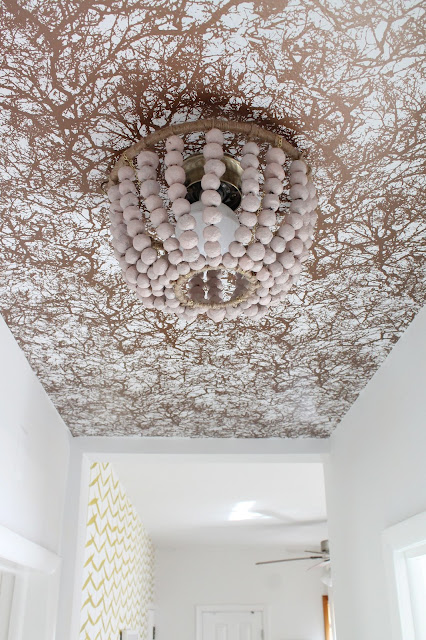
Use this chic renters hack to cover those blah flush mount lights. After removing the glass orb and lightbulb I decided to replace the standard bulb with a globe LED from Ikea that puts out 1000 lumens (that's bright).
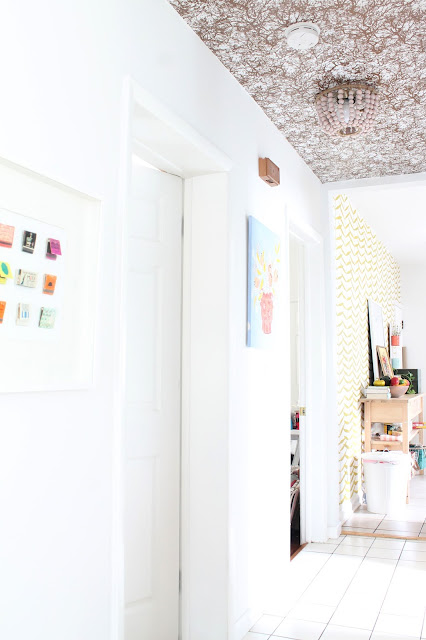
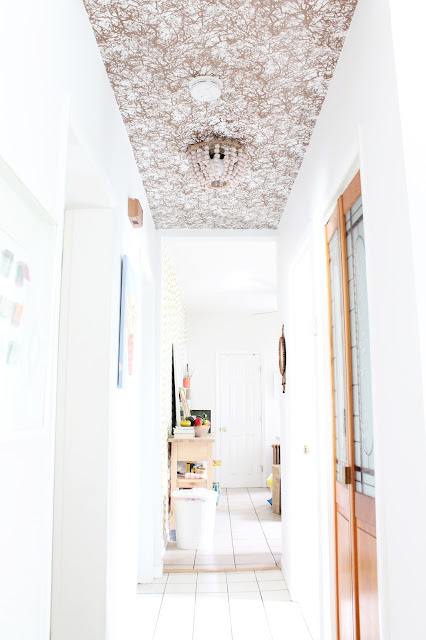
This paper mache bead chandelier takes a few days to make but can create a WOW moment in an otherwise ordinary hallway (Even with a move in your near future you can take it with you when you leave)! The first version of this chandelier was saggy and wasn't quite the right scale--see how I perfected the frame below!
Tempaper wallpaper sent me a complimentary roll of removable wallpaper in Forest Copper that was perfect for our short hallway (They also have a new line by Genevieve Gorder that is to DIE for). It draws the eye upward to the fun new fixture and creates fun pattern play with my hand-painted walls in the kitchen. It only took about 45 minutes to install by myself and was forgiving when it needed to be repositioned or I needed to cut around the smoke detector and light fixture.
What You'll Need to Make a Beaded Chandelier
Bamboo Skewers
Small Link Chain and Jump Rings
Flat Nose Pliers
Flat Nose Pliers
Acrylic Paint and Paint Brush
Mixing Bowl
Twine
Scissors
Craft Glue
1. Mix together papier mache pulp in a large mixing bowl following the manufacture's instructions. Form 1/2"-1" balls by rolling paper clay in your hands and slide them onto a bamboo skewer to dry. Be sure to prop the drying beads up on a mixing bowl so your beads aren't flat on one side. I used half of a 5lb package of paper pulp to create a over 200 beads to make my chandelier. The style I opted for required beads to taper from smaller to larger from the bottom to larger hoops...so keep that in mind when forming the quantities of your beads. After your beads have dried (usually about 12 hours), paint your desired color of acrylic paint and prop up to dry!
2. Wrap both of the interior rings of the embroidery hoops with twine and tie ends in a knot. You won't need the part of the hoop with the metal tightening screw, but you can always keep it for another project! Keep the knot secure with a dot of craft glue.
3. Connect the wrapped embroidery hoops together by suspending the smaller hoop from the larger hoops with four equivalent lengths of metal chain and large jump rings. My chain lengths were each 8" spaced equally around the perimeter of the rings.
4. Tie a long length of twine from the lower ring and string equal amounts of beads onto the strand creating a "swagged" chandelier shape before tying to the top ring. Repeat around the entire circumference of the chandelier. Reinforce the knots with a dot of craft glue.
5. Use screw in hooks or wire to secure your finished chandelier over the pre-existing light fixture or pendant--and let there be light!
Doesn't our hallway look fab? My collection of summer paintings is on sale now, so snatch up a funky floral before they're gone!
I love hunting for unique renter friendly lighting! I'm working on installing gorgeous sconces in our bedroom for a little bit of an elevated look--stay tuned!
xo Lindsey Crafter
This post includes affiliate links for your convenience and at no extra charge to you! Thanks for supporting the brands that keep Lindsey Crafter goin'!
Mixing Bowl
Twine
Scissors
Craft Glue
2. Wrap both of the interior rings of the embroidery hoops with twine and tie ends in a knot. You won't need the part of the hoop with the metal tightening screw, but you can always keep it for another project! Keep the knot secure with a dot of craft glue.
3. Connect the wrapped embroidery hoops together by suspending the smaller hoop from the larger hoops with four equivalent lengths of metal chain and large jump rings. My chain lengths were each 8" spaced equally around the perimeter of the rings.
4. Tie a long length of twine from the lower ring and string equal amounts of beads onto the strand creating a "swagged" chandelier shape before tying to the top ring. Repeat around the entire circumference of the chandelier. Reinforce the knots with a dot of craft glue.
5. Use screw in hooks or wire to secure your finished chandelier over the pre-existing light fixture or pendant--and let there be light!
Doesn't our hallway look fab? My collection of summer paintings is on sale now, so snatch up a funky floral before they're gone!
I love hunting for unique renter friendly lighting! I'm working on installing gorgeous sconces in our bedroom for a little bit of an elevated look--stay tuned!
xo Lindsey Crafter
This post includes affiliate links for your convenience and at no extra charge to you! Thanks for supporting the brands that keep Lindsey Crafter goin'!


Post a Comment